So yesterday I tried out this recipe, Garlic and Herb Roasted Chicken and honestly, the result was just amazing.
Like, the chicken turned out so juicy and flavorful, I swear, the moment I took a bite, my heart was just happy. It’s got super simple ingredients, you know, like garlic, herbs, a bit of lemon zest, and some olive oil.
But the taste? Full-on restaurant vibes. Now if you’re also thinking of making something easy yet kinda fancy over the weekend, then you should definitely give this recipe a shot.

Garlic Herb Roasted Chicken
Description
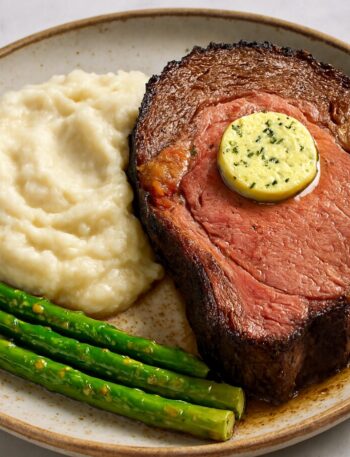
Garlic and Herb Roasted Chicken is a juicy, flavorful main dish made with simple ingredients like fresh herbs, garlic, lemon zest, and olive oil. The chicken is marinated overnight for deep flavor and roasted until golden brown and crispy on the outside while staying tender inside. It is perfect for family dinners or special occasions because this dish pairs beautifully with mashed potatoes, roasted veggies, or salad.
Ingredients
Chicken & Main Items:
Herbs & Spices:
Citrus Element:
Optional for Serving:
Instructions
- First things first, I washed the chicken properly and cleaned it up nicely.
- I used chicken with the skin on, because as you probably know, the skin helps keep the chicken juicy while baking.
- Then I patted it dry using some tissue paper, just to make sure the marinade sticks well later on.
- So in a blender, I added everything like thyme, rosemary, basil, garlic, lemon zest, a little bit of pickle juice, seasoned salt, black pepper, chicken bouillon, and olive oil.
- I blended it all for around 5 to 10 seconds, just enough so the herbs are still kinda visible. You don’t want it to turn into a full-on paste.
- This marinade turns out a bit thick and has a greenish tint to it, which looks kinda nice actually.

- Then I took a zip bag or you can use any airtight bowl and put all the chicken pieces in it.
- Then, I poured the entire marinade over the chicken and mixed it a bit with my hands so that everything gets coated evenly.
- After that, I kept it in the fridge to marinate overnight. (You should keep it for at least 6 to 8 hours, that’s kinda important.)
- Next day, I preheated the oven to 200°C, which is basically 400°F.
- Then, took a baking dish and arranged the chicken pieces in it.
- Don’t pour all the marinade liquid into the dish. You can just sprinkle a little bit of the herbs on top for that extra flavor.
- Then I placed the dish in the oven, uncovered, and let it bake for about 1 hour.
- After an hour, the chicken was roasted really nicely. It had that golden brown color and the edges were all crispy and perfect.
- I took a little bit of the juices from the baking dish and basted the chicken with it. I just brushed it lightly to add that final touch.
- And that’s it, it was ready to serve!
Step 1: Chicken Prep
Step 2: Making the Marinade

Step 3: Marinating the Chicken

Step 4: Baking Time

Step 5: Final Touch

Pro Tips & Variations
Pro Tips:
- Increase marination time: So, if you’ve got the time, let the chicken marinate for a full 24 hours. What happens is, the flavor really gets deep inside and the chicken turns out even more juicy and flavorful.
- Don’t remove the skin: Now, the chicken skin actually releases natural fat while roasting, which helps maintain moisture. That means your chicken won’t end up dry or chewy.
- Avoid overcrowding: When you’re placing the chicken pieces in the baking dish, don’t stack them on top of each other. Just leave a little bit of space between each piece so that all sides roast evenly and properly.
- Definitely baste: After baking, take a little bit of the juice from the dish and brush it over the chicken. It adds a nice shine and also boosts the flavor a bit more.
- Use a thermometer: If you’re not sure whether the chicken is fully cooked or not, just use a meat thermometer. Once it hits around 75°C, you’re good to go. That’s the sweet spot.
Variations:
- Spicy version: If you like things a bit spicy, then go ahead and add some red chili flakes or cayenne pepper to the marinade. It gives a nice kick.
- Butter flavor: Instead of olive oil, you can use a bit of melted butter. It gives a richer, slightly indulgent taste, kinda comforting.
- Yogurt marinade: You can skip the pickle juice and add some yogurt instead. It gives the chicken a tangy flavor and makes the texture more tender and soft.
- Boneless option: If you’re not into bone-in chicken, then just use boneless thighs or breasts. But keep in mind, the cooking time will be a little shorter, so don’t overdo it.
- Air fryer method: You can also make this in an air fryer instead of the oven. Just roast it at 180°C for about 25 to 30 minutes, and make sure to flip the pieces halfway through so they cook evenly.
Storage & Reheating Instructions
Storage Instructions:
- Keep it in the fridge: So, if you’ve got some leftover chicken, just let it come down to room temperature first. Then put it in an airtight container and pop it into the fridge. It stays totally safe for up to 3 days, no problem.
- Freezer option: Now, if you want to store it for a longer time, you can freeze it. Just transfer the chicken into a zip bag or any freezer-safe container and freeze it. It’ll easily last for about 2 months.
- Store the gravy separately: If there’s any leftover juice or marinade, keep that in a separate container. That way, when you reheat the chicken later, you can use it to add a bit of moisture.
- Always label it: Just write the date on the container so you remember when you made it. It’s a small thing but super helpful.
- Avoid plastic wrap: Don’t store the chicken directly in foil or plastic wrap. Use a proper airtight box instead as it helps avoid any weird fridge smells.
Reheating Instructions:
- Oven method: Preheat your oven to 180°C. Then, wrap the chicken in foil and heat it for around 10 to 15 minutes. This keeps the chicken soft and moist, which is kinda important.
- Microwave method: If you’re in a hurry, just place the chicken on a microwave-safe plate. Pour a little water or leftover juice over it and heat for about 1 to 2 minutes. It’s quick and easy.
- Pan method: You can also reheat it in a non-stick pan. Just add a little olive oil and keep the flame low. This makes the outer layer of the chicken a bit crispy, which is nice.
- Don’t let it dry out: No matter which method you use, always add a bit of moisture like water, broth, or leftover gravy. Otherwise, the chicken can feel kinda dry and chewy.
- Taste check before serving: After reheating, just taste a small piece to check the seasoning. If needed, add a pinch of salt or pepper to balance things out.
Serving Suggestions:
With Side Dishes:
- Garlic mashed potatoes: This goes perfectly with roasted chicken. The soft, buttery mashed potatoes kinda balance out the flavors of the chicken and make the whole plate feel more comforting.
- Roasted veggies: You can roast some asparagus, carrots, broccoli, or even bell peppers on the side. Just toss them with a little olive oil and salt, and roast them simply. It’s nothing fancy, but they taste great and add color to the plate.
- Steamed rice: Now, if you’re someone who prefers simple meals, then serving this chicken with plain steamed rice also works really well. It’s light, easy, and lets the chicken flavor stand out.
- Green salad: For a fresh and light touch, you can make a simple salad with lettuce, cucumber, and tomato. It adds a nice crunch and freshness to the whole meal.
Sauce & Extras:
- Lemon butter sauce: Just mix a bit of melted butter with lemon juice and drizzle it over the chicken. It gives a tangy, buttery flavor that kinda lifts everything up.
- Garlic mayo dip: If you’re into creamy dips, then go for garlic mayo or even ranch dressing. It’s smooth, flavorful, and works well with the roasted texture.
- Chili oil: If you want a little spicy twist, just add a few drops of chili oil on top. It’s subtle but adds a nice kick.
- Bread rolls: You can serve some warm dinner rolls or garlic bread on the side. They’re great for soaking up all the juices and make the meal feel more complete.
Presentation Tips:
- Garnish with herbs: Before serving, sprinkle a little fresh parsley or basil on top. It adds a pop of color and a bit of freshness. Thus, makes the plate look nicer too.
- Lemon wedges: You can add a few lemon slices to the plate. People can squeeze them as they like, and it adds a fresh zing to the chicken.
- Family style: If it’s a dinner party or a casual get-together, serve the whole chicken on a large platter. Let everyone cut their own piece as it looks simple and kinda classy at the same time.
Nutrition Facts
Servings 4
Serving Size 1 chicken portion (about 200g cooked meat)
- Amount Per Serving
- Calories 380kcal
- % Daily Value *
- Total Fat 22g34%
- Saturated Fat 5g25%
- Cholesterol 120mg40%
- Sodium 420mg18%
- Potassium 350mg10%
- Total Carbohydrate 2g1%
- Dietary Fiber 0.3g2%
- Sugars 0.5g
- Protein 36g72%
- Vitamin A 210 IU
- Vitamin C 2.5 mg
- Calcium 20 mg
- Iron 1.2 mg
- Vitamin D 8 IU
* Percent Daily Values are based on a 2,000 calorie diet. Your daily value may be higher or lower depending on your calorie needs.
FAQ
Q1. Can I make this chicken without the skin?
Yeah, you totally can. But just keep in mind, the chicken might turn out a little dry. The skin actually helps lock in moisture and adds flavor while roasting. So if you’re going skinless, maybe use a bit of extra olive oil or butter to balance things out.
Q2. Is pickle juice really necessary?
Nope, it’s not a must. Pickle juice adds a bit of tangy flavor, which is nice, but if you don’t have it, you can easily swap in lemon juice or even a little vinegar. It works just fine.
Q3. What if I don’t have an oven?
If you don’t have an oven, you can still make it in an air fryer or even in a covered pan on low flame. It might take a bit more time, but the result comes out pretty close. It is still tasty and nicely roasted.
Q4. What’s the minimum marination time for the chicken?
You should marinate it for at least 6 hours. But honestly, if you can go for 12 to 24 hours, the flavor gets way deeper and the chicken turns out much better. Overnight marination is kinda the best option.
Q5. What occasions is this dish best for?
This recipe is perfect for weekend dinners, family get-togethers, or even a special lunch. It’s simple enough to make without stress, but still looks and tastes a little fancy. So yeah, it works great when you’ve got guests coming over too.