Sometimes mornings feel too rushed to pull out a pan, and that’s when microwave scrambled eggs come in handy. They’re quick, warm, and filling, and they don’t leave you with a pile of dishes.
I usually make them when I want something fast before heading out or when I need a small snack later in the day. It’s a simple little trick that makes breakfast easier, and it leads right into talking about what microwave scrambled eggs actually are.
What is Microwave Scrambled Eggs?
Microwave scrambled eggs are just scrambled eggs cooked in the microwave instead of on the stove. The idea is really simple like you whisk the eggs with a little milk and seasoning, then heat them in short bursts so they stay soft and don’t turn rubbery.
They’re usually eaten right away while still warm, often with toast, bagels, or even rolled into a tortilla for a quick bite. Some people like adding cheese or herbs, while others keep them plain. There isn’t a big cultural story behind them, but they’ve become a handy trick for anyone who wants eggs without pulling out a pan. It’s a small everyday shortcut that makes breakfast feel easier.
Why You’ll Love This Recipe:
- Quick to make: Microwave scrambled eggs take only about three minutes from start to finish, so you don’t have to wait around when you’re hungry. I’ve tried skipping the stirring step once, and the eggs turned out uneven, so now I always stick to short bursts and stirring.
- Minimal cleanup: You only need one bowl or mug and a fork, which means fewer dishes to wash later. I like this especially on mornings when the sink already feels full.
- Easy to customize: You can add cheese, herbs, or even a spoonful of salsa depending on what you feel like. I sometimes add scallions for a bit of freshness, and it changes the flavor completely.
- Works for busy mornings: Because it’s fast and filling, it fits right into a rushed breakfast routine. I’ve even made it as a quick snack in the afternoon when I didn’t want to cook something bigger.
- Beginner-friendly: The steps are simple, and even if you overcook slightly, the eggs are still edible. The main thing to remember is whisking well and checking every 30 seconds.
Ingredients Needed:
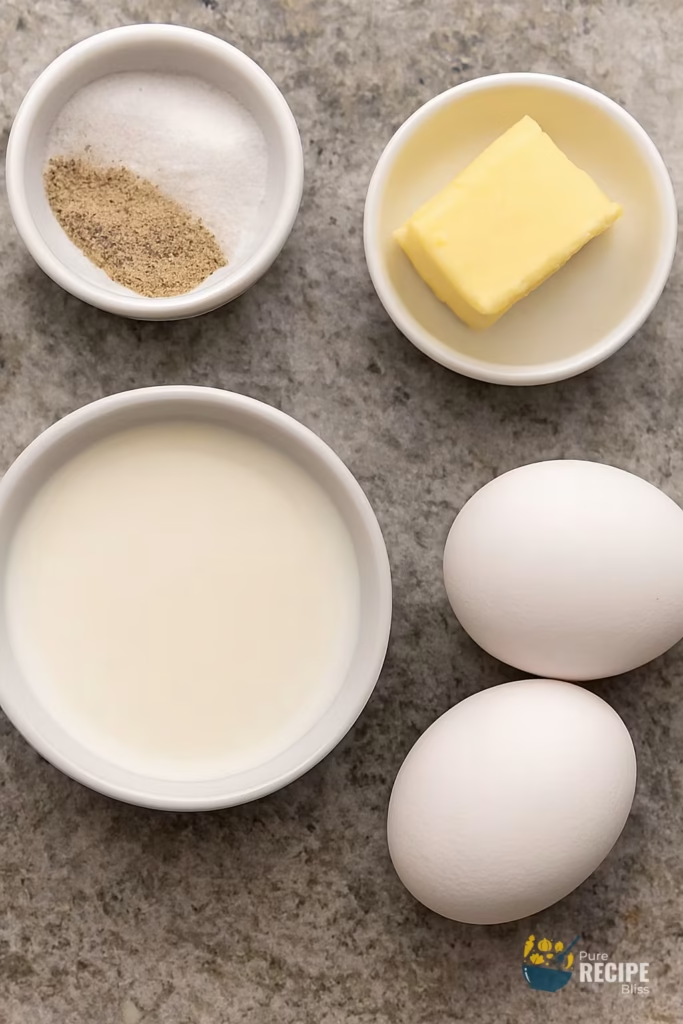
- Eggs: You’ll need two eggs for one serving, and I’ve noticed that whisking them really well makes the texture smoother. If you add more eggs, just remember the cooking time will need a little extra.
- Milk or cream: A small splash of milk keeps the eggs soft, and cream makes them richer. I sometimes use unsweetened almond milk when I’m out of dairy, and it works fine.
- Salt: Adding salt before cooking helps season the eggs evenly. I’ve tried sprinkling it after, but it never blends as well.
- Black pepper: I usually add pepper after cooking because it keeps the eggs looking bright instead of gray.
- Butter: A spoon of butter adds flavor and keeps the eggs from drying out. If I don’t have butter, I use olive oil, but the taste is a little different.
- Optional extras: Cheese, scallions, or even a spoonful of salsa can change the flavor quickly. I like adding shredded cheese at the last microwave burst so it melts nicely.
💡 Note: For the full ingredient list with exact amounts and measurements, please check the recipe card below.
Step-By-Step Instructions to Make Microwave Scrambled Eggs:
One small thing I learned while making microwave scrambled eggs at home is that stirring in between cooking bursts really changes the texture. The first time I tried, I let the eggs cook straight through, and they came out rubbery on the edges. Since then, I always stop and stir every 30 seconds, and the eggs stay soft and fluffy.
Step 1: Crack and whisk the eggs
Crack the eggs into a microwave-safe bowl or mug. Add a splash of milk and salt, then whisk until the mixture looks smooth and even. If you still see streaks of egg white, keep whisking because those streaks will cook up chewy later.
Step 2: Add butter and start heating
Stir in a little butter or oil, then place the bowl in the microwave. Heat for about 30 seconds, just enough to start melting the butter and warming the mixture.
Step 3: Stir and repeat cooking bursts
Take the bowl out and stir with a fork. Put it back in the microwave for another short burst. Repeat this process two or three times. Each time you stir, the eggs will look more set and less liquid.
Step 4: Check texture and finish cooking
When the eggs look mostly set but still a little glossy, stop cooking. They’ll finish firming up from the residual heat. If you like them firmer, add one more short burst.
Step 5: Season and serve
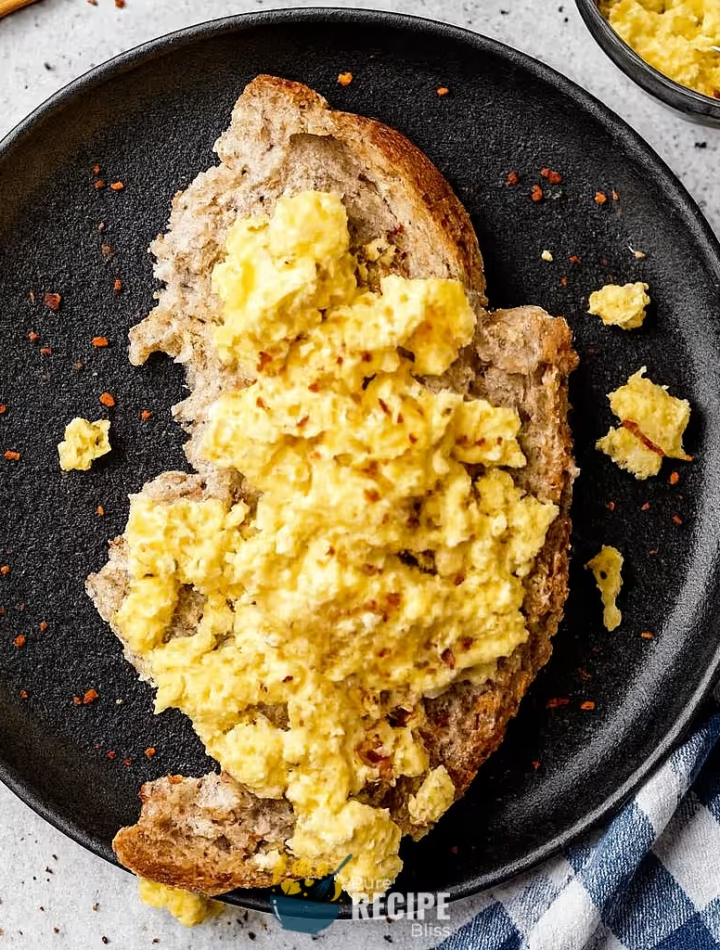
Sprinkle black pepper after cooking so the eggs stay bright in color. Serve them hot with toast, bagels, or whatever you like.
💡 Note: These steps are just an overview. For detailed quantities, measurements, and exact timings to make this recipe, please check the recipe card below.
Helpful Tips For The Best Results:
- Whisk thoroughly: Make sure the eggs and milk are mixed until smooth, because if you leave streaks of egg white, they will cook up chewy and uneven. I learned this the hard way when I rushed through whisking.
- Cook in short bursts: Heating in small intervals and stirring in between keeps the texture soft. If you let it run too long without stopping, the edges get rubbery while the center stays wet.
- Choose the right bowl: A deeper microwave-safe bowl or mug works better than a shallow dish, since it prevents spills when you stir.
- Add fat for creaminess: Butter or oil helps keep the eggs moist. I’ve tried skipping it, but the eggs turned out dry.
- Swap ingredients smartly: If you don’t have milk, unsweetened almond or oat milk works fine. If you’re out of butter, olive oil is okay, but the flavor is lighter.
Tasty Variations to Try:
- Cheesy eggs: Stir in shredded cheddar or mozzarella during the last cooking burst so it melts nicely.
- Herb mix: Add fresh parsley, dill, or chives after cooking for a fresh flavor.
- Spicy kick: A spoonful of chili crisp or a drizzle of hot sauce makes the eggs more lively.
- Veggie add-ins: Toss in chopped spinach or mushrooms before microwaving for extra nutrition.
- Seasonal twist: In summer, I like adding diced tomatoes for freshness, while in colder months, a sprinkle of dried oregano or paprika feels cozy.
- Creamier option: Mix in a spoonful of cream cheese or ricotta before cooking for a richer texture.
Serving Suggestions:

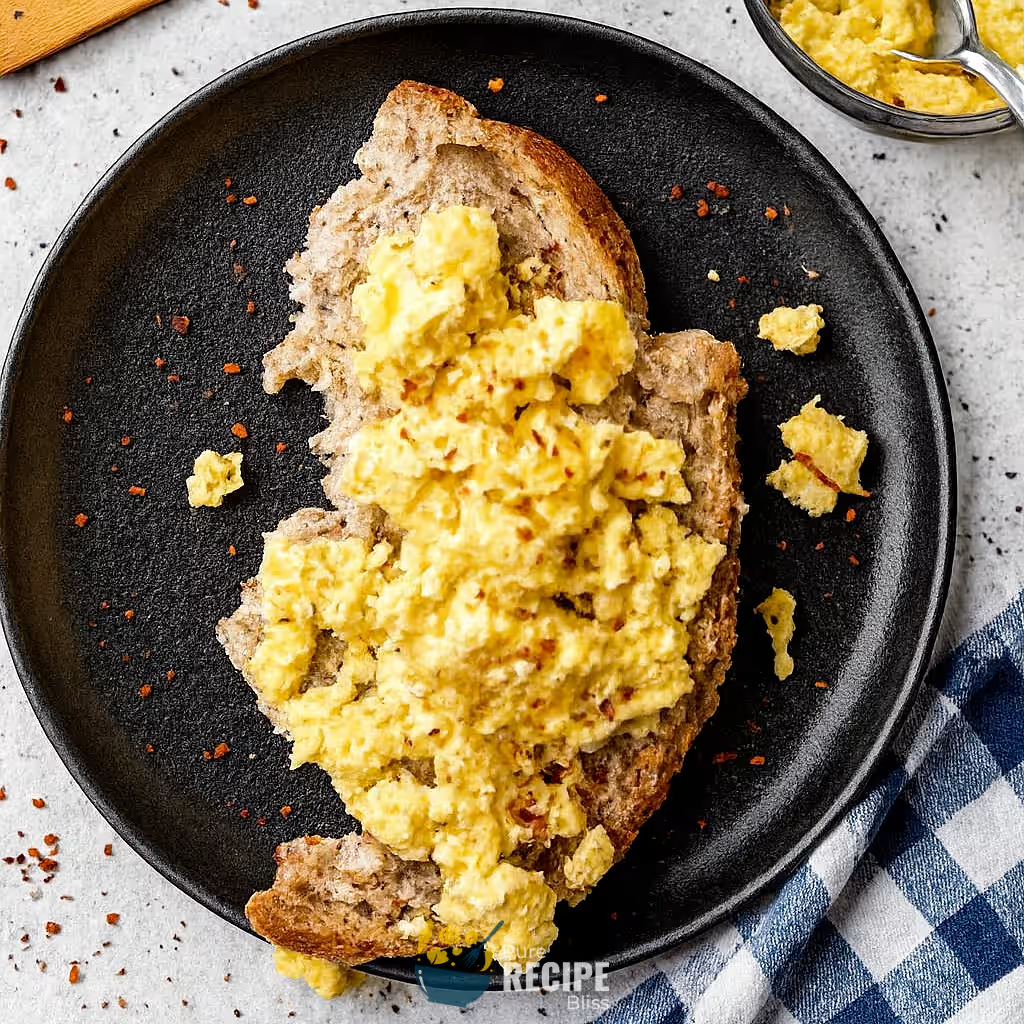
1. Serve with toast:
Microwave scrambled eggs taste good with a slice of buttered toast or a bagel. The eggs are soft, and the bread adds a bit of crunch, which makes the meal feel more complete.
2. Pairs well with fruit:
A small side of berries or melon balances the richness of the eggs. I sometimes add a banana when I want something quick and filling.
3. Perfect for wraps:
You can spoon the eggs into a tortilla with cheese or avocado for a fast breakfast wrap. It’s easy to hold and works well if you’re eating on the go.
4. Add veggies on the side:
Sautéed spinach or mushrooms make the plate more colorful and add extra flavor. I like this when I want the meal to feel a little healthier.
Storage & Reheating Tips:
- How long it keeps: Microwave scrambled eggs are best eaten fresh, but if you have leftovers, they can stay in the fridge for about two days. I’ve noticed they taste fine the next day but lose some of their fluffiness.
- Best storage method: Let the eggs cool down first, then place them in an airtight container. This helps prevent moisture from collecting inside and keeps the texture from turning soggy.
- Simple reheating advice: Warm the eggs in short microwave bursts, about 10-15 seconds at a time, and stir in between. I usually add a tiny splash of milk or water before reheating, which helps bring back some softness.
Frequently Asked Questions (FAQ):
-
Can I use something other than milk?
Yes, you can swap milk with cream for richer eggs or use unsweetened almond or oat milk if you prefer dairy-free. I’ve tried almond milk, and it kept the eggs soft enough.
-
Can I make microwave scrambled eggs ahead of time?
They taste best fresh, but you can store them in the fridge for a day or two. Just remember they lose some fluffiness, so reheating with a splash of milk helps.
-
Why do my eggs turn rubbery?
This usually happens if you cook them too long without stirring. Short bursts with mixing in between keep the texture soft and prevent dry edges.
-
Is this recipe suitable for different diets?
Yes, it can be adjusted easily. Use plant-based milk and oil instead of butter for a dairy-free version, or add extra veggies if you want more nutrition.
Microwave Scrambled Eggs
Description
Microwave scrambled eggs are a quick way to enjoy soft, fluffy eggs without using a pan. They’re ready in minutes, need very little cleanup, and can be customized with cheese, herbs, or spices depending on what you like.
Ingredients
Instructions
- Crack 2 large eggs into a microwave-safe bowl or mug.
- Add 3 tablespoons milk and ¼ teaspoon salt, then whisk until smooth and even.
- Stir in 1 tablespoon butter or olive oil so the eggs stay moist.
- Microwave on high for about 30 seconds, then stir with a fork to break up the mixture.
- Return to the microwave for another 30 seconds, stir again, and repeat once more.
- Check the texture: stop when the eggs look soft and slightly glossy. If you prefer firmer eggs, microwave for another 15-20 seconds.
- Sprinkle ¼ teaspoon black pepper after cooking, then serve hot with toast or your favorite sides.
Notes
- Whisking thoroughly before microwaving makes the eggs smoother and prevents chewy streaks.
- Stop cooking just before the eggs look fully set, since they continue cooking from residual heat.
- Adding cheese during the last microwave burst helps it melt evenly without clumping.
Nutrition Facts
Servings 254
Serving Size 1 bowl of scrambled eggs
- Amount Per Serving
- Calories 1kcal
- % Daily Value *
- Total Fat 22g34%
- Saturated Fat 10g50%
- Cholesterol 370mg124%
- Sodium 420mg18%
- Potassium 190mg6%
- Total Carbohydrate 4g2%
- Sugars 2g
- Protein 13g26%
- Vitamin A 880 IU
- Calcium 100 mg
- Iron 2 mg
- Vitamin D 45 IU
* Percent Daily Values are based on a 2,000‑calorie diet, and your daily needs may be higher or lower depending on your lifestyle. Nutrition information is shared only as a general estimate and may not always be fully accurate. If you follow a special diet or have specific health concerns, it’s best to check with a registered dietitian for personalized guidance.