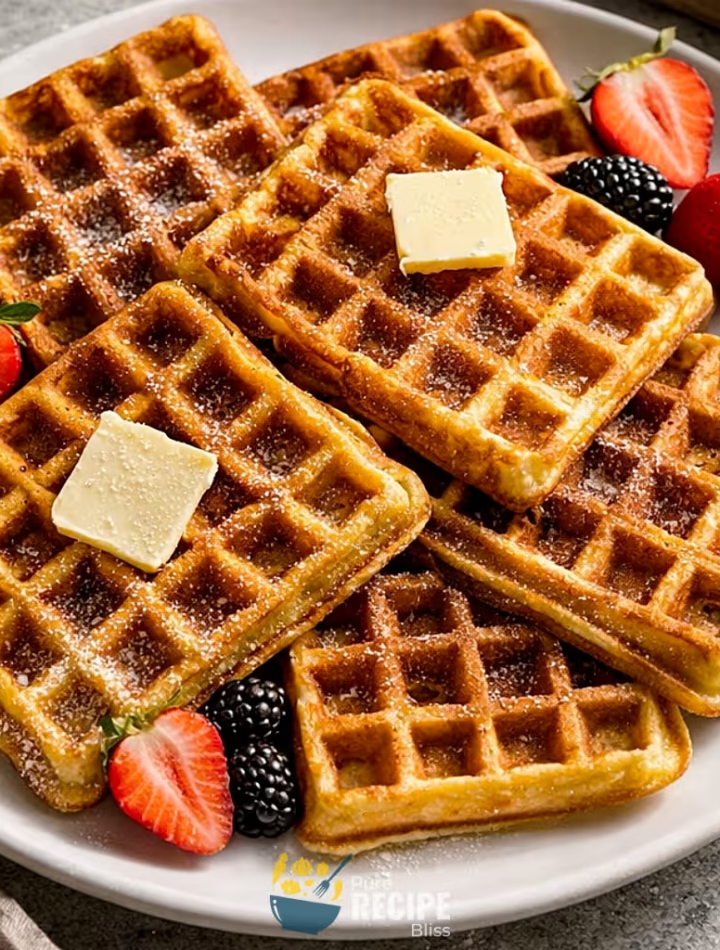
When I first tried making Classic Buttermilk Waffles at home, I was surprised at how quick the whole process felt once the ingredients were ready. The batter comes together in just a few steps, and the waffle iron does most of the work for you.
They’re the kind of dish I like to pull out for breakfast when I want something a little more fun than toast or cereal. They don’t take long, and the result feels worth it every time. That’s why I keep coming back to this recipe whenever I want a warm start to the day.
What is Buttermilk Waffles?
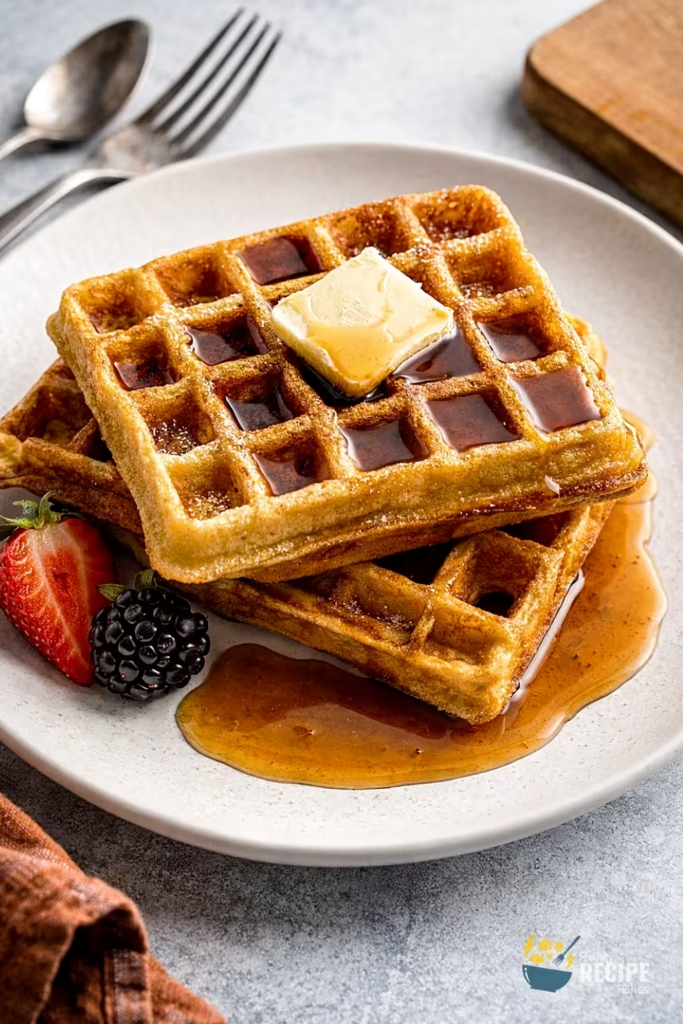
So, buttermilk waffles are basically a type of waffle made with buttermilk in the batter, which gives them a light texture and a little tangy flavor. The buttermilk works with the baking soda to make them rise nicely, so they turn out fluffy inside while still having a bit of crispness on the outside.
They’re usually eaten for breakfast, but I’ve seen people enjoy them for brunch or even as a quick snack when they want something filling. Most of the time they’re served with toppings like syrup, butter, or fruit, but you can also make them more savory with eggs or bacon. That’s why they’re such a flexible dish because you can dress them up however you like.
Why You’ll Love This Recipe:
- Quick to make: The Classic Buttermilk Waffles don’t take much time at all, and once you mix the batter and heat the waffle iron, you’ll have a stack ready before you know it.
- Light but filling: They turn out fluffy inside with a little crispness on the outside, so they feel satisfying without being heavy. I noticed that even one or two waffles keep me full for a while.
- Easy to change up: You can keep them plain or add things like fruit, chocolate chips, or even cheese if you want something savory. I tried blueberries once and they baked right into the batter nicely.
- Works for different meals: Most people think of waffles for breakfast, but I’ve made them for brunch and even as a quick snack in the afternoon. They hold up well with both sweet and savory toppings.
- Family‑friendly: Everyone seems to enjoy them, and I’ve found that kids especially like adding their own toppings. It makes the meal feel interactive and fun.
Ingredients Needed:
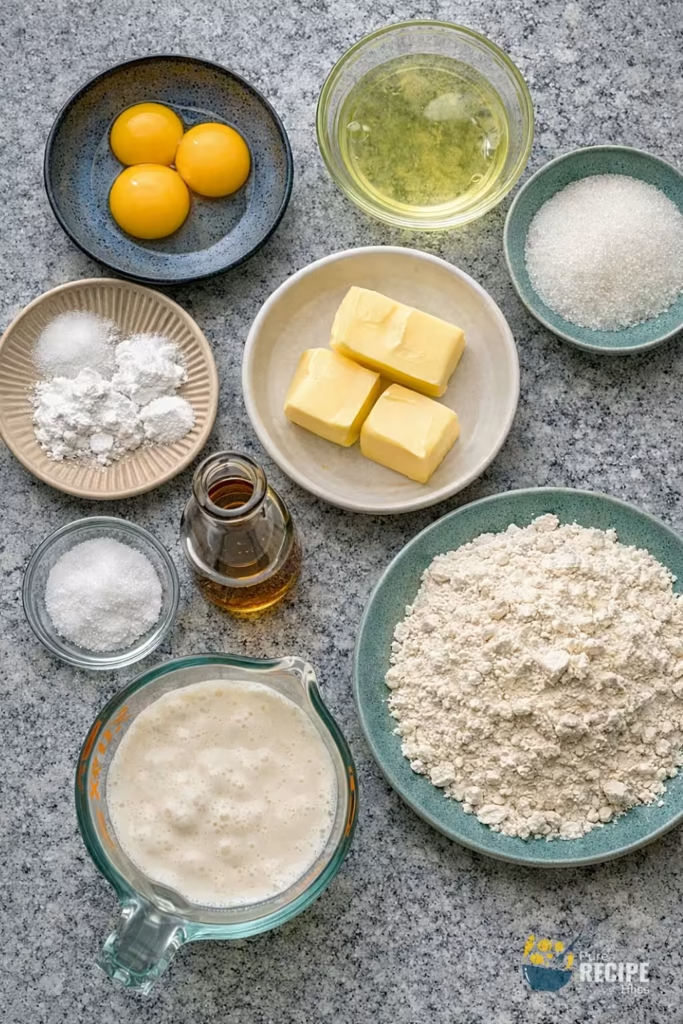
- Flour: You’ll need all‑purpose flour here, and I’ve tried swapping a little with whole wheat before, but it made the waffles heavier, so I usually stick with regular flour.
- Sugar: A small amount of granulated sugar gives the batter a touch of sweetness, and it balances well with toppings later.
- Leavening agents: Baking powder and baking soda work together, and the buttermilk helps activate the soda. I once forgot the baking soda, and the waffles came out flatter, so it’s worth double‑checking.
- Salt: Just a little salt makes the flavor better overall, even though you don’t really taste it directly.
- Eggs: You’ll separate the whites and yolks. The whites get whipped and folded in, which is what makes the waffles light. I learned that skipping this step makes them dense.
- Buttermilk: Real buttermilk gives the best texture and flavor. I tried using milk with lemon juice once, but the waffles didn’t rise as nicely.
- Butter: Melted unsalted butter adds richness. I sometimes warm the buttermilk slightly so the butter doesn’t harden when mixed in.
- Vanilla extract: Just a teaspoon adds a nice background flavor, and it makes the waffles taste more complete.
💡 Note: For the full ingredient list with exact amounts and measurements, please check the recipe card below.
Step-By-Step Instructions to Make Buttermilk Waffles:
One small thing I learned while making these at home is that letting the batter rest really does change the texture. The first time I skipped that step, the waffles came out flatter and not as fluffy, so now I always give the batter a few minutes before cooking.
Step 1: Mix the dry ingredients
Start by whisking together the flour, sugar, baking powder, baking soda, and salt in a large bowl. Make sure everything looks evenly combined so you don’t end up with clumps of baking soda in one bite.
Step 2: Combine the wet ingredients
In another bowl, whisk the egg yolks with buttermilk, melted butter, and vanilla. I like to warm the buttermilk slightly so the butter doesn’t harden when mixed in. The mixture should look smooth and a little creamy.
Step 3: Fold wet into dry
Pour the wet mixture into the dry bowl and gently fold them together. Don’t stir too aggressively, because overmixing can make the waffles dense. The batter should look thick but not lumpy.
Step 4: Whip the egg whites
Beat the egg whites until soft peaks form. I once made the mistake of whipping them too stiff, and the batter ended up foamy instead of smooth. Soft peaks give the right lift without making the texture uneven.
Step 5: Fold in the egg whites
Gently fold the whipped egg whites into the batter. The mixture should look lighter and airy. This is the step that makes the waffles fluffy inside.
Step 6: Let the batter rest
Leave the batter alone for about 10 minutes. This short rest helps the leavening agents do their job and makes the waffles rise better.
Step 7: Cook the waffles
Preheat your waffle iron until it’s hot, then spray lightly with non‑stick spray. Pour in the batter and cook until the waffles look golden and crisp. I usually wait until the edges look firm and the steam slows down before opening the iron.
Step 8: Serve and enjoy
Take the waffles out and serve them right away with your favorite toppings. I’ve noticed they taste best when eaten warm, because the crisp edges soften if they sit too long.
💡 Note: These steps are just an overview. For detailed quantities, measurements, and exact timings to make this recipe, please check the recipe card below.
Helpful Tips For The Best Results:
- Texture tip: Always whip the egg whites only until soft peaks form. If you go too far and make them stiff, the batter gets foamy and the waffles lose their smooth texture.
- Heat control: Make sure the waffle iron is fully hot before adding the batter. If it’s not hot enough, the waffles cook unevenly and end up pale and soft instead of golden and crisp.
- Resting the batter: Letting the batter sit for a short time really helps. I once skipped this step and the waffles came out flatter, so now I always give it a few minutes.
- Ingredient swap: Whole milk can be used if you don’t have buttermilk, but the waffles won’t be as fluffy. I’ve tried it, and while they were fine, the buttermilk version is noticeably better.
- Avoid stacking: If you’re cooking several at once, don’t stack them right away. The steam softens the edges, so I spread them out on a cooling rack instead.
Tasty Variations to Try:
- Flavor swap: Add a teaspoon of almond extract instead of vanilla for a nutty flavor that pairs well with fruit toppings.
- Savory option: Reduce the sugar and mix in shredded cheddar or herbs. I tried this once with chives, and it worked nicely with eggs on top.
- Seasonal idea: Fold in pumpkin puree and a little cinnamon during fall. The waffles come out with a warm flavor that feels seasonal.
- Dietary option: Use a gluten‑free flour blend if needed. I tested one, and while the texture was slightly different, it still worked.
- Sweet add‑in: Stir in mini chocolate chips or blueberries directly into the batter. The chips melt into little pockets, and the berries burst with juice while cooking.
- Topping twist: Try honey butter drizzle instead of syrup. I melted honey with butter once, and it soaked into the waffle pockets perfectly.
Serving Suggestions:
1. Breakfast favorite:
Serve with butter and maple syrup for a classic start to the morning. The crisp edges hold the syrup well, and it feels like a simple but satisfying meal.
2. Brunch idea:
Perfect for pairing with scrambled eggs or bacon. The savory sides balance the slight sweetness of the waffles.
3. Snack option:
Pairs well with fresh fruit and a little whipped cream. It makes a light plate when you don’t want something heavy.
4. Family style:
Serve with a variety of toppings like nut butter, honey, or chocolate chips. Everyone can build their own plate, which makes it fun and easy.
Storage & Reheating Tips:
- How long it keeps: Classic Buttermilk Waffles stay fine in the fridge for a few days. I usually keep them in a sealed bag or container, and they hold their texture better that way.
- Best storage method: If you want to save them longer, let them cool completely and then freeze them in a single layer before sealing. This prevents them from sticking together.
- Simple reheating advice: The toaster or oven works best because it brings back the crisp edges. I avoid the microwave since it makes them soft and soggy instead of crunchy.
Frequently Asked Questions (FAQ):
-
Can I substitute the buttermilk?
Yes, you can use whole milk if you don’t have buttermilk, but the waffles won’t be as fluffy. I tried the milk and lemon juice trick once, and while it worked, the texture wasn’t the same.
-
Can I make the batter ahead of time?
It’s better to mix it fresh. If you want to prepare in advance, you can combine the dry and wet ingredients separately, then whip and fold in the egg whites right before cooking.
-
Why are my waffles not crisp?
Usually it’s because the waffle iron wasn’t hot enough. I learned that preheating fully makes a big difference in getting golden edges.
-
Is there a gluten‑free option?
Yes, you can use a 1:1 gluten‑free flour blend. I tested one, and while the texture was slightly different, the waffles still held together well.
-
Can I reduce the sugar?
You can cut it down a little if you prefer less sweetness, especially if you plan to add sweet toppings. I’ve done this when serving with fruit, and it worked fine.
Buttermilk Waffles
Description
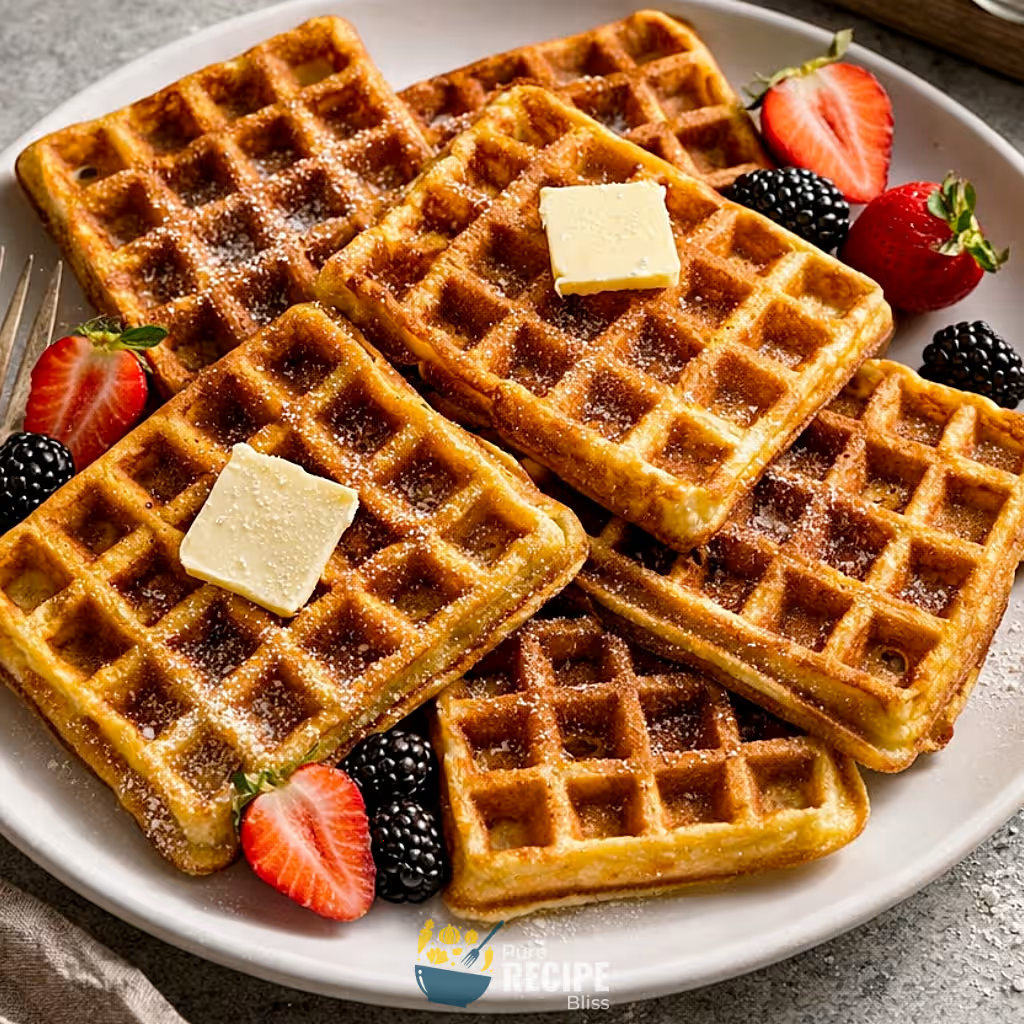
Classic Buttermilk Waffles are light inside with a crisp edge outside. This recipe is tested at home and works well for breakfast or brunch. The batter is easy to mix, and the waffles hold toppings nicely without getting soggy.
Ingredients
Instructions
- Whisk together 2 ¼ cups flour, 3 tbsp sugar, 2 tsp baking powder, ¾ tsp baking soda, ½ tsp salt, and 2 tbsp cornstarch in a large bowl.
- In another bowl, whisk 2 egg yolks with 2 cups buttermilk, 5 tbsp melted butter, and 1 tsp vanilla until smooth.
- Pour the wet mixture into the dry bowl and gently fold until combined. Batter should be thick but not lumpy.
- Beat 2 egg whites with a hand mixer until soft peaks form, then fold them carefully into the batter.
- Let the batter sit for about 8 minutes to activate the leavening agents.
- Preheat the waffle iron fully, spray lightly with non‑stick spray, and pour in enough batter to cover the plates. Cook until golden brown and crisp at the edges.
- Remove waffles and serve immediately with toppings of choice.
Notes
- Warming the buttermilk slightly prevents the melted butter from clumping.
- Don’t over‑whip the egg whites; soft peaks give the best texture.
- Avoid stacking waffles right away; place them on a cooling rack to keep edges crisp.
Nutrition Facts
Servings 10
Serving Size 1 waffle
- Amount Per Serving
- Calories 195kcal
- % Daily Value *
- Total Fat 9g14%
- Saturated Fat 3g15%
- Cholesterol 55mg19%
- Sodium 310mg13%
- Potassium 105mg3%
- Total Carbohydrate 23g8%
- Dietary Fiber 1g4%
- Sugars 6g
- Protein 6g12%
- Vitamin A 410 IU
- Vitamin C 0.5 mg
- Calcium 122 mg
- Iron 1.2 mg
- Vitamin D 18 IU
* Percent Daily Values are based on a 2,000‑calorie diet, and your daily needs may be higher or lower depending on your lifestyle. Nutrition information is shared only as a general estimate and may not always be fully accurate. If you follow a special diet or have specific health concerns, it’s best to check with a registered dietitian for personalized guidance.