Sometimes you just want a recipe that feels easy to put together but still makes everyone happy at the table. Cheeseburger Sliders are exactly that kind of dish because they don’t take much time and they bake all at once in the oven.
They’re best when you want something quick for lunch or dinner, and they also work well as a snack when you’re hosting friends. It’s a simple recipe that fits busy days or casual gatherings, and it leads right into learning what Cheeseburger Sliders actually are.
What is Cheeseburger Sliders?
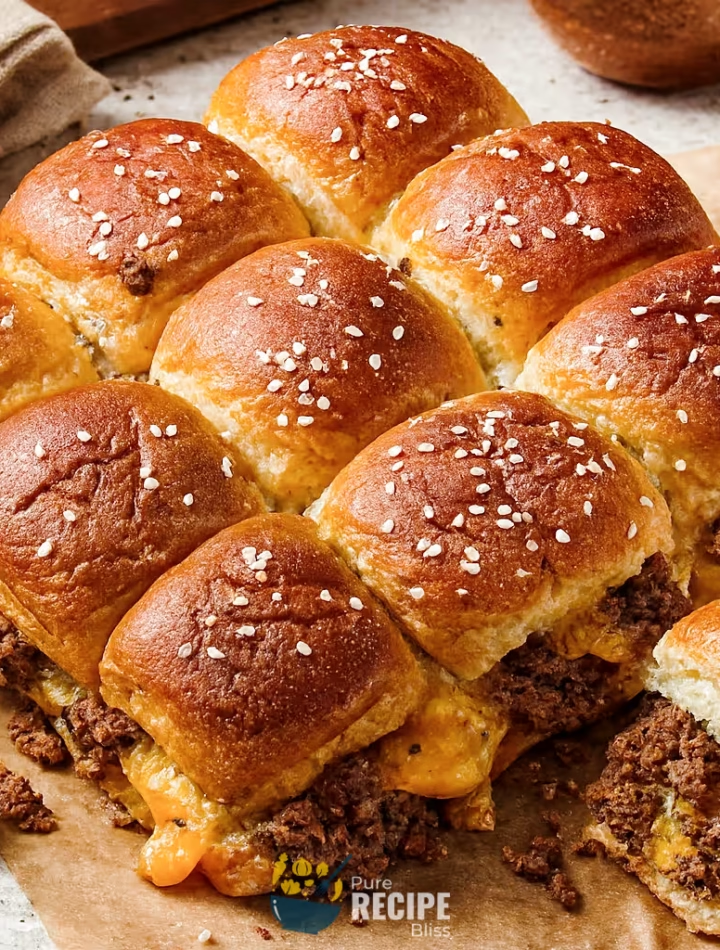
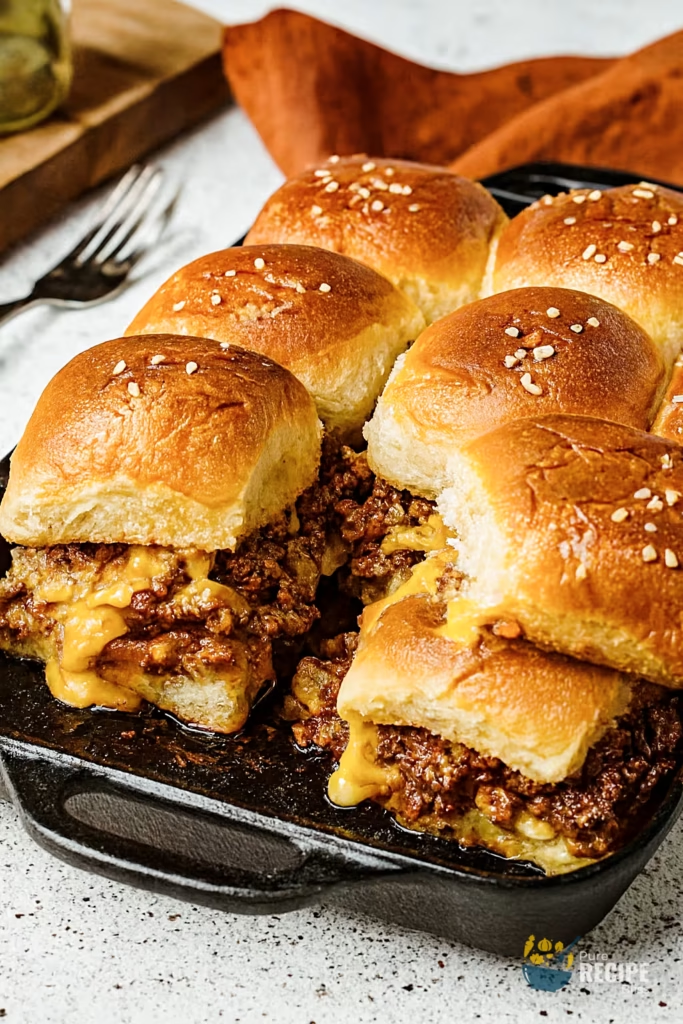
Cheeseburger Sliders are basically small burgers made with soft slider buns, seasoned ground beef, and plenty of melted cheese. Instead of shaping individual patties, the beef is cooked in one skillet, layered with cheese and sauce, and then baked together on a sheet pan. This makes them easy to prepare and serve without much fuss.
They’re usually eaten as bite-sized sandwiches, perfect for sharing at parties, game day gatherings, or casual family dinners. Because they’re smaller than regular burgers, people often enjoy them as appetizers or snacks, but they can also work as a main meal when paired with sides like fries or salad. It’s a simple, crowd-friendly recipe that feels familiar but still special.
Why You’ll Love This Recipe:
- Quick to make: Cheeseburger Sliders don’t take a lot of time, and you can have them ready in about half an hour, which makes them really convenient when you don’t want to spend too long in the kitchen.
- Simple ingredients: The recipe uses basic things like ground beef, slider buns, and cheese, so you don’t need to go searching for anything fancy. Most of the items are already in the pantry or fridge.
- Beginner-friendly: The steps are straightforward, and since the beef is cooked in one skillet and then layered on a sheet pan, it’s easy even if you don’t cook often.
- Great for gatherings: These sliders are small and easy to pick up, so they’re perfect for game day, potlucks, or casual family dinners where everyone wants something tasty but not too heavy.
- Easy to customize: You can swap the cheese, change the sauce, or even add toppings like pickles or jalapeños, so it’s flexible depending on what you like.
- Crowd-pleasing flavor: The mix of juicy beef, melted cheese, and the special sauce makes them feel comforting and familiar, which is why they always go over well with friends and family.
Ingredients Needed:
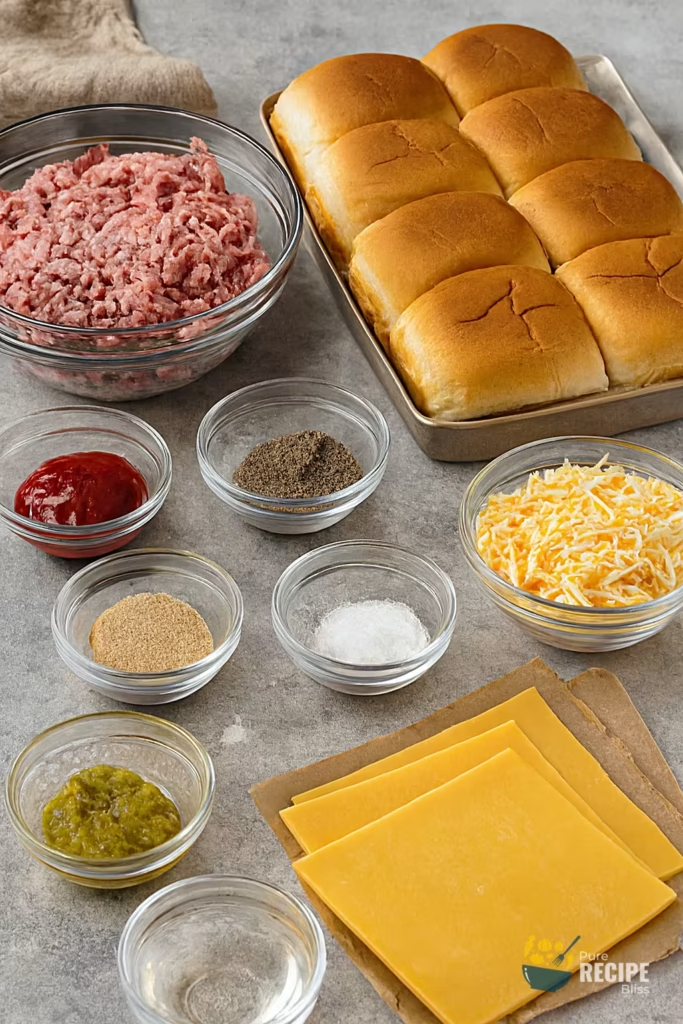
- Slider buns: You’ll need about twelve small buns, and brioche or Hawaiian rolls work best because they stay soft and slightly sweet, which balances the savory beef.
- Ground beef: A pound of ground beef is enough, and using 80/20 gives you a nice balance of flavor and juiciness. If you prefer leaner meat, you can go with 90/10, but the sliders may be a little less moist.
- Cheese slices: Sharp cheddar slices go on the bottom layer, and they help keep the buns from getting soggy while also adding that classic burger flavor.
- Shredded cheese: Colby Jack or any similar cheese works well for the top layer, and it melts into gooey pools that make the sliders extra cheesy.
- Seasonings: Garlic powder, kosher salt, and black pepper are simple but they give the beef mixture enough flavor without making it complicated.
- Special sauce: A quick mix of mayonnaise, ketchup, sweet pickle relish, and a splash of red wine vinegar makes a creamy sauce that ties everything together.
- Optional condiments: You can serve the sliders with mustard, extra ketchup, or even pickles on the side, depending on what everyone likes.
💡 Note: For the full ingredient list with exact amounts and measurements, please check the recipe card below.
Step-By-Step Instructions to Make Cheeseburger Sliders:
When I was making this recipe at home, I found that putting a slice of cheese on the bottom buns before adding the beef really helps. It keeps the bread from soaking up too much juice, and the sliders stay firm instead of soggy.
Step 1: Prepare the buns
Slice the whole slab of slider rolls in half horizontally, keeping them attached so they’re easier to handle. Place the bottom half on a baking sheet. The bread should look neat and even, ready to hold the layers.
Step 2: Cook the beef
Add the ground beef to a skillet and cook until it turns brown and crumbly. Stir in the seasonings so the flavor spreads evenly. The beef should smell savory and look slightly crispy around the edges.
Step 3: Add the cheese slices
Lay slices of cheddar cheese on the bottom buns. The cheese acts like a barrier and melts into a gooey base layer. It should cover most of the bread so the beef sits nicely on top.
Step 4: Layer the beef
Spoon the cooked beef mixture over the cheese slices. Spread it evenly so each slider gets a good amount. The beef should look juicy but not too wet.
Step 5: Drizzle the sauce
Pour the special sauce over the beef. It should look glossy and creamy, adding flavor without making the sliders messy.
Step 6: Sprinkle shredded cheese
Add shredded Colby Jack cheese on top. It should cover the beef and sauce, creating a second layer that melts into gooey pools.
Step 7: Finish with top buns
Place the top half of the slider rolls over everything. Brush lightly with olive oil so they bake golden and slightly crisp.
Step 8: Bake until melted
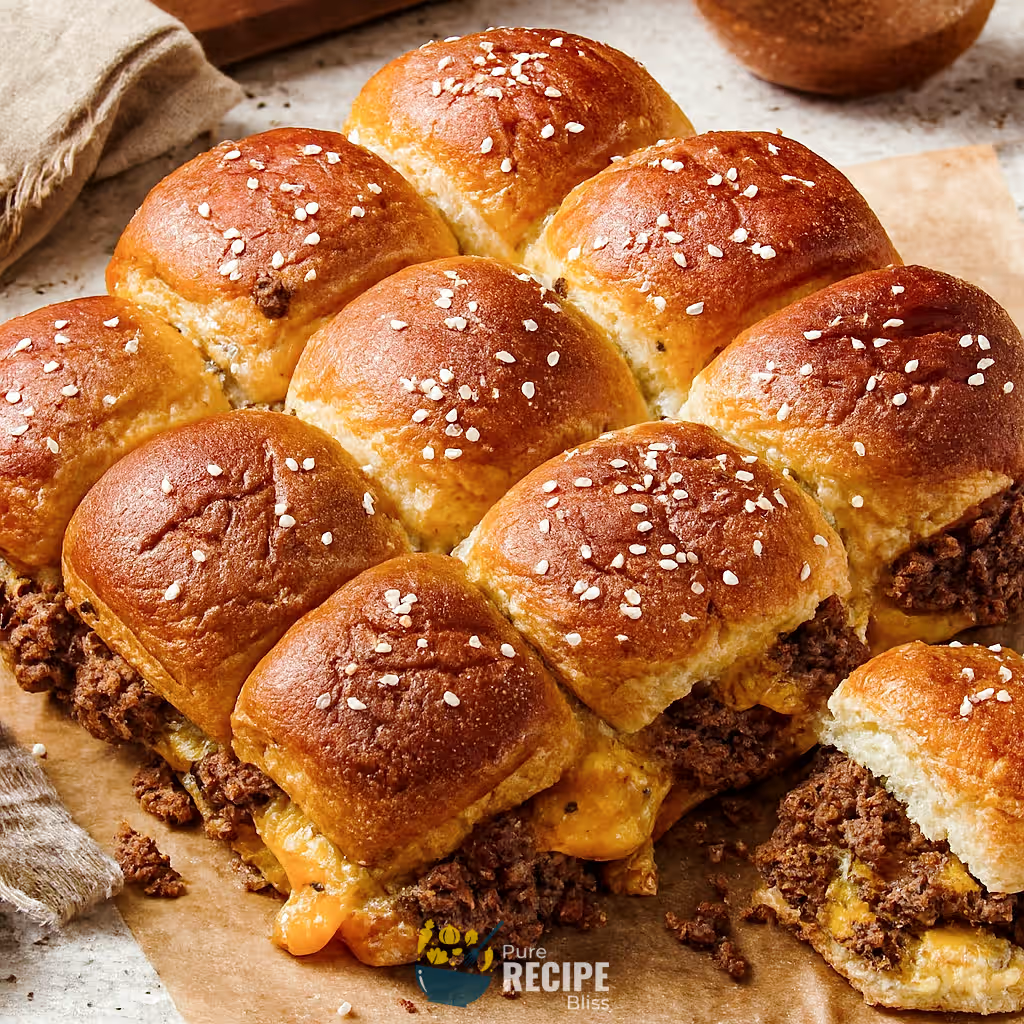
Put the baking sheet in the oven and bake until the cheese is melted and the buns look golden. The sliders should smell rich and cheesy when ready.
Step 9: Make the sauce
Mix mayonnaise, ketchup, relish, and vinegar in a small bowl until smooth. The sauce should look creamy and slightly pink. Taste and adjust seasoning if needed.
Step 10: Serve warm
Take the sliders out and serve them right away with extra condiments or dipping sauce. They should feel warm, cheesy, and easy to pick up.
💡 Note: These steps are just an overview. For detailed quantities, measurements, and exact timings to make this recipe, please check the recipe card below.
Helpful Tips For The Best Results:
- Cheese layer first: Always place a slice of cheese on the bottom buns before adding the beef. This keeps the bread from soaking up too much juice and helps the sliders stay firm.
- Cook beef evenly: Break the beef into small crumbles while cooking so it browns evenly. If the pieces are too big, they won’t spread well across the buns.
- Don’t cover while baking: Bake the sliders uncovered so the buns turn golden and slightly crisp. Covering them with foil makes them steam and lose texture.
- Swap ingredients smartly: If you don’t have Colby Jack, use mozzarella or Monterey Jack. They melt well and still give that gooey texture.
- Control the heat: Keep the skillet on medium heat when cooking the beef. Too high and it dries out, too low and it won’t brown properly.
Tasty Variations to Try:
- Spicy sliders: Add jalapeños or drizzle hot sauce over the beef for a little kick.
- BBQ style: Swap the special sauce with barbecue sauce and add pickles for a smoky flavor.
- Vegetarian option: Use plant-based ground meat or even cooked lentils with cheese for a meat-free version.
- Breakfast sliders: Add scrambled eggs and bacon along with the cheese for a morning twist.
- Seasonal idea: In summer, try fresh tomato slices inside the sliders. In colder months, add caramelized onions for extra warmth.
- Cheese swap: Try pepper jack for spice or Swiss for a milder flavor. Each cheese changes the taste but still keeps the sliders melty and satisfying.
Serving Suggestions:
1. Game day favorite:
Cheeseburger Sliders are perfect for serving at sports parties or casual get-togethers because they’re easy to grab and eat while chatting.
2. Pairs with sides:
Serve with garlic potato wedges, fries, or even a simple salad to balance the richness of the sliders.
3. Snack option:
These sliders also work well as a quick snack when you want something filling but not too heavy.
4. Extra condiments:
Pair with ketchup, mustard, pickles, or guacamole for added flavor and variety at the table.
Storage & Reheating Tips:
- Store separately: Keep the cooked beef and sauce in airtight containers in the fridge. This way the buns don’t get soggy, and everything stays fresher for longer.
- Fridge life: The beef mixture usually keeps well for a few days, while the sauce can last almost a week if sealed properly.
- Freezer option: You can freeze the beef mixture in portions, which makes it easier to reheat later without wasting.
- Reheat gently: Warm the beef in a skillet or microwave until hot, then assemble fresh sliders. If reheating assembled sliders, use the oven so the buns stay crisp instead of soft.
Frequently Asked Questions (FAQ):
-
Can I use different buns?
Yes, you can swap brioche or Hawaiian rolls with dinner rolls or any soft bread. Just make sure they aren’t too crusty so the sliders stay easy to bite.
-
Can I make Cheeseburger Sliders ahead of time?
You can cook the beef and prepare the sauce earlier, then assemble and bake right before serving. This keeps the buns fresh and prevents sogginess.
-
Why are my sliders soggy?
If the beef mixture is too wet, the buns soak it up. Adding a cheese slice on the bottom layer helps block the juices.
-
Can I make them healthier?
You can use lean ground beef, turkey, or even plant-based meat. Whole wheat buns also work if you want more fiber.
-
Can I freeze them?
It’s better to freeze just the beef mixture. The buns don’t hold up well in the freezer, but reheating the beef later works fine.
Cheeseburger Sliders
Description
Cheeseburger Sliders are small, oven-baked burgers made with soft slider buns, seasoned ground beef, melted cheese, and a simple homemade sauce. They’re quick to prepare, easy to serve, and perfect for parties, potlucks, or casual family dinners.
Ingredients
Instructions
- Preheat oven to 350°F. Slice 12 slider buns horizontally, keeping them attached, and place the bottom half on a baking sheet.
- Heat a skillet over medium heat. Add 1 pound ground beef and cook until browned and crumbly. Stir in 2 teaspoons garlic powder, 1 teaspoon kosher salt, and ½ teaspoon black pepper. Remove from heat.
- Place 6 slices sharp cheddar cheese evenly on the bottom buns.
- Spoon the cooked beef mixture over the cheese layer, spreading it across all buns.
- Drizzle ¼ cup special sauce (made from mayonnaise, ketchup, relish, and vinegar) over the beef.
- Sprinkle 1 cup shredded Colby Jack cheese on top of the sauce.
- Place the top half of the buns over the sliders and brush lightly with olive oil.
- Bake uncovered for 10-15 minutes, until the cheese is melted and the buns are golden.
- For the sauce, whisk together ¼ cup mayonnaise, 1 tablespoon ketchup, 1 tablespoon sweet pickle relish, and 1 teaspoon red wine vinegar until smooth. Taste and adjust seasoning if needed.
- Serve warm with extra condiments like mustard, ketchup, or pickles.
Notes
- Line the bottom buns with cheese to prevent sogginess.
- Bake uncovered so the buns stay crisp instead of steaming.
- Sauce can be made up to 3 days ahead and stored in the fridge.
Nutrition Facts
Servings 12
Serving Size 1 slider
- Amount Per Serving
- Calories 299kcal
- % Daily Value *
- Total Fat 20g31%
- Saturated Fat 8g40%
- Trans Fat 0.5g
- Cholesterol 57mg19%
- Sodium 337mg15%
- Potassium 134mg4%
- Total Carbohydrate 17g6%
- Dietary Fiber 0.2g1%
- Sugars 5g
- Protein 14g29%
- Vitamin A 213 IU
- Vitamin C 0.2 mg
- Calcium 143 mg
- Iron 1 mg
* Percent Daily Values are based on a 2,000‑calorie diet, and your daily needs may be higher or lower depending on your lifestyle. Nutrition information is shared only as a general estimate and may not always be fully accurate. If you follow a special diet or have specific health concerns, it’s best to check with a registered dietitian for personalized guidance.