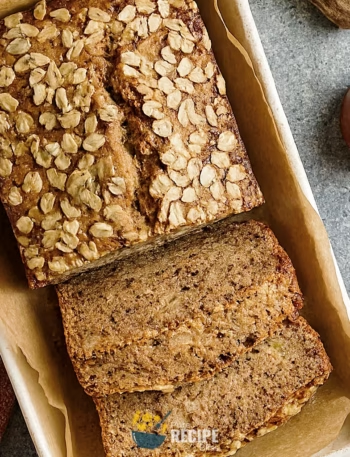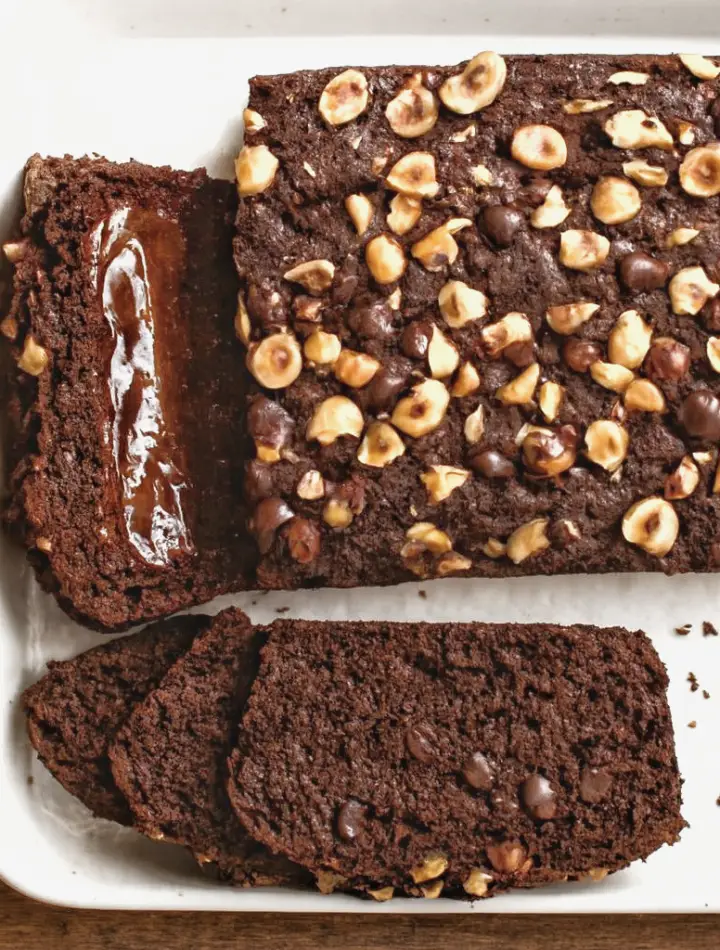
So actually yesterday I ended up making a Chocolate-Hazelnut Banana Bread, and to be honest when I tasted it I realized that it had turned out so soft and full of flavor that I was really surprised myself.
The thing is that the banana brings its own natural sweetness, and then when you add the chocolate together with the hazelnut, it makes the whole bread taste even richer and better.
And because of that, whether you eat it in the morning for breakfast or later in the evening with tea, it feels perfect at any time. I feel that if you try it even once, then you will definitely like it.
Why You’ll Love This Recipe
-
u003cstrongu003eSoft and Moist Texture:u003c/strongu003e This bread has a texture that feels very soft and moist because it is made using nicely ripe bananas. And when you take a bite, it feels quite smooth and it does not feel dry at all.
-
u003cstrongu003eChocolate-Hazelnut Flavor:u003c/strongu003e This bread has homemade chocolate hazelnut butter added to it, and that makes the flavor taste much better. The rich taste of chocolate together with the nutty flavor of hazelnut feels like a very good combination.
-
u003cstrongu003eHealthier Ingredients:u003c/strongu003e This recipe does not have refined sugar, and instead it uses coconut sugar, and it also has gluten-free flours. Because of that, when you eat it, you feel a little less guilty about enjoying it.
-
u003cstrongu003eEasy to Make:u003c/strongu003e The steps are very simple, because you just need to mix everything, put it in the pan, and then bake it. And even if you are a beginner, you will still be able to make it without much difficulty.
-
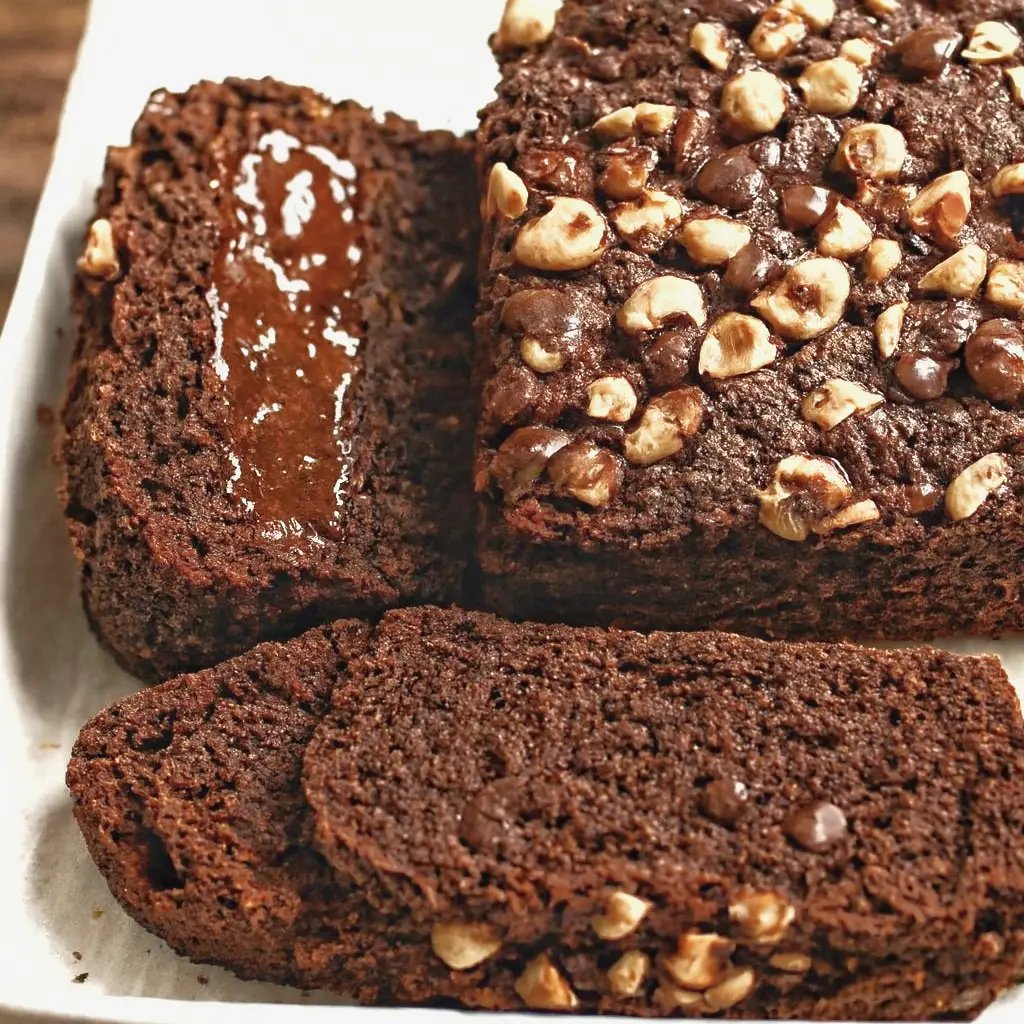
u003cstrongu003ePerfect Anytime Treat:u003c/strongu003e You can eat this bread in the morning for breakfast, or you can eat it as an evening snack, or even when you feel like having dessert, because it fits well at any time. And when you add chocolate chips and hazelnuts on top, it also gives a nice crunchy texture.
Ingredients Needed:
-
u003cstrongu003e1 1/3 cups mashed overripe bananas – u003c/strongu003eThese overripe bananas give the bread natural sweetness and moisture, which keeps the texture soft and makes the flavor stronger.
-
u003cstrongu003e1/3 cup coconut sugar –u003c/strongu003e Coconut sugar is a slightly healthier option, and its taste blends easily with bananas and chocolate, so the sweetness feels balanced and not too sharp.
-
u003cstrongu003e1/4 cup unsweetened almond milk –u003c/strongu003e This milk makes the batter smoother, and because it is unsweetened, it does not add extra sweetness to the bread.
-
u003cstrongu003e1/4 cup chocolate hazelnut butter – u003c/strongu003eThis adds a deep chocolate flavor along with a nutty taste, and it also makes the texture richer.
-
u003cstrongu003e1/4 cup refined coconut oil, melted –u003c/strongu003e Melted coconut oil keeps the bread moist and soft, and even after baking the bread does not feel dry.
-
u003cstrongu003e2 tablespoons ground flax seed – u003c/strongu003eFlax seed works like an egg replacement and helps bind the batter, while also adding some fiber.
-
u003cstrongu003e1 cup hazelnut flour –u003c/strongu003e Hazelnut flour makes the flavor more nutty and also provides a gluten-free base for the bread.
-
u003cstrongu003e3/4 cup gluten-free oat flour –u003c/strongu003e Oat flour keeps the texture light so the bread does not feel heavy, and being gluten-free makes it easier to digest.
-
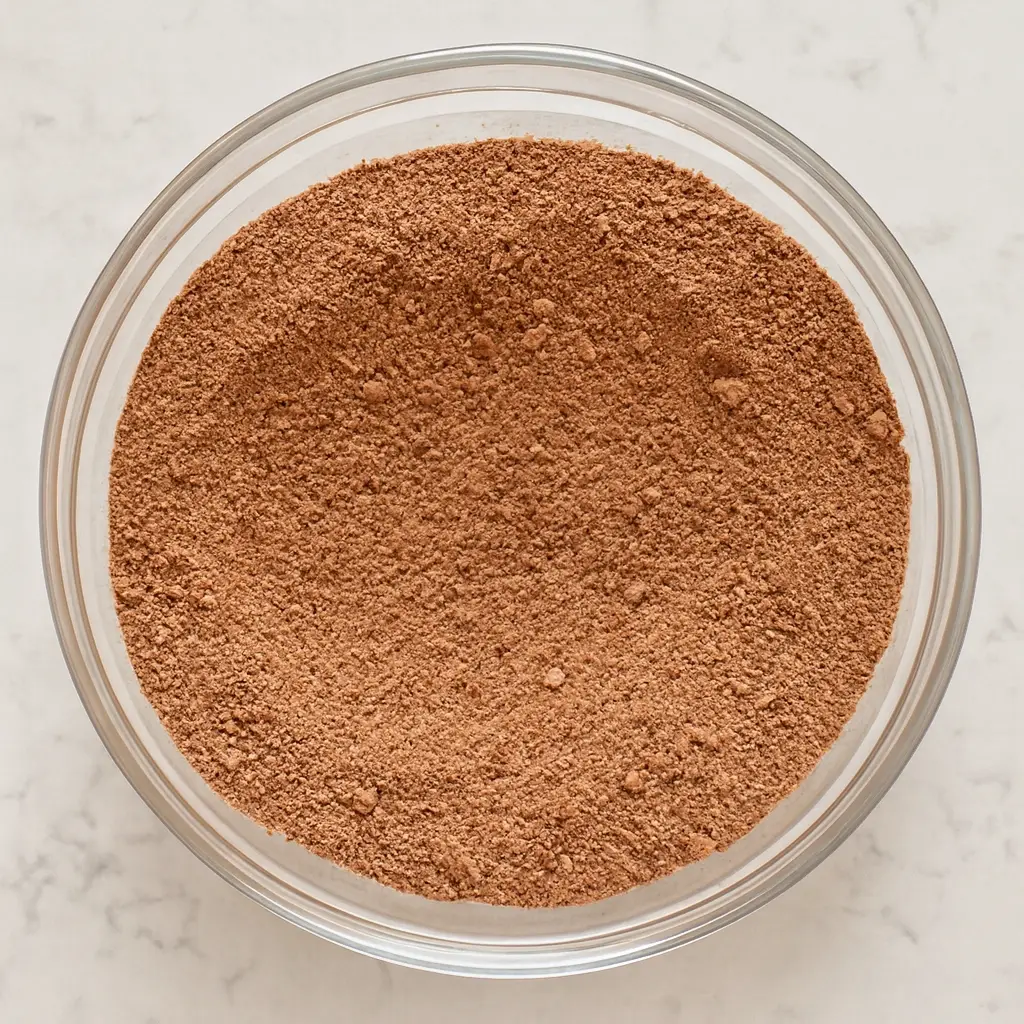
u003cstrongu003e1/2 cup cacao powder –u003c/strongu003e This gives a pure chocolate flavor that is not overly sweet, and it also makes the bread dark and rich in color.
-
u003cstrongu003e1 teaspoon baking soda –u003c/strongu003e Baking soda helps the bread rise properly and makes the loaf fluffy.
-
u003cstrongu003e1 teaspoon baking powder – u003c/strongu003eBaking powder also helps with rising and improves the structure, and together with baking soda it gives the bread a good lift.
-
u003cstrongu003e1/2 teaspoon kosher salt –u003c/strongu003e Salt balances the flavor and highlights the sweetness, and a little salt always tastes good with chocolate.
-
u003cstrongu003e4 ounces chocolate chips (about ⅔ cup) –u003c/strongu003e These create melted pockets of chocolate that make each bite more enjoyable, and they also add a little crunch on top.
-
u003cstrongu003eSmall handful chopped hazelnuts (optional) – u003c/strongu003eSprinkling these on top adds crunch and makes the hazelnut flavor stronger.
-
u003cstrongu003eSmall handful chocolate chips (optional) –u003c/strongu003e These are perfect as an optional topping, because they melt on top and give a glossy look along with extra chocolate taste.
-
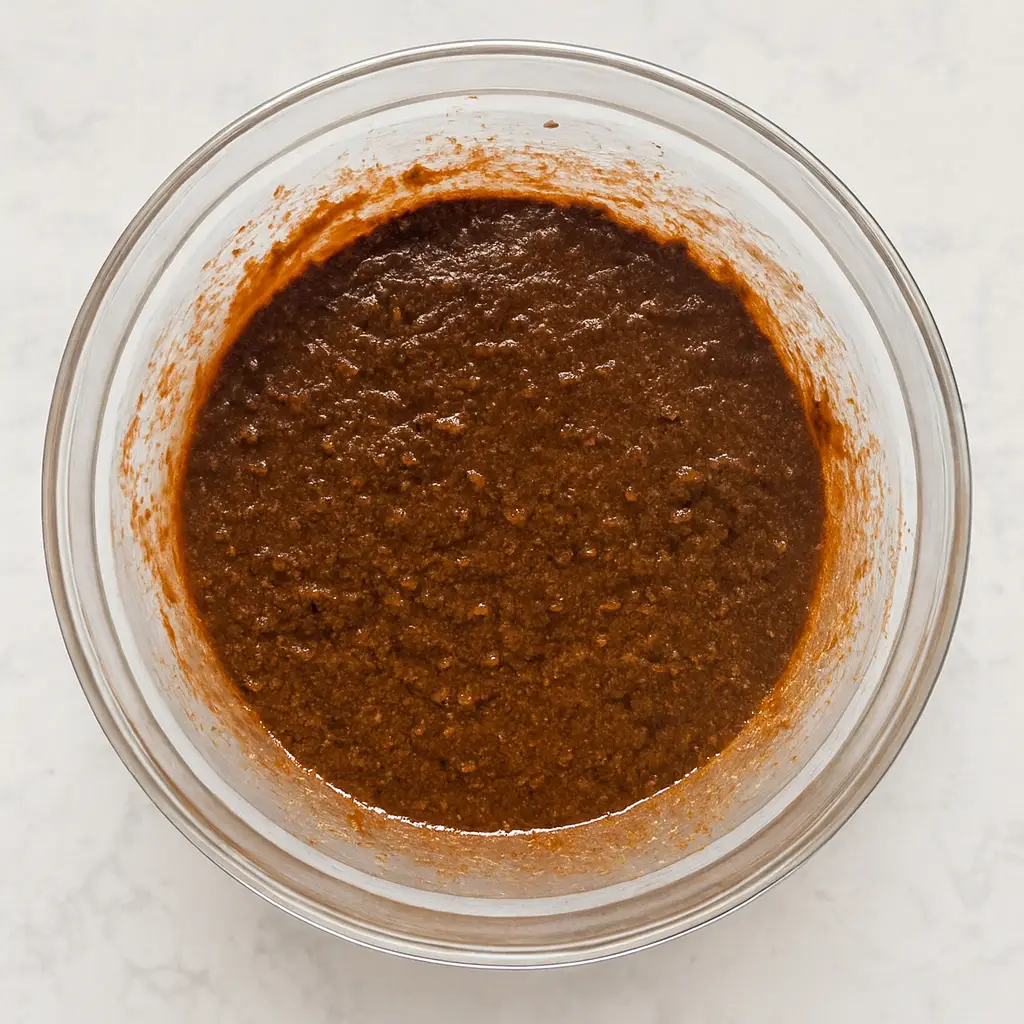
u003cstrongu003eFor Chocolate Hazelnut Butter: 2 cups roasted hazelnuts, 4 tbsp coconut sugar, 3 tbsp cacao powder, 1/4 tsp salt – u003c/strongu003eThis mixture blends easily into a smooth and creamy chocolate hazelnut spread, which has a rich flavor and gives the bread its signature taste.
Step-By-Step Instructions:
Step 1: Preheat the oven
First you need to preheat the oven to 350°F (175°C), because this makes sure that when baking starts the bread gets the right heat and rises evenly.
At the same time, you should line the loaf pan with parchment paper and lightly grease it with coconut oil, so that the bread can come out easily later.
Step 2: Mix the wet ingredients
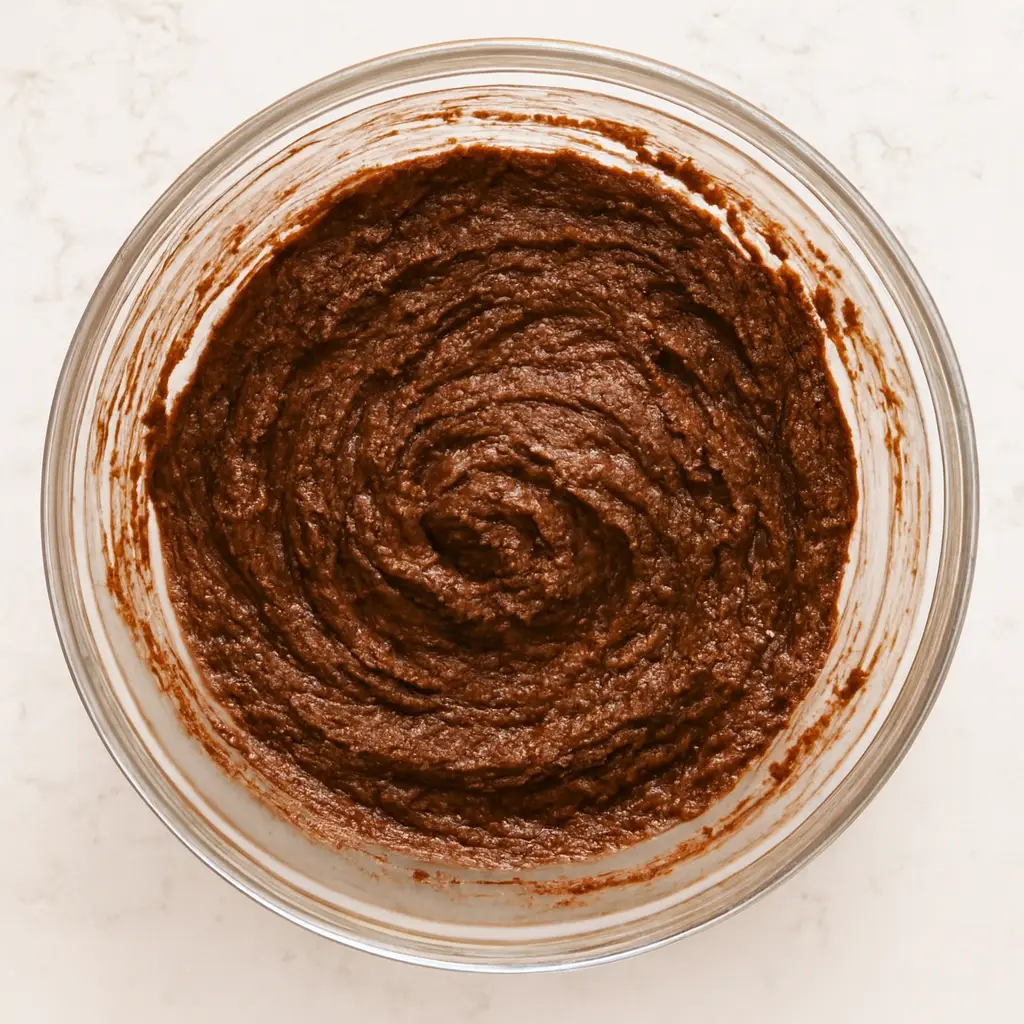
Take a large mixing bowl and add the mashed bananas, coconut sugar, almond milk, chocolate hazelnut butter, melted coconut oil, and flax seed.
Then whisk everything together until it is mixed well. The batter should look smooth, but it is fine if there are a few small banana chunks left.
Step 3: Prepare the dry ingredients in another bowl
Take another bowl and add the hazelnut flour, oat flour, cacao powder, baking soda, baking powder, and kosher salt. Whisk them together properly, because this step is important to make sure all the dry ingredients are evenly mixed and no lumps are formed.
Step 4: Combine the dry and wet mixtures
Now add the dry mixture into the bowl with the wet mixture, and start folding it gently with a spatula.
Do not overmix it, just make sure everything is combined properly. The batter will feel a little thick, so do not worry about that.
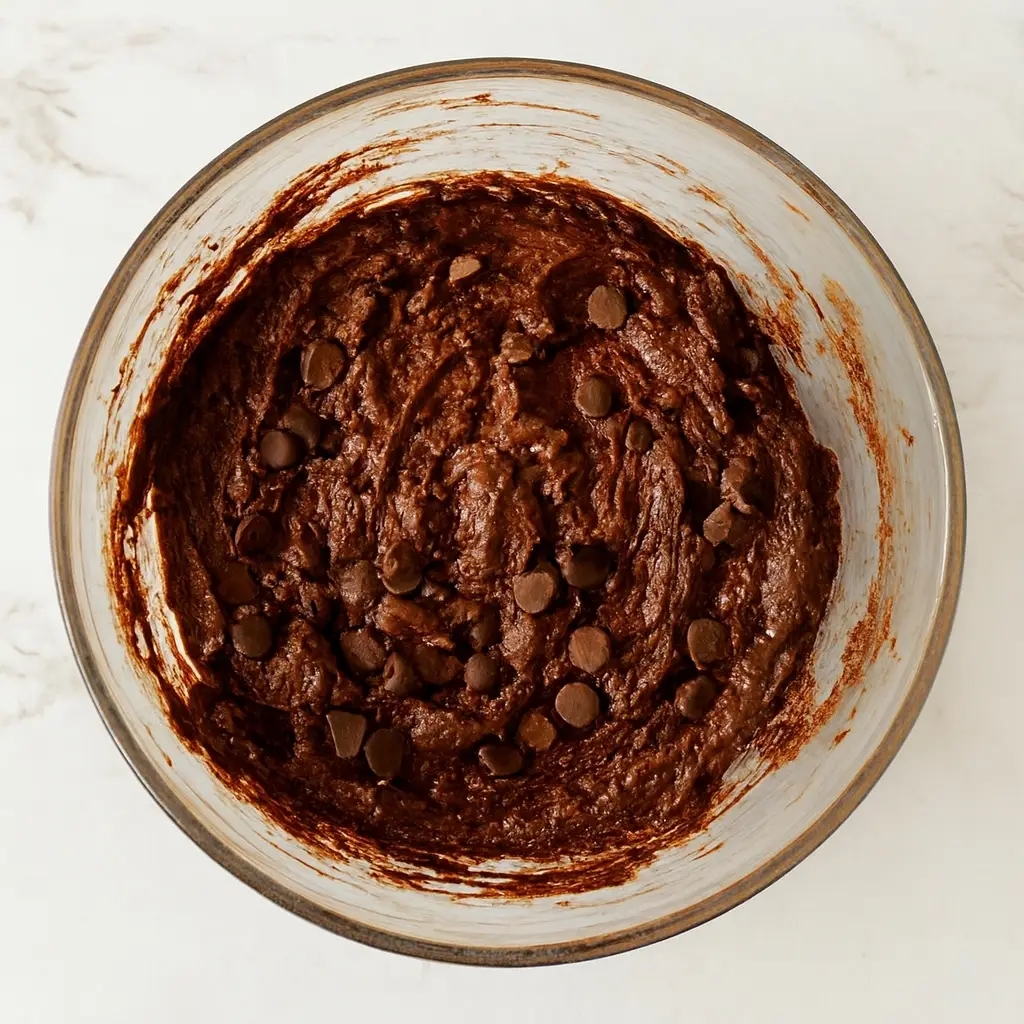
Step 5: Add the chocolate chips
When the batter is ready, fold in the chocolate chips.
This will create melted pockets of chocolate in the bread after baking, which makes it taste very nice.
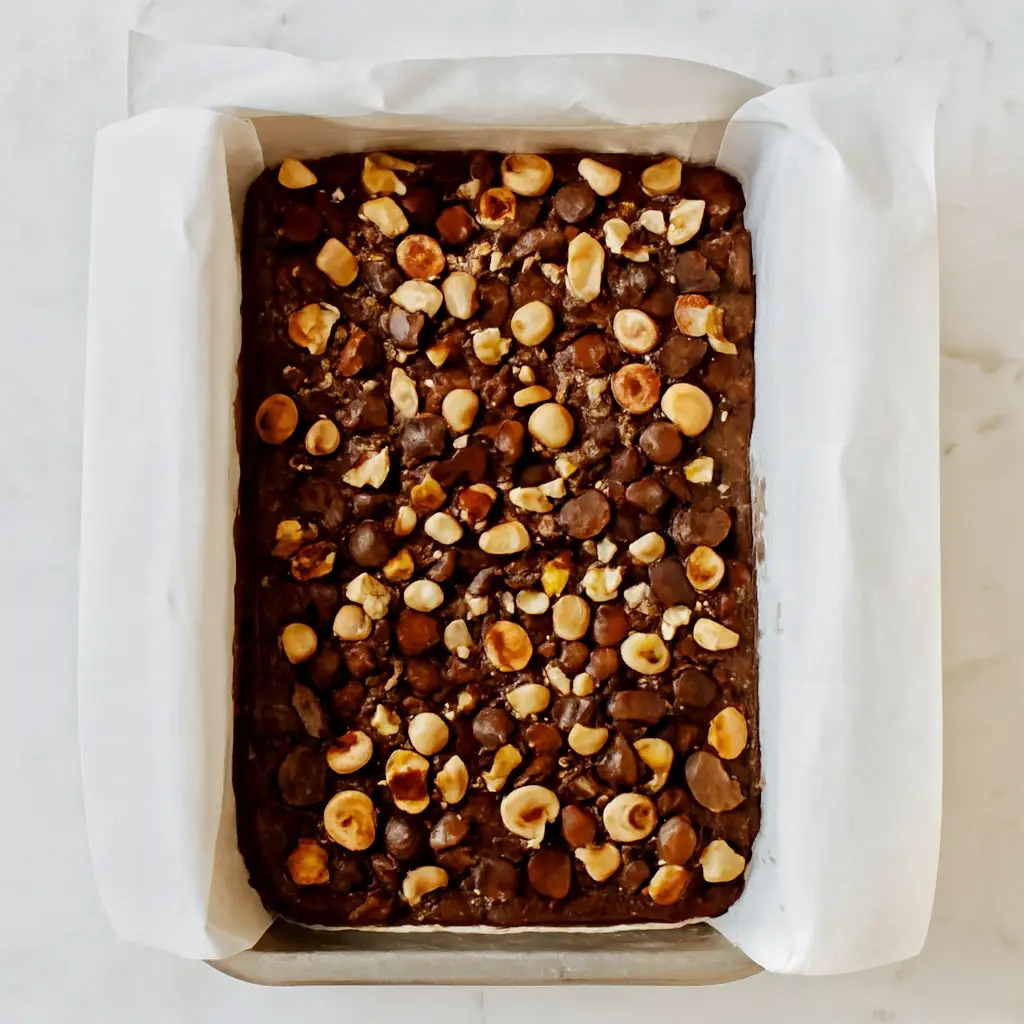
Step 6: Pour the batter into the loaf pan
Pour the batter into the prepared loaf pan and smooth the surface lightly.
You can also sprinkle some optional hazelnuts or extra chocolate chips on top, because this makes the bread look better and adds more flavor.
Step 7: Bake the bread
Place the pan in the oven and bake it for 50 minutes to 1 hour.
To check if it is ready, insert a toothpick in the middle, and if it comes out clean then the bread is done. If you are using a 9×5-inch pan, you should check it after 40–45 minutes.
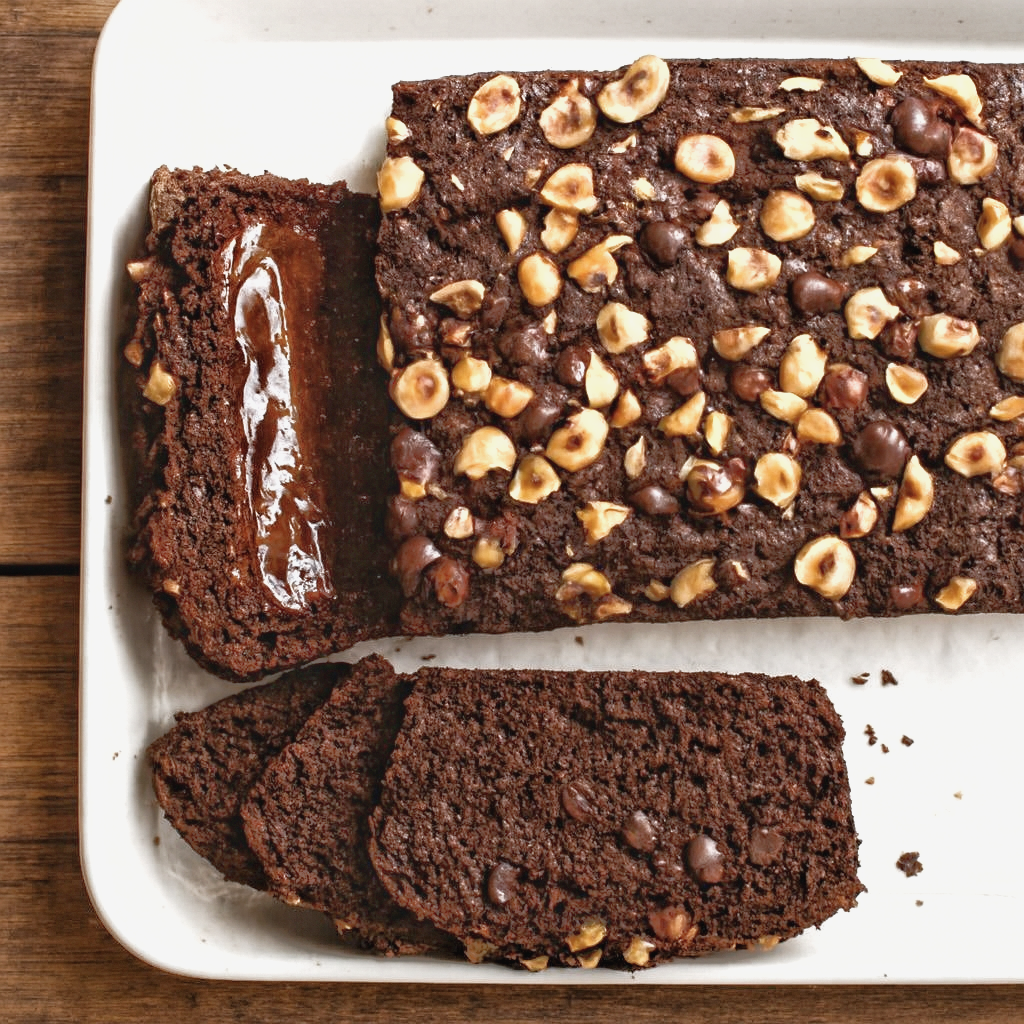
Step 8: Let the bread cool completely
Leave the bread in the pan to cool completely, because if you try to remove it while it is still hot it might break.
Once it has cooled down, slice it and enjoy it, whether with tea, coffee, or even as breakfast.

Expert Tips For The Best Result:
-
u003cstrongu003eBananas should be extra ripe:u003c/strongu003e When the bananas have a color that is almost black, then their sweetness and moisture are at the best level. This makes the bread naturally sweet, and at the same time the texture becomes much softer.
-
u003cstrongu003eDo not overmix the batter:u003c/strongu003e When you are mixing the dry and wet ingredients together, you should only fold them until everything looks evenly combined. If you mix too much, then the bread can turn out dense and it will not be as fluffy as it should be.
-
u003cstrongu003eDo not forget to line the loaf pan:u003c/strongu003e If you use parchment paper, then removing the bread becomes very easy. This is especially helpful when the bread is a little moist, because a lined pan also helps the bread keep a proper shape.
-
u003cstrongu003eCheck the center with a toothpick:u003c/strongu003e Sometimes the bread looks cooked from the outside, but inside it can still remain raw. By using the toothpick test, you can know exactly if it is baked properly, so you should not skip this step.
-
u003cstrongu003eAllow full cooling before slicing:u003c/strongu003e If you try to cut the bread while it is still hot, then it can break apart or feel mushy. When you let it cool completely, the slices come out clean and neat.
Tasty Variations to Try:
-
u003cstrongu003eDouble Chocolate Version:u003c/strongu003e If you like extra chocolate flavor, then you can add a little more cacao powder or some melted dark chocolate into the batter. This makes the bread taste richer and gives it a fudgy texture.
-
u003cstrongu003eNut-Free Option:u003c/strongu003e If you want to avoid hazelnuts, then you can replace the hazelnut flour with oat flour. The taste will be a little different, but the texture will still stay soft.
-
u003cstrongu003eCrunchy Top:u003c/strongu003e Before baking, you can sprinkle some raw sugar on top. After baking, this gives a crispy and caramelized top that tastes very nice.
-
u003cstrongu003eMocha Twist:u003c/strongu003e If you want the chocolate flavor to feel deeper, then add 1 teaspoon of instant coffee powder into the batter. The coffee helps enhance the taste of the chocolate.
-
u003cstrongu003eBanana Chunk Lover Version:u003c/strongu003e If you enjoy visible banana pieces, then use half mashed bananas and half chopped bananas. This way, you get chunks of banana in every bite, which feels different and enjoyable.
Serving Suggestions:
Breakfast Ideas:
-
u003cstrongu003eWarm Slice with Coffee:u003c/strongu003e A warm slice of this bread feels very nice when you eat it with hot coffee, because the flavors go well together. And if you are in a hurry in the morning, you can just warm it in the microwave for about 15–20 seconds and then enjoy it easily.
-
u003cstrongu003eWith Greek Yogurt:u003c/strongu003e If you want a breakfast that feels more filling, you can put some Greek yogurt on top of a slice. The creaminess of the yogurt together with the chocolate flavor of the bread makes the taste feel balanced.
-
u003cstrongu003eWith Fresh Fruits on the Side:u003c/strongu003e This bread tastes good when you eat it with strawberries, blueberries, or banana slices on the side. The fruits add freshness and also bring natural sweetness, which makes the whole plate feel lighter.
-
u003cstrongu003eNut Butter Drizzle:u003c/strongu003e If you want to make it a little more indulgent, you can drizzle peanut butter or almond butter on top. This adds more flavor and also makes the slice feel more filling.
Snack & Dessert Ideas:
-
u003cstrongu003eWith Chocolate Sauce:u003c/strongu003e If you are in the mood for dessert, you can pour some warm chocolate sauce on top of the bread. This makes the chocolate flavor stronger and more enjoyable.
-
u003cstrongu003eIce Cream Pairing:u003c/strongu003e You can serve a slice with one scoop of vanilla or hazelnut ice cream, and then it becomes a proper dessert. The warm bread together with the cold ice cream makes a combination that feels very satisfying.
-
u003cstrongu003eToasted Slice:u003c/strongu003e If you like a texture that is a little crispy, you can lightly toast a slice in a pan. The chocolate chips melt on top while toasting, and the taste becomes deeper.
-
u003cstrongu003eTea-Time Treat:u003c/strongu003e In the evening, a slice of this bread feels very satisfying when you eat it with tea. It feels light, and at the same time it handles your sweet craving in a simple way.
Storage & Reheating:
1. Storage Instructions:
-
u003cstrongu003eKeep at Room Temperature:u003c/strongu003e If you plan to finish the bread within 2–3 days, you can keep it on the counter by wrapping it in foil or placing it in an airtight container. This way the bread stays soft and does not become dry. You just need to make sure the container is properly sealed so that the moisture does not escape.
-
u003cstrongu003eUse Plastic Wrap:u003c/strongu003e It is best to wrap the bread tightly in plastic wrap first and then place it inside a container. This helps the bread stay fresh and keeps the top slightly moist.
-
u003cstrongu003eStays Fresh for About a Week:u003c/strongu003e You can also store the bread in the fridge, where it stays fresh for about one week. The slices may feel a little firm when kept in the fridge, but once you warm them they become soft again.
-
u003cstrongu003ePrevent Moisture Loss:u003c/strongu003e Because the fridge can make the bread dry, it is important to store it in an airtight container. You can also place a small sheet of parchment paper with the bread so that the surface does not become sticky.
-
u003cstrongu003eFreeze Individual Slices:u003c/strongu003e If you want to store the bread for a longer time, you should cut it into slices and wrap each slice individually. Then place them in a freezer-safe bag. In the freezer, the bread can last easily for up to six months.
-
u003cstrongu003eQuick Grab-and-Go:u003c/strongu003e Frozen slices are very convenient because you can take out one slice whenever you want, warm it, and enjoy it. The taste feels almost as fresh as when it was first baked.
2. Reheating Instructions:
-
u003cstrongu003eMicrowave Method:u003c/strongu003e You can warm one slice in the microwave for about 15–20 seconds. This makes the bread soft again and also melts the chocolate chips slightly, which improves the taste.
-
u003cstrongu003eToaster or Pan Method:u003c/strongu003e If you prefer a slice with a slightly crisp edge, you can warm it in a toaster or on a pan over medium heat for 1–2 minutes. This method works especially well for slices taken out of the freezer.
-
u003cstrongu003eAvoid Overheating:u003c/strongu003e If you heat the bread too much, it can become dry. That is why it is better to warm it in short intervals so that the texture stays soft.
FAQ:
-
u003cstrongu003eIs this bread gluten-free?u003c/strongu003e
Yes, this bread is completely gluten-free because it is made with hazelnut flour and gluten-free oat flour. And if you make sure to use certified gluten-free ingredients, then even people who are sensitive to gluten can feel safe eating it.
-
u003cstrongu003eCan I use normal wheat flour instead of hazelnut flour?u003c/strongu003e
Technically you can use wheat flour, but the texture and taste will both change. Wheat flour usually makes the bread a little heavier, and you will not get that nutty flavor that hazelnut flour gives.
-
u003cstrongu003eCan I use ready-made chocolate hazelnut butter?u003c/strongu003e
Yes, you can use store-bought chocolate hazelnut butter if you do not have time to make it at home. You just need to make sure that it is not overly sweet, because otherwise the bread can turn out too sweet.
-
u003cstrongu003eWill it work if the bananas are not fully ripe?u003c/strongu003e
Honestly, overripe bananas are the best choice. If the bananas are not properly ripe, then the bread will have less sweetness and the texture can feel a little dry.
-
u003cstrongu003eIs this bread kid-friendly?u003c/strongu003e
Yes, this bread is kid-friendly because it does not contain refined sugar and the ingredients are clean. The only thing to keep in mind is that if there is a nut allergy issue, then you should skip the hazelnuts.
Chocolate-Hazelnut Banana Bread
Description
This Chocolate-Hazelnut Banana Bread has a texture that feels soft and moist, and at the same time it has a flavor that tastes rich. It is made using ripe bananas, cacao powder, gluten-free flours, and homemade chocolate hazelnut butter, so the ingredients all come together in a simple way. It is dairy-free, it is gluten-free, and it is naturally sweetened with coconut sugar, which makes it feel balanced. You can enjoy it for breakfast, you can have it as a snack, or you can serve it as a dessert, because it works well at any time.
Ingredients
For the Banana Bread:
For Chocolate Hazelnut Butter:
Instructions
- Preheat oven to 350°F (175°C). Line an 8.5×4.5-inch loaf pan with parchment paper and lightly grease.
- In a mixing bowl, whisk mashed bananas, coconut sugar, almond milk, chocolate hazelnut butter, melted coconut oil, and ground flax seed.
- In another bowl, whisk hazelnut flour, oat flour, cacao powder, baking soda, baking powder, and salt.
- Fold dry ingredients into the wet mixture until combined.
- Fold in chocolate chips.
- Pour batter into the prepared pan. Add hazelnuts or extra chocolate chips on top if desired.
- Bake 50–60 minutes or until a toothpick inserted in the center comes out clean.
- Cool completely before slicing.
- Add roasted hazelnuts to a high-powered blender or food processor and blend 5–8 minutes until smooth.
- Add coconut sugar, cacao powder, and salt. Blend another 30 seconds.
- Store in a glass jar at room temperature for 1 week or in the fridge for 1 month.
Banana Bread:
Chocolate Hazelnut Butter:
Notes
- u003cliu003eIf using a 9×5-inch pan, check the bread at 40–45 minutes.u003c/liu003eu003cliu003eOverripe bananas (almost black) give the best flavor and moisture.u003c/liu003eu003cliu003eFor extra crunch, add more chopped hazelnuts on top before baking.u003c/liu003e
Nutrition Facts
Servings 10
Serving Size 1 Slice
- Amount Per Serving
- Calories 300kcal
- % Daily Value *
- Total Fat 18g28%
- Saturated Fat 7g35%
- Sodium 210mg9%
- Total Carbohydrate 32g11%
- Dietary Fiber 5g20%
- Sugars 13g
- Protein 5g10%
- Vitamin C 3 mg
- Calcium 65 mg
- Iron 2 mg
* Percent Daily Values are based on a 2,000‑calorie diet, and your daily needs may be higher or lower depending on your lifestyle. Nutrition information is shared only as a general estimate and may not always be fully accurate. If you follow a special diet or have specific health concerns, it’s best to check with a registered dietitian for personalized guidance.