You know how sometimes you just want bread that feels a little more special than plain rolls? That’s when I like to make Italian Herb and Cheese Bread. It doesn’t take all day, and once you’ve done it a couple of times, the steps feel pretty straightforward.
I usually bake these rolls when I’m planning sandwiches for lunch or dinner, but they’re also nice to have around if you want something warm to snack on. It’s a recipe that fits into everyday cooking without being complicated, and it sets the stage for talking about what Italian Herb and Cheese Bread really is.
What is Italian Herb and Cheese Bread?
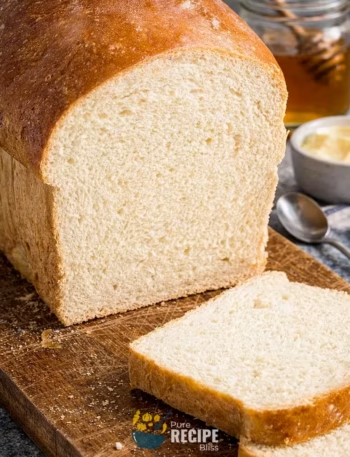
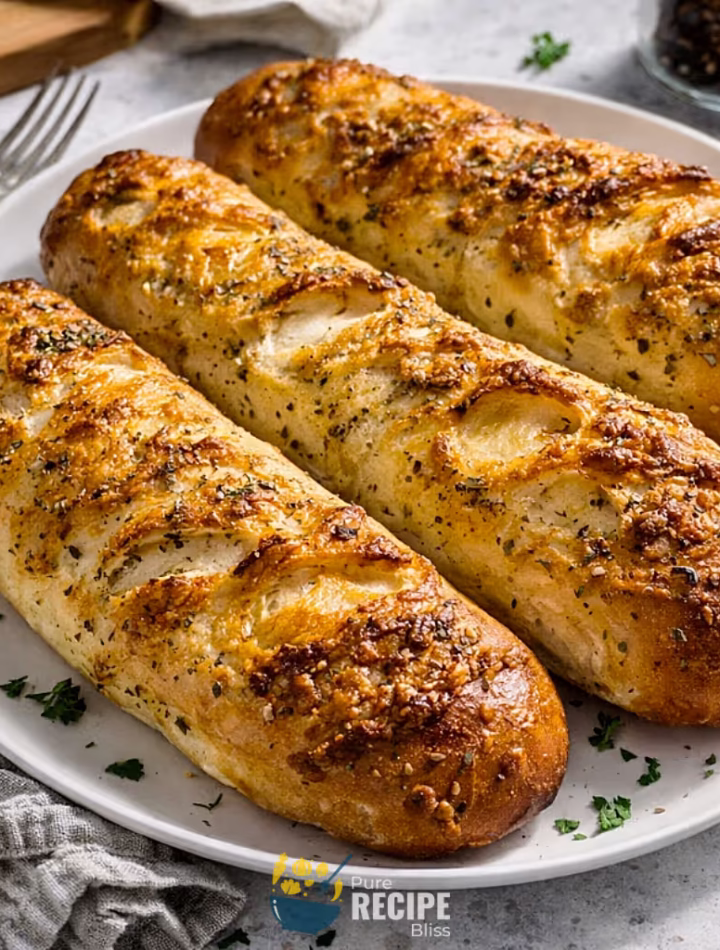
Italian Herb and Cheese Bread is basically a soft sub‑style roll that’s topped with a mix of dried herbs and melted cheese, so you get that chewy inside with a slightly crisp and flavorful crust. It’s the kind of bread you’d expect to see in a deli sandwich, but making it at home gives you more control over how cheesy or herby you want it.
Most people use it for sandwiches like meatball subs, grinders, or even just a simple turkey and cheese, but honestly it’s good on its own too. The bread holds up well to heavier fillings, which makes it practical for lunch or dinner, and it’s also nice to slice up and serve alongside soup or pasta. It’s a versatile bread that fits into everyday meals without much fuss.
Why You’ll Love This Recipe:
- Easy to handle: The dough might look a little sticky at first, but once it rises, it becomes much easier to shape, so you don’t feel stressed about working with it.
- Quick enough for a regular day: Even though there are two proofing steps, the actual hands‑on time is short, so you can fit it in around other cooking or chores without it taking over your whole day.
- Great for sandwiches: The rolls are sturdy enough to hold fillings like meatballs or grilled chicken, so you don’t end up with bread falling apart halfway through eating.
- Customizable toppings: You can play around with different cheeses or herb blends, and I’ve found that adding a little extra parmesan makes the crust more flavorful.
- Works for different meals: I usually make them for lunch or dinner subs, but they’re also nice to slice up and serve with soup, or even just warm one up for a snack when you want something filling.
- Tested at home: I once tried using fresh mozzarella, and it made the crust soggy instead of crisp, so now I stick with low‑moisture cheese because that small change really makes the bread turn out better.
Ingredients Needed:

- Bread flour: This gives the rolls more strength, so they rise nicely and don’t collapse when you add heavy fillings. I’ve tried using all‑purpose flour before, and while it works, the texture isn’t quite the same.
- Whole milk: Using milk instead of water makes the crumb softer and adds a little richness. I noticed the bread feels more tender when I stick with milk.
- Butter (cold, cubed): Adding cold butter during kneading takes a bit longer to mix in, but it helps the dough develop better. I once tried softened butter, and the dough didn’t hold its shape as well.
- Eggs: These add structure and a bit of flavor. I like how they make the rolls more golden when baked.
- Yeast and sugar: The sugar helps the yeast activate, and I’ve found that letting it bloom properly makes the dough rise more consistently.
- Salt: It balances the flavor and keeps the bread from tasting flat.
- Egg wash: Brushing the rolls before baking helps the herbs and cheese stick better.
- Italian seasoning blend: A mix of dried herbs like oregano and basil gives that deli‑style flavor.
- Low‑moisture mozzarella: This type of cheese crisps up instead of melting into a soggy layer. I once tried fresh mozzarella, and it made the crust too wet.
- Parmesan or Romano: A little sprinkle adds sharpness and makes the topping more flavorful.
💡 Note: For the full ingredient list with exact amounts and measurements, please check the recipe card below.
Step-By-Step Instructions to Make Italian Herb and Cheese Bread:
You know the dough feels stickier than you expect at first, but once it rises, it becomes much easier to shape. So don’t panic if it looks messy in the beginning as it smooths out later.
Step 1: Bloom the yeast
Start by mixing warm milk with yeast and a little sugar. Let it sit until you see foam on top, which means the yeast is active. If it doesn’t foam, it usually means the yeast is old or the milk was too hot.
Step 2: Mix the dough
Add flour, salt, and eggs into the yeast mixture, then mix until it looks shaggy. It won’t look smooth yet, and that’s fine. I usually scrape down the sides of the bowl a couple of times to keep everything together.
Step 3: Knead with butter
Drop in cold cubes of butter and keep kneading until the dough turns smooth. It takes a little longer because the butter is cold, but that’s what helps the dough develop properly. I once tried softened butter, and the rolls didn’t hold their shape as well.
Step 4: First rise
Place the dough in a greased bowl, cover it, and let it rise until it looks puffed and doubled. I usually keep it in a slightly warm spot, like near the oven, because cooler rooms slow it down.
Step 5: Shape the rolls
Punch down the dough gently, divide it into equal pieces, and roll each into a rectangle. Then roll them up tightly into logs and pinch the seams so they don’t open while baking. I learned that if you don’t pinch firmly, the rolls spread out instead of rising tall.
Step 6: Second rise
Cover the shaped rolls and let them proof again until they look slightly puffed. This step gives them that soft texture inside.
Step 7: Add toppings
Brush the rolls with egg wash, sprinkle herbs, and then add mozzarella and parmesan. Work quickly so the toppings stick well. I once waited too long, and the cheese slid off during baking.
Step 8: Bake until golden
Bake until the rolls are golden brown and the cheese looks crisp. The inside should feel soft but cooked through. I like to tap the bottom of a roll because if it sounds hollow, it’s usually done.
💡 Note: These steps are just an overview. For detailed quantities, measurements, and exact timings to make this recipe, please check the recipe card below.
Helpful Tips For The Best Results:
- Sticky dough is normal: At first the dough feels messy and sticky, but after the first rise it tightens up, so don’t rush to add extra flour. A light dusting on your hands is usually enough.
- Watch the milk temperature: If the milk is too hot, the yeast won’t work properly. I usually test it by touching as it should feel warm but not hot.
- Pinch seams firmly: When shaping the rolls, make sure the seams are sealed tightly. If not, the rolls tend to spread wide instead of rising tall.
- Cheese choice matters: Low‑moisture mozzarella crisps nicely. I once tried fresh mozzarella, and it made the crust soggy, so I avoid that now.
- Proof in a warm spot: If your kitchen is cool, the dough may rise slowly. I sometimes place the bowl near the oven while it preheats, and that helps.
Tasty Variations to Try:
- Extra garlic flavor: Mix a little garlic powder into the herb blend for a stronger flavor.
- Cheddar topping: Swap mozzarella for sharp cheddar if you want a more bold and tangy crust.
- Whole wheat option: Replace part of the bread flour with whole wheat flour. It makes the rolls a bit denser but adds a nutty taste.
- Seasonal herbs: In summer, I like adding fresh basil or rosemary instead of dried seasoning. It changes the flavor and feels more garden‑fresh.
- Spicy twist: Sprinkle red pepper flakes along with the herbs if you want a little heat.
- Parmesan heavy: I sometimes double the parmesan topping because it gives a sharper bite and makes the crust more flavorful.
Serving Suggestions:

1. Sandwiches:
Serve with meatball subs, turkey grinders, or even a simple ham and cheese because the bread holds up well to heavier fillings.
2. Soups:
Perfect for pairing with tomato soup or creamy potato soup, since the cheesy crust adds extra flavor.
3. Pasta nights:
Pairs well with spaghetti, lasagna, or baked ziti, making it a nice alternative to garlic bread.
4. Snack option:
Warm up a roll and eat it plain or with a little butter when you want something filling but quick.
5. Party platters:
Slice into smaller pieces and serve with dips like spinach artichoke or marinara for gatherings.
Storage & Reheating Tips:
- Short-term storage: Keep Italian Herb and Cheese Bread in an airtight bag or container at room temperature for a couple of days. Make sure the rolls are fully cooled before sealing, otherwise the steam makes the crust soft.
- Freezing option: Wrap the cooled rolls individually or place them together in a freezer bag. They stay good for a few months, and wrapping them separately makes it easier to grab just one when needed.
- Reheating method: Warm the bread in a low oven until the crust feels crisp again. I usually set it around medium heat so the inside stays soft without drying out.
Frequently Asked Questions (FAQ):
-
Can I use all-purpose flour instead of bread flour?
Yes, you can, but the rolls may turn out a little softer and less chewy. I’ve tried it before, and while it works, the bread doesn’t hold up as well to heavier fillings.
-
Can I make Italian Herb and Cheese Bread ahead of time?
You can prepare the dough, shape the rolls, and keep them covered in the fridge overnight. Just let them come back to room temperature before baking so they rise properly.
-
Why didn’t my rolls rise much?
Usually it’s either the yeast not being fresh or the milk being too hot. I’ve learned to always check the yeast date and test the milk by touch.
-
Can I make this bread lighter for dietary needs?
You can swap part of the bread flour with whole wheat flour or use part-skim mozzarella. It changes the texture slightly, but it still tastes good.
-
What if the cheese doesn’t stick?
Make sure to brush the rolls with egg wash right before adding the herbs and cheese. If you wait too long, the toppings slide off during baking.
Italian Herb and Cheese Bread
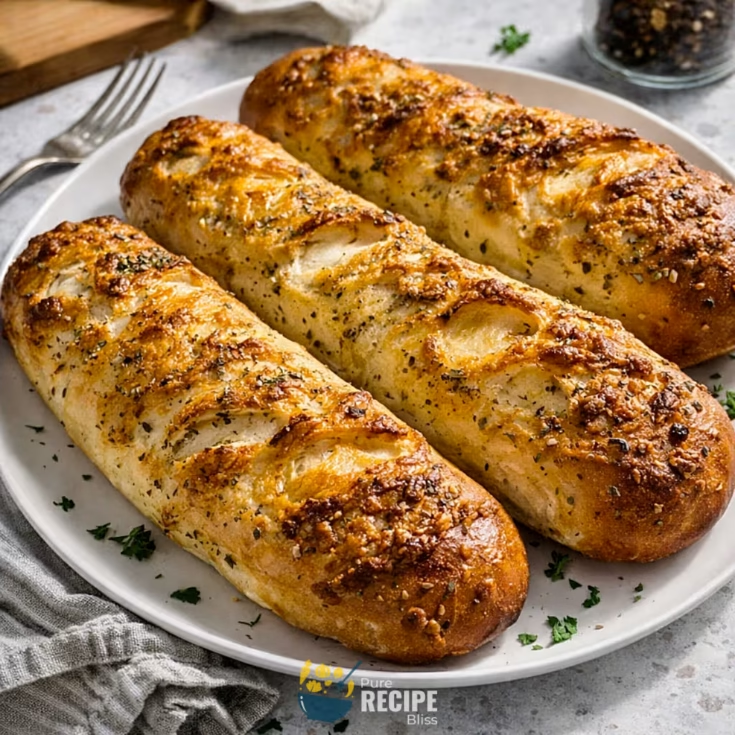
Italian Herb and Cheese Bread is a soft, deli‑style roll topped with a savory blend of herbs and melted cheese. The inside stays fluffy while the crust turns golden and crisp, making it sturdy enough for subs, grinders, or hearty sandwiches. This homemade version is straightforward to prepare, tested in a regular kitchen, and works well for lunch, dinner, or even as a snack. The recipe balances flavor and texture, giving you bakery‑style bread without complicated steps.
Ingredients
- 3 ¼ cups bread flour (450g)
- 2 eggs, beaten
- 1 cup whole milk, warmed (245g)
- 3 tablespoons unsalted butter, cold and cubed (41g)
- 2 ½ teaspoons active dry yeast (11g)
- 1 tablespoon + 2 teaspoons sugar (30g)
- 2 teaspoons fine sea salt (12g)
- 1 egg white, beaten (for egg wash)
- 1 tablespoon water (for egg wash)
- ¾ cup low-moisture mozzarella, grated
- 2 tablespoons parmesan, grated (or Romano)
- ½ tablespoon Italian seasoning blend
Instructions
- Mix 1 cup warm milk with 1 tablespoon + 2 teaspoons sugar and 2 ½ teaspoons yeast in a bowl, then let it sit until foamy.
- Add 3 ¼ cups bread flour, 2 teaspoons salt, and 2 beaten eggs into the yeast mixture, mixing until a shaggy dough forms.
- Add 3 tablespoons cold cubed butter and knead until smooth and elastic.
- Place the dough in a greased bowl, cover, and let rise for about 1 hour until doubled in size.
- Punch down, divide into six equal pieces (about 140g each), and roll each into a rectangle.
- Roll tightly into logs, pinch seams, and place seam-side down on a parchment-lined baking sheet.
- Cover and let rise again for about 30 minutes until slightly puffed.
- Brush with 1 egg white mixed with 1 tablespoon water, sprinkle ½ tablespoon Italian seasoning, score lightly, and top with ¾ cup mozzarella and 2 tablespoons parmesan.
- Bake at 400°F for about 20 minutes until golden brown and cheese is crisp.
- Cool completely on a wire rack before serving.
Notes
Nutrition Information
Yield 6 Serving Size 1 rollAmount Per Serving Calories 411Total Fat 13gSaturated Fat 7gTrans Fat 0.2gUnsaturated Fat 4gCholesterol 85mgSodium 948mgCarbohydrates 56gNet Carbohydrates 54gFiber 2gSugar 7gProtein 16g
Percent Daily Values are based on a 2,000‑calorie diet, and your daily needs may be higher or lower depending on your lifestyle. Nutrition information is shared only as a general estimate and may not always be fully accurate. If you follow a special diet or have specific health concerns, it’s best to check with a registered dietitian for personalized guidance.