I’ve been making Instant Pot Chili quite a lot lately because it’s one of those meals that doesn’t ask for much effort but still feels filling and cozy. The nice part is that it cooks quickly, so you don’t have to wait around like you would with a slow simmer on the stove.
It works best as a dinner dish since it’s hearty, but I’ve also enjoyed it for lunch the next day when reheated. That’s why I thought it would be good to share this recipe here before we talk more about what Instant Pot Chili actually is.
What is Instant Pot Chili?
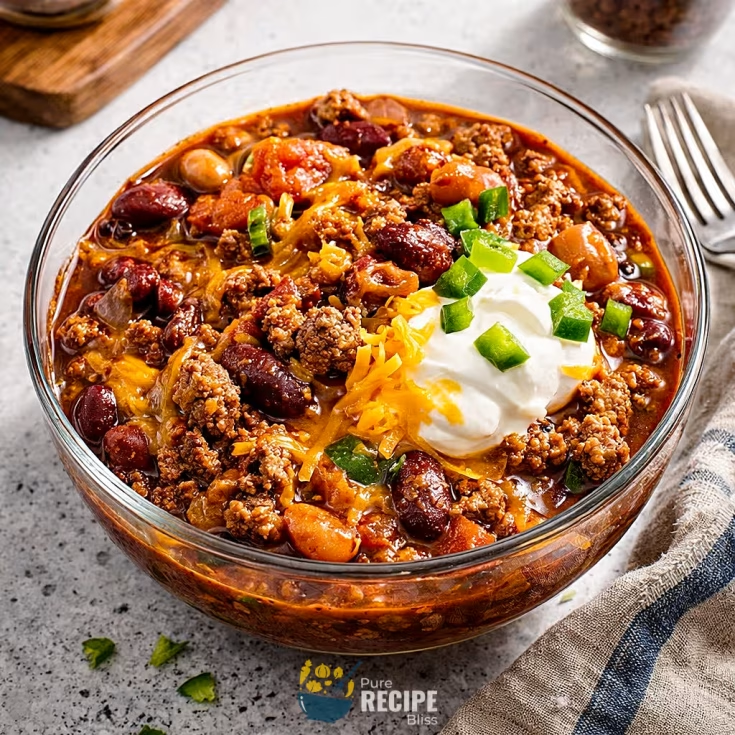
Instant Pot Chili is basically a hearty stew made with ground meat, beans, tomatoes, and a mix of spices, all cooked together under pressure. The Instant Pot helps speed things up, so instead of simmering for a long time on the stove, you get that deep flavor in a much shorter time.
It’s usually served hot in a bowl and topped with things like shredded cheese, sour cream, or tortilla chips. Some people enjoy it with bread or cornbread on the side because it soaks up the sauce really well. Chili is often thought of as a dinner dish, but it works just as nicely for lunch, especially when you want something filling and warm.
Culturally, chili has roots in American comfort food traditions, and the Instant Pot version is just a modern way of making it faster without losing the taste. It’s one of those meals that feels familiar and satisfying, no matter how you serve it.
Why You’ll Love This Recipe:
- Quick cooking time: The Instant Pot Chili doesn’t take hours like the traditional stovetop version. Once everything is inside, it cooks fast, and you can have dinner ready without waiting too long.
- Full of flavor: Even though it’s quick, the spices and tomatoes blend together really well under pressure, so the taste feels rich and satisfying. I noticed the smoky paprika makes a big difference in giving it depth.
- Easy to adjust: You can swap beef for turkey or chicken, or even add more beans if you want it meat‑free. I’ve tried it with black beans once, and it turned out just as good.
- Great for leftovers: The chili thickens overnight, and the flavor gets stronger. I usually keep a container for lunch the next day, and it reheats nicely without losing texture.
- Comfort food anytime: It’s filling enough for dinner, but it also works for lunch when you want something warm and hearty. I’ve even frozen portions to save for later, and they taste just as good when reheated.
Ingredients Needed:
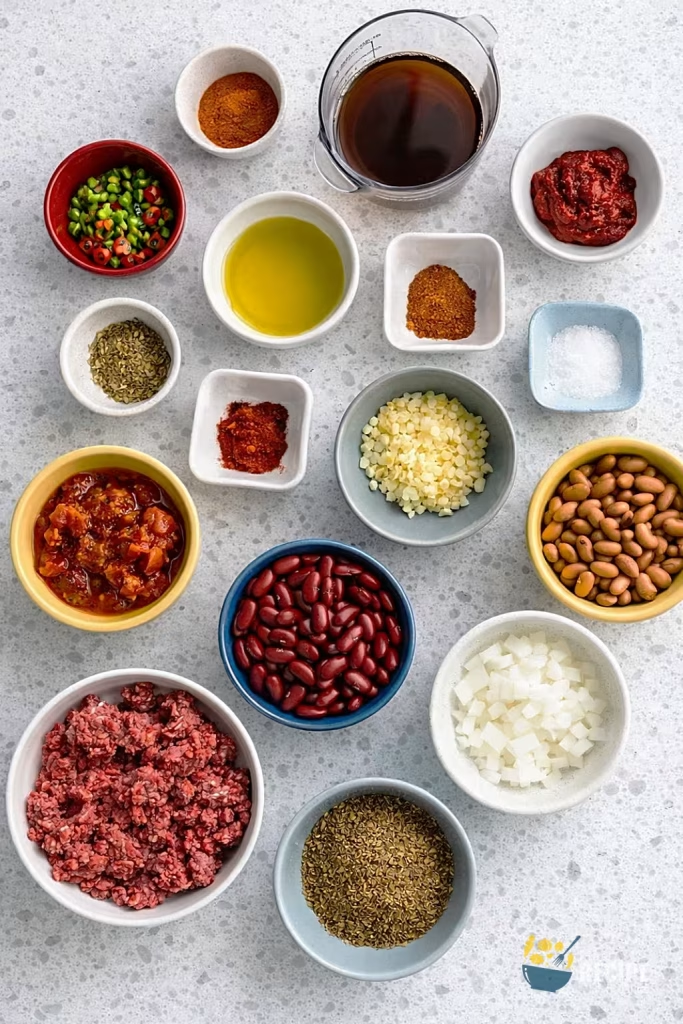
- Ground meat: I usually go with lean ground beef because it gives the chili a hearty base, but you can easily switch to turkey or chicken if you want something lighter.
- Beans: Kidney beans and pinto beans are the classic choice here, and they hold their shape well. I’ve tried black beans once, and they worked fine too, so you can mix and match depending on what you have.
- Onion and garlic: These two are important because they build the flavor right from the start. I always chop the onion a bit smaller so it blends in better after cooking.
- Jalapeño or pepper: Adding one jalapeño gives a nice kick, but if you don’t want too much heat, you can use a bell pepper instead. I once left the seeds in by mistake, and it turned out way spicier than I expected.
- Tomato paste and canned tomatoes: Tomato paste helps thicken the chili, while fire‑roasted tomatoes add a smoky taste. If you only have regular diced tomatoes, that works too, but the flavor won’t be as deep.
- Spices: Chili powder, cumin, oregano, paprika, and a little cayenne if you like heat. I’ve noticed smoked paprika makes a big difference, so I don’t skip it.
- Seasoning: A bit of salt and sugar helps balance everything. The sugar cuts the acidity from the tomatoes, and the salt brings out the flavors.
- Broth: Beef broth adds more depth compared to water. I’ve tried chicken broth once when I was out of beef broth, and it still worked fine.
💡 Note: For the full ingredient list with exact amounts and measurements, please check the recipe card below.
Kitchen Gadgets & Tools You’ll Need:
- Instant Pot: This is the main tool since the recipe depends on pressure cooking. I use a 6‑quart size, and it’s big enough to hold everything without feeling crowded. Click here to see which one I use.
- Wooden spoon or spatula: You’ll need something sturdy to break up the ground meat while it cooks. I’ve noticed a wooden spoon works better than a silicone one because it scrapes the bottom more easily.
- Cutting board and knife: Since there’s onion, garlic, and jalapeño to chop, having a decent cutting board and a sharp knife makes the prep faster and less messy.
- Measuring spoons: The spices need to be measured out, and I’ve found it helps to keep them ready in small bowls before adding them in, so you don’t forget anything. If you don’t have, you can check out this one.
- Can opener: Because you’ll be using canned beans and tomatoes, a reliable can opener saves time. I once tried opening a can with a dull one, and it was frustrating.
- Storage containers: Since this chili makes enough for leftovers, I like to keep airtight containers ready. It helps with portioning and makes reheating easier later.
Step-By-Step Instructions to Make Instant Pot Chili:
Scraping the bottom of the pot after browning the meat really matters. If you skip that, the Instant Pot sometimes gives a burn warning, and it also changes the flavor because those browned bits add depth.
Step 1: Sauté the base
Start by turning on the sauté function and adding the oil, ground meat, onion, and garlic. Stir everything around until the meat loses its pink color and the onion softens. The smell at this stage should be savory and slightly sweet from the onion.
Step 2: Add spices and tomato paste
Once the meat is cooked, stir in the tomato paste and all the spices. Mixing them in early helps coat the meat and brings out the flavors more strongly. The mixture should look a little glossy and smell smoky from the paprika.
Step 3: Add beans, tomatoes, and broth
Pour in the beans, canned tomatoes, and broth. Stir well and make sure to scrape the bottom of the pot so nothing sticks. The mixture should look chunky and colorful, with the beans and tomatoes evenly spread.
Step 4: Pressure cook
Close the lid and set the valve to sealing. Cook on high pressure. The pot will take some time to build pressure, and then it will cook quickly. When it’s done, let the pressure release naturally for a bit. This resting time helps the chili thicken and the flavors settle.
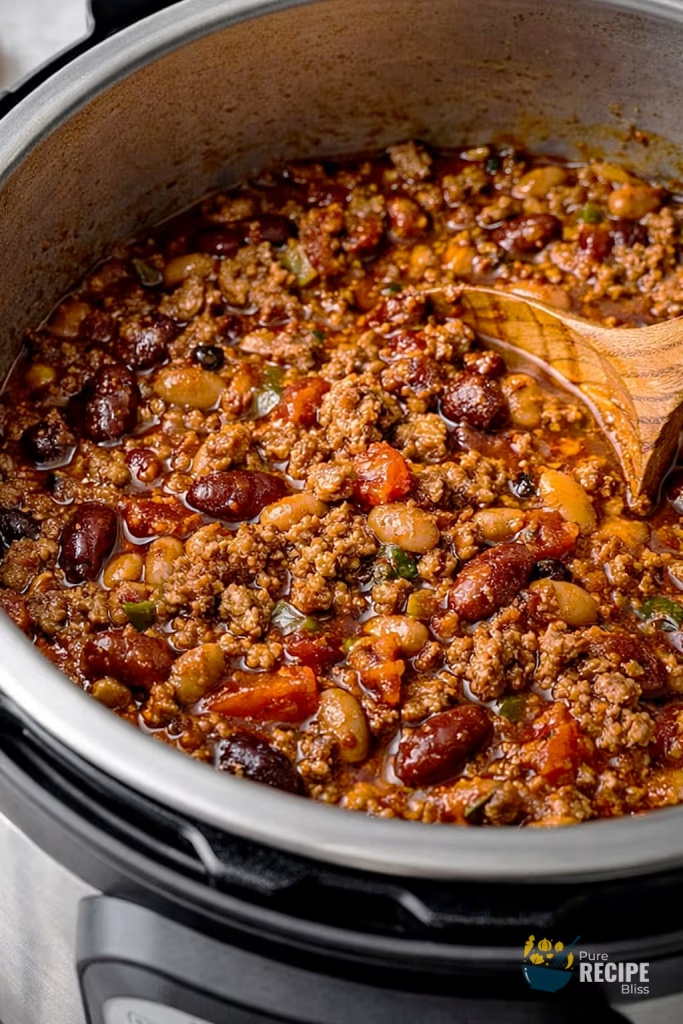
Step 5: Stir and serve
Open the lid carefully, give the chili a good stir, and taste for seasoning. If it feels too spicy, you can add a little more sugar or a splash of broth. Serve hot with toppings like cheese, sour cream, or tortilla chips. The chili should look thick and rich, with a deep red color.
💡 Note: These steps are just an overview. For detailed quantities, measurements, and exact timings to make this recipe, please check the recipe card below.
Helpful Tips For The Best Results:
- Texture matters: When you sauté the meat, make sure to break it up into smaller pieces. If it’s left too chunky, the chili feels uneven later.
- Control the heat: Removing the seeds from the jalapeño keeps the spice level balanced. I once left them in, and it was way hotter than I expected.
- Scrape the bottom: After browning, always scrape the pot well. This prevents the burn warning and also adds flavor from those browned bits.
- Swap ingredients smartly: If you don’t have beef broth, chicken broth works fine. I’ve tried it, and the taste was still rich.
- Let it rest: Giving the chili a few minutes after cooking helps it thicken naturally. It also makes the flavors blend better.
Tasty Variations to Try:
- Meat swap: Use ground turkey or chicken instead of beef for a lighter version.
- Bean variety: Try black beans or chickpeas instead of kidney and pinto beans. They change the texture slightly but still taste good.
- Extra smoky flavor: Add a little chipotle in adobo sauce if you want more smokiness. Just be careful, it can get spicy fast.
- Vegetarian option: Skip the meat and double the beans. I’ve done this once, and it turned out hearty enough to feel complete.
- Seasonal twist: In colder months, add diced sweet potatoes for extra bulk. They soften nicely and give a slightly sweet balance.
- Spice change: A pinch of cinnamon or cocoa powder can add warmth and depth. It’s not traditional, but it works surprisingly well.
Serving Suggestions:
- Dinner option: Serve Instant Pot Chili hot in a bowl with shredded cheese and sour cream on top. It’s perfect for a cozy evening meal when you want something filling.
- Lunch idea: Pairs well with a simple green salad or a slice of garlic bread. It reheats nicely, so it works well for next‑day lunches.
- Side pairing: Serve with cornbread, dinner rolls, or even rice. These sides soak up the sauce and make the meal more complete.
- Casual gathering: Perfect for game nights or family get‑togethers. You can set out toppings like avocado, jalapeños, and tortilla chips so everyone can customize their bowl.
Storage & Reheating Tips:
- Refrigerator storage: Instant Pot Chili keeps well in the fridge for about three to four days. I usually place it in airtight containers so the flavors don’t mix with other foods.
- Freezer storage: It freezes nicely for several months. I portion it into smaller containers because it’s easier to thaw only what I need later.
- Reheating method: Warm it on the stove over low heat or in the microwave. If it looks too thick after reheating, I add a splash of broth or water to bring back the right texture.
Frequently Asked Questions (FAQ):
-
Can I use a different meat?
Yes, you can swap ground beef for turkey or chicken. I’ve tried turkey once, and it made the chili lighter but still flavorful.
-
Can I make Instant Pot Chili ahead of time?
Absolutely. It tastes even better the next day because the beans soak up more flavor. I usually cook it the night before if I want it ready for lunch.
-
What if my chili feels too thick?
Just add a splash of broth or water when reheating. Stir well, and it should loosen up without changing the taste.
-
Is there a vegetarian option?
Yes, you can skip the meat and add extra beans or even lentils. I’ve done this, and it still turned out hearty enough to feel complete.
-
How spicy is it?
The heat depends on the jalapeño and cayenne. If you want it mild, remove the seeds or leave out the cayenne.
Instant Pot Chili
This Instant Pot Chili is a hearty, flavorful dish that comes together quickly. It’s packed with beans, meat, and spices, and it works well for dinner or meal prep. I like how it tastes even better the next day when the flavors settle.
Ingredients
- 2 pounds ground beef
- 1 large onion, chopped
- 3 cloves garlic, minced
- 1 tablespoon olive oil
- 1 medium jalapeño, seeded and finely chopped
- 2 tablespoons chili powder
- 1 teaspoon ground cumin
- 1 teaspoon dried oregano
- 1 teaspoon smoked paprika
- ½ teaspoon cayenne pepper (optional)
- 1 tablespoon tomato paste
- ½ teaspoon salt (or to taste)
- 1 teaspoon sugar
- 15 oz can red kidney beans, drained and rinsed
- 15 oz can pinto beans, drained and rinsed
- 28 oz can fire‑roasted tomatoes
- ½ cup beef broth
Instructions
- Turn the Instant Pot to sauté mode. Add 1 tablespoon olive oil, 2 pounds ground beef, 1 large chopped onion, and 3 minced garlic cloves. Cook until beef is browned and onion softens.
- Stir in 1 tablespoon tomato paste, 2 tablespoons chili powder, 1 teaspoon cumin, 1 teaspoon oregano, 1 teaspoon smoked paprika, and ½ teaspoon cayenne. Mix until meat is coated and spices are fragrant.
- Add 1 medium chopped jalapeño, 15 oz kidney beans, 15 oz pinto beans, 28 oz fire‑roasted tomatoes, 1 teaspoon sugar, ½ teaspoon salt, and ½ cup beef broth. Stir well, scraping the bottom to prevent sticking.
- Seal the lid and set to high pressure for 10 minutes. Allow natural release for about 10 minutes before opening.
- Stir chili, taste, and adjust seasoning if needed. Serve hot with toppings like shredded cheese, sour cream, or tortilla chips.
Notes
Nutrition Information
Yield 6 Serving Size 1 bowlAmount Per Serving Calories 539Total Fat 19gSaturated Fat 7gTrans Fat 1gUnsaturated Fat 10gCholesterol 98mgSodium 603mgCarbohydrates 47gNet Carbohydrates 32gFiber 15gSugar 6gSugar Alcohols 0gProtein 45g
Percent Daily Values are based on a 2,000‑calorie diet, and your daily needs may be higher or lower depending on your lifestyle. Nutrition information is shared only as a general estimate and may not always be fully accurate. If you follow a special diet or have specific health concerns, it’s best to check with a registered dietitian for personalized guidance.