I’ve been trying out a few new cookie ideas lately, and these Peanut Butter Brownie Swirl Cookies ended up being one of the easiest ones to pull together. The whole process doesn’t take much time, and once the doughs are chilled, the baking part is quick.
They’re the kind of treat I like to make when I want something sweet without spending hours in the kitchen. I usually enjoy them as a snack in the afternoon or sometimes after dinner when I’m craving both chocolate and peanut butter. Let me walk you through what Peanut Butter Brownie Swirl Cookies really are in the next section.
What is Peanut Butter Brownie Swirl Cookies?
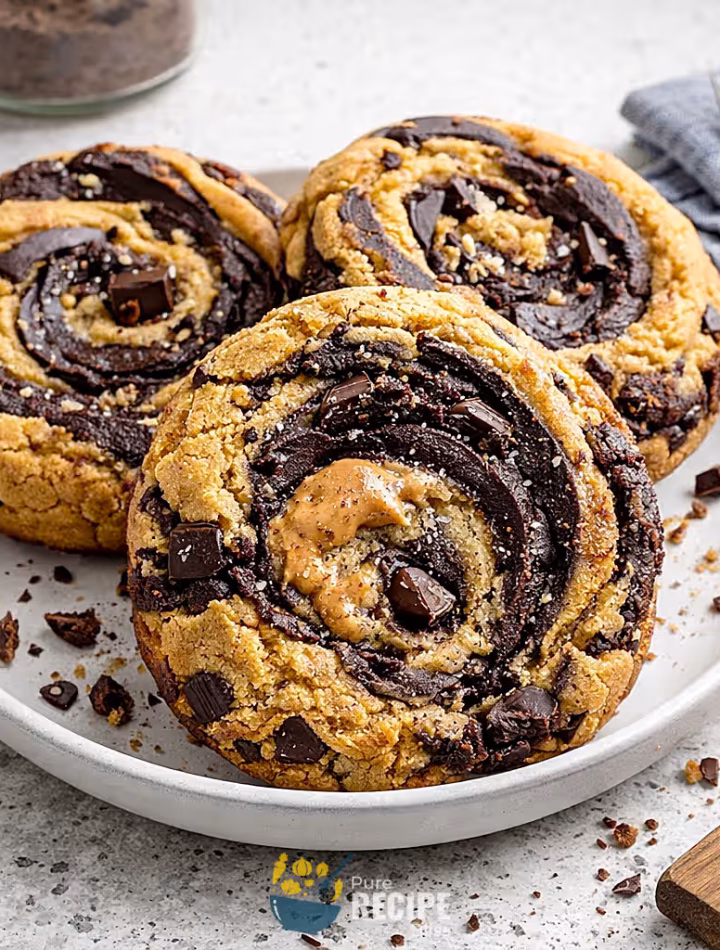
Peanut Butter Brownie Swirl Cookies are basically a mix of two different cookie doughs that you put together in one batch. One side is a fudgy chocolate brownie dough, and the other side is a creamy peanut butter dough. When you scoop them side by side and give them a little swirl, you end up with cookies that look marbled and taste like both flavors at once.
They are usually eaten just like regular cookies, straight from the tray once they cool down a bit. People often serve them as a sweet snack in the afternoon, or as a small dessert after dinner. They don’t really have a cultural background, but they are popular because they combine two classic flavors that most people already enjoy.
Why You’ll Love This Recipe:
- Quick to make: These Peanut Butter Brownie Swirl Cookies don’t take a long time, and once the doughs are chilled, the baking part is really fast, so you can have fresh cookies without waiting all day.
- Two flavors in one: You get both chocolate and peanut butter in the same cookie, so you don’t have to choose between them. I like that each bite feels a little different depending on how the swirl comes out.
- Easy to adjust: You can swap ingredients if you need, like using dairy‑free butter or a gluten‑free flour blend. I’ve tried coconut sugar once, and it gave a nice caramel flavor.
- Fun to bake: The swirling step makes them look special, and it’s simple enough that you don’t need fancy skills. I learned not to over‑swirl because the colors mix too much, so just a couple of drags with a skewer works best.
- Snack or dessert: They fit into different times of the day. I usually eat them as an afternoon snack, but they also work well as a small dessert after dinner.
Ingredients Needed:
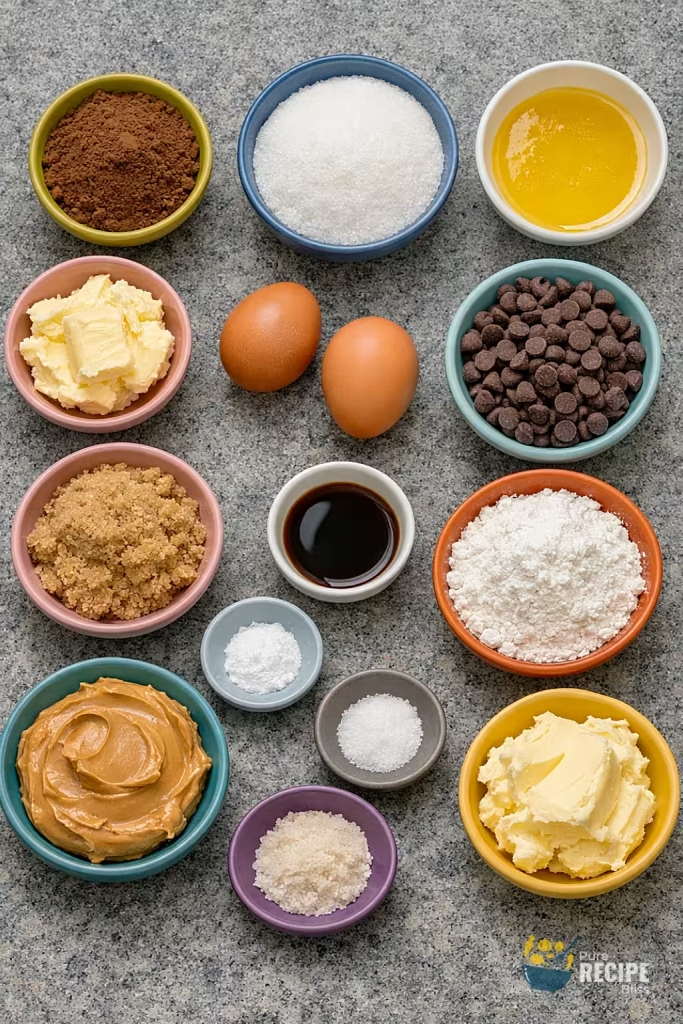
- Peanut butter dough basics: You’ll need creamy peanut butter, a little softened butter, brown sugar, one egg, vanilla extract, flour, baking soda, and salt. I once tried chunky peanut butter, but the swirl didn’t look as neat, so smooth works better.
- Brownie dough basics: For the chocolate side, you’ll use melted butter, white sugar, cocoa powder, one egg, vanilla, flour, baking powder, salt, and chocolate chips. I like folding in the chips at the end so they stay visible in the swirl.
- Easy to find items: Most of these ingredients are things you probably already keep around, so you don’t have to shop for anything unusual.
- Room temperature helps: I’ve noticed that using room‑temperature butter and eggs makes the mixing easier and keeps the dough smoother.
- Optional swaps: If you want to adjust, you can use gluten‑free flour, dairy‑free butter, or even coconut sugar. I’ve tried coconut sugar once, and it gave a deeper flavor that I liked.
💡 Note: For the full ingredient list with exact amounts and measurements, please check the recipe card below.
Kitchen Gadgets & Tools You’ll Need:
- Mixing bowls: You’ll want at least two medium‑sized bowls since you’ll be making the peanut butter dough and the brownie dough separately. I’ve found that using glass bowls makes it easier to see if everything is mixed properly.
- Hand mixer or whisk: A hand mixer speeds things up, but if you don’t have one, a sturdy whisk works fine. I’ve tried both, and the mixer just saves a little effort. Here’s the one I use.
- Cookie scoop or spoon: A cookie scoop helps keep the portions even, but a regular spoon works too. I once used two spoons to shape the dough, and while it wasn’t perfect, it still baked fine.
- Baking sheet with parchment paper: Lining the tray with parchment makes cleanup easier and keeps the cookies from sticking. I once skipped the parchment, and the swirl pattern didn’t hold as nicely.
- Toothpick or skewer: This is for the swirling step. I’ve noticed that dragging it lightly just once or twice gives a cleaner look, while too many swirls make the colors blend too much.
- Cooling rack: It helps the cookies set properly after baking. If you don’t have one, you can leave them on the tray longer, but they sometimes get a little too soft underneath. You can try this one.
Step-By-Step Instructions to Make Peanut Butter Brownie Swirl Cookies:
You know chilling the doughs just the right amount makes a big difference. If they’re too cold, they’re hard to scoop, and if they’re too warm, the swirl looks messy.
Step 1: Mix the peanut butter dough
Start by beating together the peanut butter, softened butter, and sugar until the mixture looks fluffy and smooth. Then add the egg and vanilla and mix again. After that, stir in the dry ingredients until everything comes together into a soft dough. It should feel thick but still easy to scoop.
Step 2: Prepare the brownie dough
In another bowl, whisk melted butter with sugar until it looks glossy. Add cocoa powder, then mix in the egg and vanilla. Fold in the flour, baking powder, salt, and chocolate chips until the dough looks dark and rich. It should feel slightly heavier than the peanut butter dough.
Step 3: Chill both doughs
Place both bowls in the fridge for a short time. This helps the dough firm up so it holds shape better when scooped. I once skipped this step, and the cookies spread too much in the oven.
Step 4: Scoop and swirl
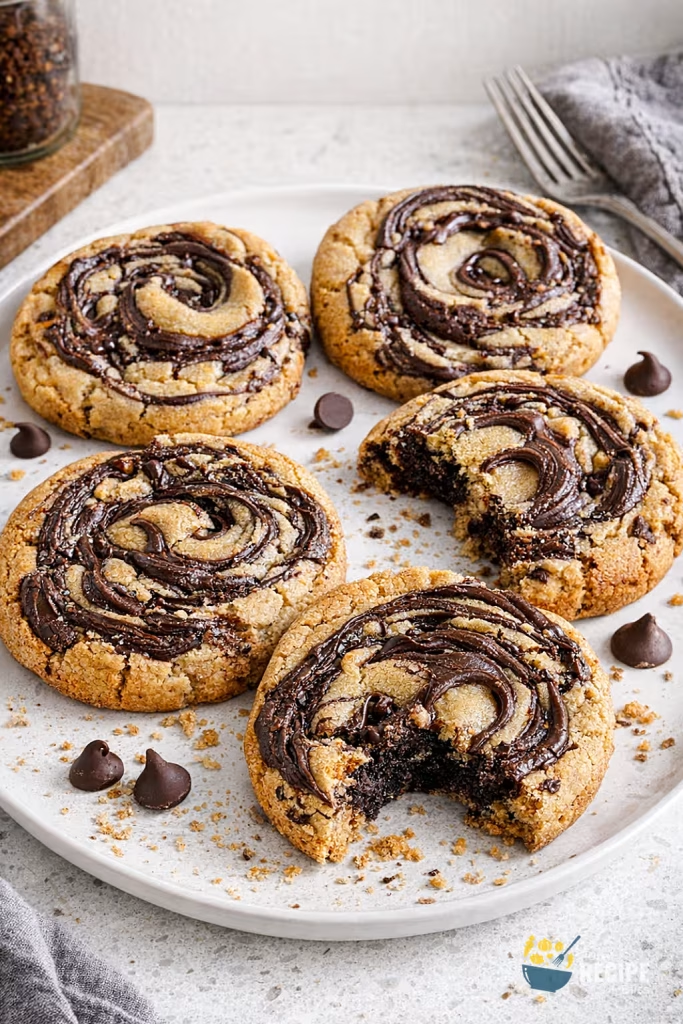
Take a spoonful of each dough and place them side by side on a lined baking sheet. Use a toothpick or skewer to drag lightly through the doughs once or twice. This creates a marbled look without blending the colors too much.
Step 5: Bake until set
Put the tray in the oven and bake until the tops look slightly crackly and the edges feel set. The centers should still look soft, which is fine because they continue to cook a little after you take them out.
Step 6: Cool before serving
Leave the cookies on the tray for a few minutes before moving them to a cooling rack. If you move them too soon, they can break apart. Once cooled, they’re ready to enjoy.
💡 Note: These steps are just an overview. For detailed quantities, measurements, and exact timings to make this recipe, please check the recipe card below.
Helpful Tips For The Best Results:
- Texture matters: Make sure both doughs are thick but still soft enough to scoop. If either feels too sticky, chill a little longer, and if too firm, let it sit out briefly.
- Heat control: Bake at a steady temperature. I once tried raising the heat to finish faster, but the edges hardened while the centers stayed raw.
- Ingredient swaps that work: Coconut sugar can replace white sugar without changing texture too much. Gluten‑free flour blends also hold up fine, though the brownie side spreads slightly more.
- Don’t over‑swirl: A couple of light drags with a skewer is enough. Too much swirling blends the colors and loses the marbled look.
- Cool properly: Let cookies rest on the tray before moving. If you rush, they break apart easily.
Tasty Variations to Try:
- Flavor swap: Use almond butter instead of peanut butter for a slightly different nutty taste.
- Dietary option: Make them vegan with plant‑based butter, chocolate, and a flax egg. The brownie side stays softer but still tastes good.
- Seasonal idea: Add a pinch of cinnamon or pumpkin spice in the peanut butter dough during fall for a warm flavor twist.
- Extra chocolate: Mix white chocolate chips into the peanut butter dough for a sweeter contrast.
- Healthier touch: Try reducing sugar slightly and adding oats to the peanut butter dough for a chewier texture.
- Festive version: Sprinkle crushed candy canes on top during the holidays for a minty crunch.
Serving Suggestions:
- Serve with coffee or tea: These Peanut Butter Brownie Swirl Cookies taste really good when paired with a warm drink, and I usually enjoy them with a cup of coffee in the afternoon.
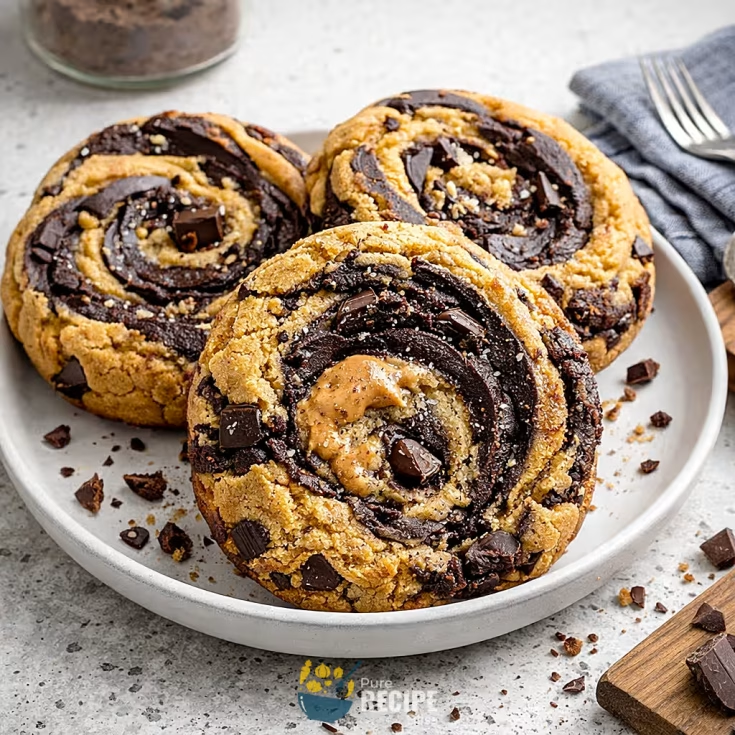
- Perfect for gatherings: They work well for small get‑togethers or family snacks because the swirl pattern makes them look a little more special than plain cookies.
- Pairs well with ice cream: If you want something extra, place one or two cookies next to a scoop of vanilla or chocolate ice cream, and it feels like a quick dessert without much effort.
- Snack or dessert option: I often keep them ready for an evening snack, but they also fit nicely as a light dessert after dinner when you want something sweet but not too heavy.
Storage & Reheating Tips:
- How long it keeps: Peanut Butter Brownie Swirl Cookies usually stay fresh for a few days when kept in a sealed container. I’ve noticed they taste best within the first three days, after that they start to lose softness.
- Best storage method: Keep them in an airtight box at room temperature if you plan to eat them soon. If you want to save them longer, place them in the freezer, and they hold up well for a couple of weeks.
- Simple reheating advice: When you want to enjoy them again, just warm one in the microwave for a short time until it feels soft and slightly warm. I sometimes use the oven for a few minutes if I want the edges crisp again.
Frequently Asked Questions (FAQ):
-
Can I substitute ingredients?
Yes, you can swap regular flour for a gluten‑free blend or use dairy‑free butter and chocolate. I’ve tried coconut sugar once, and it gave a deeper caramel flavor that worked nicely.
-
Can I make them ahead?
You can prepare both doughs in advance and keep them chilled in the fridge. I usually make the dough the night before, and then bake the cookies the next day when I want them fresh.
-
Why do my cookies spread too much?
This usually happens if the dough isn’t chilled enough. I learned that even a short chill helps the swirl hold its shape better during baking.
-
Are they suitable for dietary needs?
Yes, you can make them vegan by using plant‑based butter, chocolate, and an egg substitute. They still bake well, though the brownie side comes out a little softer.
Peanut Butter Brownie Swirl Cookies
These cookies bring together fudgy brownie dough and creamy peanut butter dough in one batch. They are simple to prepare, bake quickly, and give you that chocolate‑peanut butter flavor mix in every bite.
Ingredients
- ½ cup melted butter
- 1 cup white sugar
- ⅓ cup cocoa powder
- 1 egg
- 1 tsp vanilla extract
- ¾ cup all‑purpose flour
- ¼ tsp baking powder
- ¼ tsp salt
- ½ cup chocolate chips
- ½ cup creamy peanut butter
- ¼ cup softened butter
- ½ cup brown sugar
- 1 egg
- 1 tsp vanilla extract
- 1 cup all‑purpose flour
- ½ tsp baking soda
- ¼ tsp salt
Instructions
- Beat together ½ cup creamy peanut butter, ¼ cup softened butter, and ½ cup brown sugar until fluffy. Add 1 egg and 1 teaspoon vanilla extract, then mix in 1 cup all‑purpose flour, ½ teaspoon baking soda, and ¼ teaspoon salt until dough forms.
- In another bowl, whisk ½ cup melted butter with 1 cup white sugar until glossy. Stir in ⅓ cup cocoa powder, then add 1 egg and 1 teaspoon vanilla extract. Fold in ¾ cup all‑purpose flour, ¼ teaspoon baking powder, ¼ teaspoon salt, and ½ cup chocolate chips until combined.
- Chill both doughs for about 30 minutes so they firm up slightly and hold shape better.
- Scoop 1-2 tablespoons of each dough side by side onto a parchment‑lined baking sheet. Lightly swirl with a toothpick or skewer to create a marbled look.
- Bake at 350°F (175°C) for 9-11 minutes until tops look crackly and edges are set. The centers should remain soft.
- Cool on the tray for 5-10 minutes before transferring to a wire rack to finish setting.
Notes
Nutrition Information
Yield 12 Serving Size 1 cookieAmount Per Serving Calories 210Total Fat 12gSaturated Fat 6gTrans Fat 0gUnsaturated Fat 5gCholesterol 30mgSodium 120mgCarbohydrates 24gNet Carbohydrates 22gFiber 2gSugar 16gSugar Alcohols 0gProtein 4g
Percent Daily Values are based on a 2,000‑calorie diet, and your daily needs may be higher or lower depending on your lifestyle. Nutrition information is shared only as a general estimate and may not always be fully accurate. If you follow a special diet or have specific health concerns, it’s best to check with a registered dietitian for personalized guidance.