I wanted to share something fun I made recently because it turned out to be a quick little treat that doesn’t take much effort at all. Caramel apple pie bombs are one of those recipes where you don’t need a lot of time or fancy steps, but the result feels like you went the extra mile.
They work best when you’re craving something sweet in the middle of the day or after dinner, and they’re easy enough to put together without planning ahead. That’s why I thought it would be nice to start with a quick introduction before we talk about what caramel apple pie bombs actually are.
What is Caramel Apple Pie Bombs?
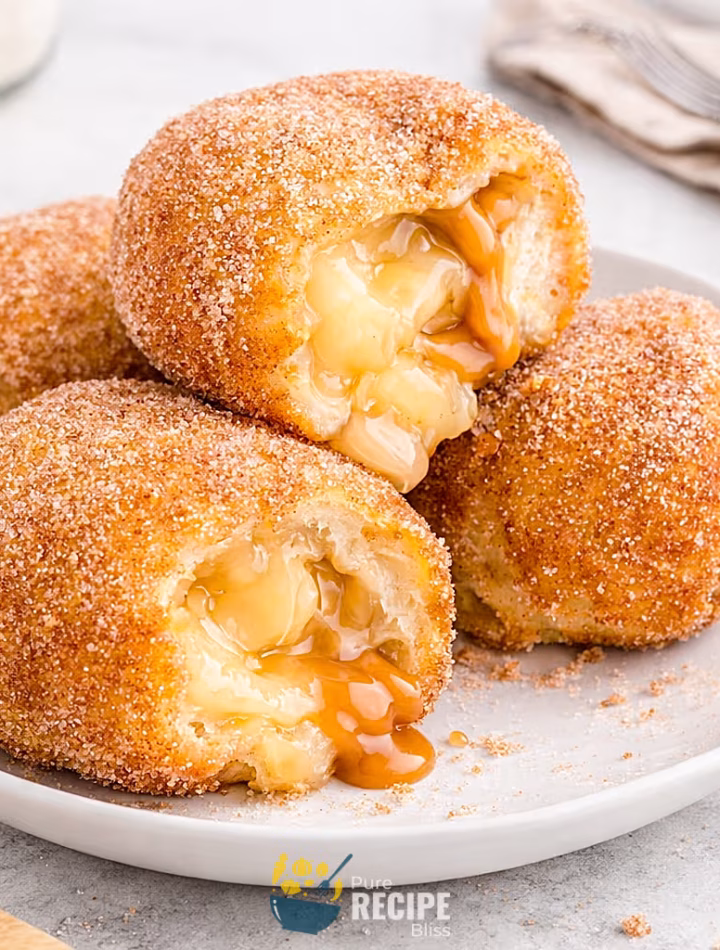
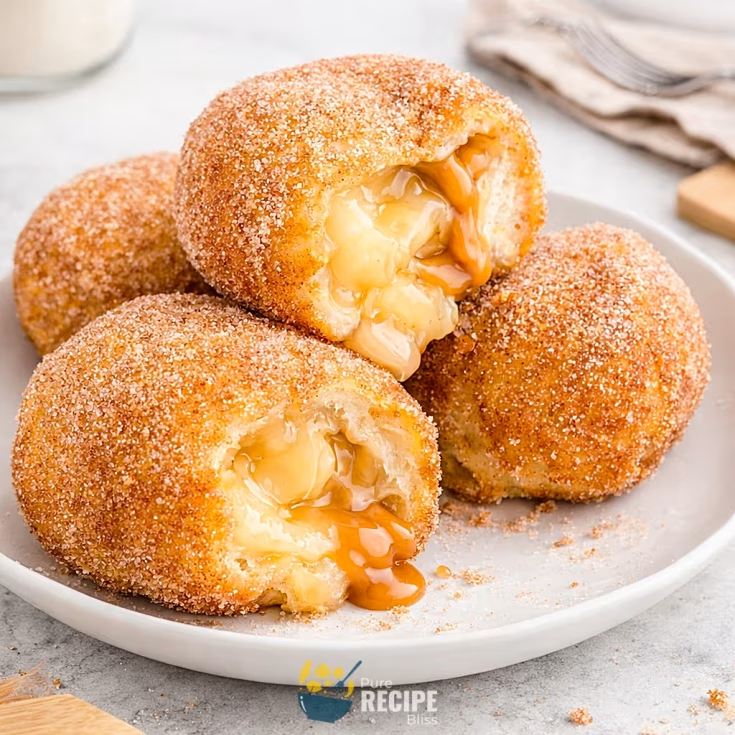
Caramel apple pie bombs are basically small fried dough balls that are filled with apple pie filling and a piece of caramel candy inside. When you bite into one, the outside is crisp and coated in cinnamon sugar, while the inside is soft with warm apples and melted caramel.
They’re usually eaten as a sweet snack or dessert, but I’ve also seen people serve them at gatherings because they’re easy to pick up and share. They don’t really belong to any traditional culture, but they feel like a fun twist on classic apple pie. Think of them as a bite-sized version that’s quicker to make and a little more playful to serve.
Why You’ll Love This Recipe:
- Quick to make: These caramel apple pie bombs don’t take much time at all, so you can put them together even when you don’t feel like spending hours in the kitchen.
- Fun size portions: Because they’re small, you don’t have to commit to a big slice of pie. You can just grab one or two and enjoy without feeling heavy.
- Easy to change up: You can swap the caramel flavor, adjust the spices, or even try different fillings. I once added a pinch of nutmeg, and it gave a nice little twist.
- Crowd-friendly: Since they’re bite-sized, they’re easy to serve at family get-togethers or casual evenings with friends. Everyone can just pick one up without needing plates.
- Comfort factor: The mix of warm apples, gooey caramel, and cinnamon sugar feels cozy and familiar, which makes them a nice treat when you want something comforting.
Ingredients Needed:
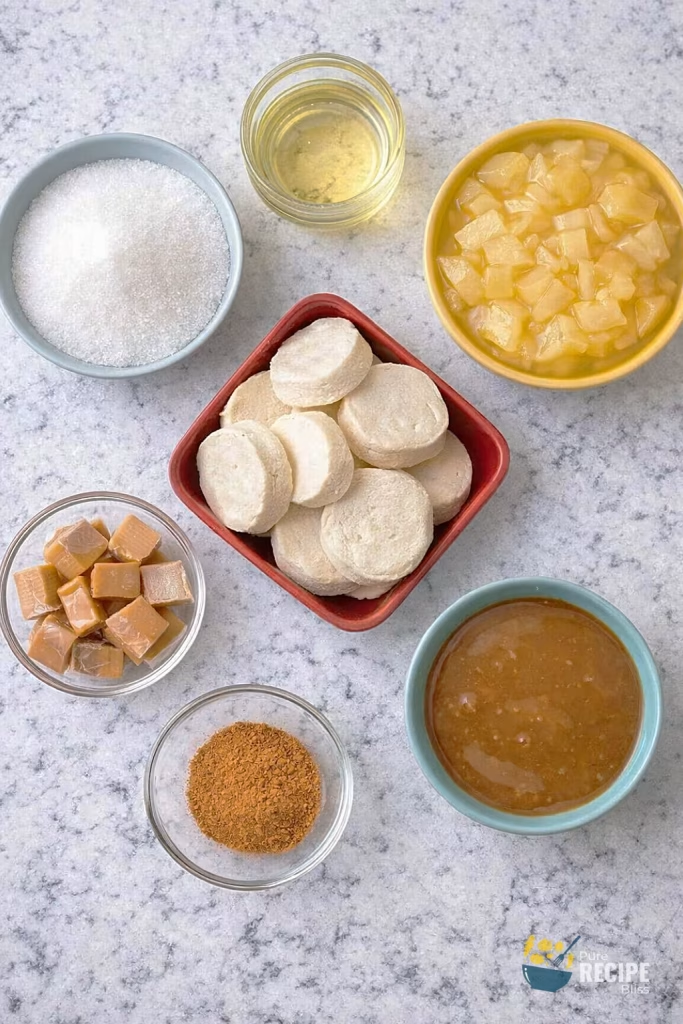
- Sugar and cinnamon: You’ll need regular granulated sugar and ground cinnamon to make the coating. Mixing them together gives that sweet and slightly spiced outside layer that sticks well when the bombs are still warm.
- Biscuit dough: A small can of biscuit dough works best because the pieces are already portioned. I found that pressing them thinner with my fingers made them cook more evenly.
- Apple pie filling: Using canned apple pie filling saves time, but you can also make your own if you like adjusting sweetness. I sometimes chop the apples smaller so they fit better inside the dough.
- Caramels: Individually wrapped caramels cut in half melt nicely inside. Whole ones don’t melt as well, so cutting them is important.
- Oil for frying: A neutral oil like canola or vegetable oil works because it heats evenly and doesn’t add extra flavor.
- Optional caramel topping: If you want them sweeter, you can drizzle caramel sauce over the finished bombs, but I usually skip it because the inside is already rich.
💡 Note: For the full ingredient list with exact amounts and measurements, please check the recipe card below.
Kitchen Gadgets & Tools You’ll Need:
- Heavy-bottomed saucepan: You’ll need a pot that can hold enough oil for frying. A heavier one keeps the heat steady, which helps the dough cook evenly without burning. I use this stainless steel thick bottomed saucepan.
- Slotted spoon: This makes it easier to lower the dough balls into the oil and lift them out safely. It also lets the extra oil drip off before you roll them in sugar. Currently, I use this one.
- Mixing bowl: A small bowl works fine for stirring together the cinnamon and sugar. I like to keep it close to the stove so I can coat the bombs right away while they’re hot.
- Rolling pin or just your hands: You can flatten the biscuit dough with a rolling pin, but honestly, pressing it out with your fingers works just as well and saves time.
- Tongs or fork (optional): If you don’t have a slotted spoon, tongs or even a sturdy fork can help move the bombs around in the oil. Just be careful since the oil is hot.
- Paper towels and plate: Having a plate lined with paper towels nearby helps soak up any extra oil before you roll the bombs in the cinnamon sugar.
Step-By-Step Instructions to Make Caramel Apple Pie Bombs:
Do you know the dough cooks more evenly when you flatten it with your fingers instead of a rolling pin. It feels easier to control the thickness, and the bombs don’t end up raw in the middle.
Step 1: Prepare the coating
Start by mixing sugar and cinnamon in a small bowl. Keep it nearby because you’ll need it right after frying. The coating sticks best when the bombs are still warm.
Step 2: Flatten the dough
Take each biscuit and press it out into a circle. Don’t make it too thin or it will tear, but don’t leave it too thick either. I usually press with my fingers until it looks even.
Step 3: Add the filling
Spoon a little apple pie filling into the center, then place half a caramel piece on top. Cutting the caramel makes it melt better, otherwise it stays chewy and uneven.
Step 4: Seal the dough
Pinch the edges together tightly so nothing leaks out. I tuck the seams underneath to make a ball shape. If you don’t seal well, the filling can escape into the oil.
Step 5: Fry the bombs
Heat the oil until a small scrap of dough bubbles right away. Fry two at a time, turning them gently so they cook evenly. They should look golden brown all over before you take them out.
Step 6: Coat in cinnamon sugar
Lift the bombs out with a slotted spoon and let the extra oil drip off. Roll them immediately in the sugar mixture so the coating sticks well.
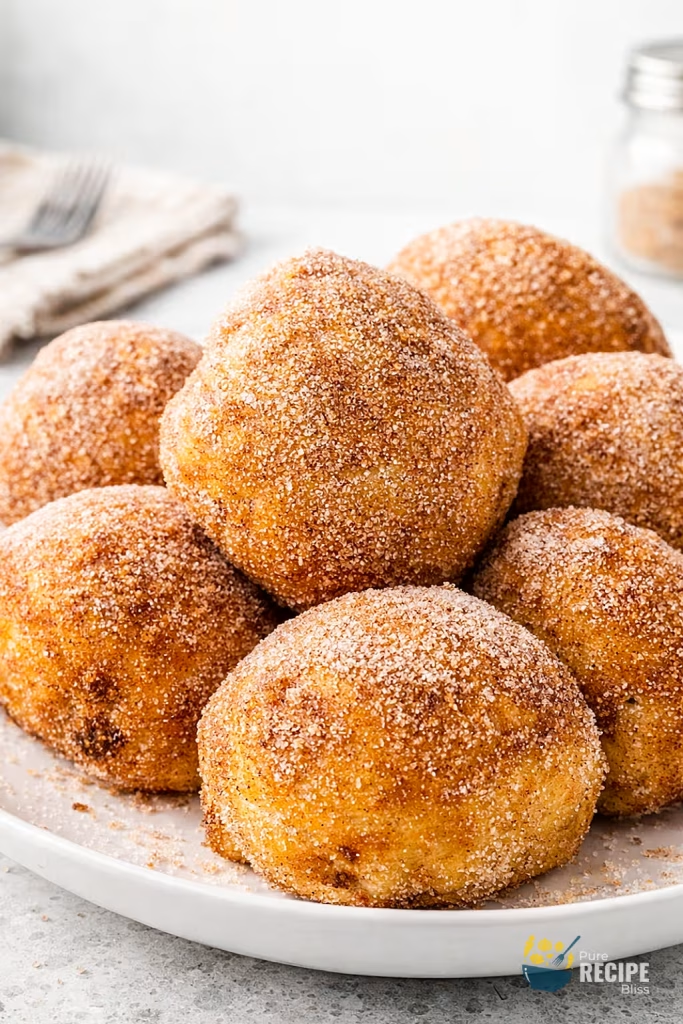
Step 7: Serve warm
Place them on a plate and enjoy while they’re still warm. The caramel inside should be gooey, and the outside crisp with a sweet coating.
💡 Note: These steps are just an overview. For detailed quantities, measurements, and exact timings to make this recipe, please check the recipe card below.
Helpful Tips For The Best Results:
- Seal the dough well: Make sure to pinch the edges tightly, because if the seams open, the filling will leak into the oil and make a mess.
- Control the heat: Keep the oil at a steady medium heat. If it’s too hot, the outside burns before the inside cooks, and if it’s too low, the dough stays greasy.
- Flatten evenly: Press the biscuit dough evenly with your fingers. If one side is thicker, it won’t cook through properly.
- Caramel size matters: Cut the caramels in half before adding them. Whole caramels don’t melt evenly and can stay chewy.
- Ingredient swap: If you don’t have vegetable oil, canola or sunflower oil works fine. Just avoid olive oil since it smokes too quickly.
Tasty Variations to Try:
- Spiced caramel apple bombs: Add a pinch of nutmeg or apple pie spice to the sugar coating for a stronger fall flavor.
- Salted caramel twist: Use sea salt caramels instead of plain ones for a sweet-salty balance.
- Chocolate version: Swap the caramel for chocolate-filled candies to make a richer filling.
- Fresh apple filling: Instead of canned filling, cook diced fresh apples with sugar and cinnamon for a homemade touch.
- Seasonal swap: Try pears or peaches in place of apples during their peak season.
- Diet-friendly option: Bake the bombs in the oven instead of frying if you want a lighter version, though the texture will be less crisp.
Serving Suggestions:
- Serve with ice cream: These caramel apple pie bombs taste great with a scoop of vanilla ice cream because the cold ice cream balances the warm filling.
- Perfect for gatherings: They work well at family get-togethers or casual parties since they’re small and easy to pick up without needing plates.
- Pairs well with coffee: A hot cup of coffee or even a latte makes a nice match because the bitterness balances the sweetness.
- Seasonal pairing: In cooler months, serving them with warm apple cider or hot chocolate adds a cozy touch that feels right for fall.
Storage & Reheating Tips:
- Room temperature storage: You can keep caramel apple pie bombs in a sealed container on the counter overnight. They stay soft but lose a little crispness by the next day.
- Refrigerator option: If you want them to last longer, place them in an airtight container in the fridge. They usually hold up for two to three days without losing too much flavor.
- Freezer method: For longer storage, freeze them on a tray first, then move to a freezer bag. This way they don’t stick together, and they can last up to a few months.
- Reheating advice: Warm them in the oven or air fryer until the outside feels crisp again. Microwaving works too, but it makes them softer instead of crunchy.
Frequently Asked Questions (FAQ):
-
Can I use a different dough?
Yes, you can swap biscuit dough with crescent roll dough, but it works better baked instead of fried since crescent rolls don’t hold up well in hot oil.
-
Can I make them ahead of time?
You can assemble the bombs and freeze them before frying. This way, you just fry them straight from frozen when you’re ready to serve.
-
Why is the inside sometimes raw?
Usually it happens if the dough is too thick or the oil is too hot. Flatten the dough evenly and keep the oil at medium heat for best results.
-
Can I make them lighter?
If you want a less greasy version, you can bake them in the oven. They won’t be as crisp, but they still taste good.
-
What if I don’t eat dairy?
You can try dairy-free caramel candies, which melt differently but still give a sweet filling.
Caramel Apple Pie Bombs
These are small fried dough balls filled with apple pie filling and gooey caramel, rolled in cinnamon sugar. They’re quick to make, fun to eat, and perfect when you want something sweet without baking a whole pie.
Ingredients
- 1 cup granulated sugar
- 2 teaspoons ground cinnamon
- 10 individually wrapped caramels, cut in half
- 1 (21-ounce) can apple pie filling
- 1 (7.5-ounce) can biscuit dough
- Vegetable oil for frying
- Optional: caramel sundae topping
Instructions
- Mix together 1 cup granulated sugar and 2 teaspoons ground cinnamon in a small bowl and keep it aside for coating.
- Flatten each biscuit from the 7.5-ounce can into a circle using your fingers until it looks even.
- Place about 1 tablespoon apple pie filling from the 21-ounce can in the center of each dough circle.
- Add half of a caramel piece on top of the apple filling.
- Pinch the edges tightly to seal and roll into a ball shape so the filling doesn’t leak.
- Heat vegetable oil in a heavy-bottomed saucepan over medium heat until hot enough for frying.
- Fry 2 dough balls at a time, turning with a slotted spoon until golden brown on all sides.
- Remove from oil, drain briefly on paper towels, then roll immediately in the sugar-cinnamon mixture.
- Serve warm, with optional caramel sundae topping drizzled over.
Notes
Nutrition Information
Yield 10 Serving Size 1 bombAmount Per Serving Calories 283Total Fat 6gSaturated Fat 2gTrans Fat 0gUnsaturated Fat 4gCholesterol 5mgSodium 164mgCarbohydrates 57gNet Carbohydrates 56gFiber 1gSugar 38gSugar Alcohols 0gProtein 2g
Percent Daily Values are based on a 2,000‑calorie diet, and your daily needs may be higher or lower depending on your lifestyle. Nutrition information is shared only as a general estimate and may not always be fully accurate. If you follow a special diet or have specific health concerns, it’s best to check with a registered dietitian for personalized guidance.