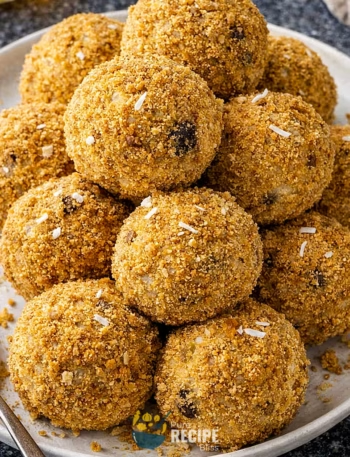
I’ve been making these Classic Cherry Crumble Bars recently, and I thought you’d like to hear about them because they’re one of those recipes that don’t take too much time yet still feel homemade. The process is pretty straightforward, and you don’t need to fuss over complicated steps.
They’re nice to have around because you can enjoy them in different ways like sometimes as a quick bite in the afternoon, sometimes as a little sweet treat after dinner, and even with coffee in the morning if you want something different. That’s why I wanted to share this recipe with you before we get into what Classic Cherry Crumble Bars actually are.
What is Cherry Crumble Bars?
Classic Cherry Crumble Bars are a layered dessert with a firm crust, a cherry filling, and a crumbly topping baked until golden. The cherries give them a mix of tart and sweet flavor, while the crust and topping add texture.
They’re usually eaten as a handheld treat, which makes them easier to serve than pie. People often bring them to gatherings or keep them in the fridge for a ready‑to‑slice snack. You can enjoy them cold for cleaner slices or at room temperature if you like them softer.
They don’t belong to any specific tradition, but they’ve become a popular way to enjoy cherries in a simple bar form. That’s what makes them practical and versatile for different occasions.
Why You’ll Love This Recipe:
- Quick to prepare: The Classic Cherry Crumble Bars don’t take a lot of time to put together, and once you’ve mixed the crust and filling, the oven does most of the work.
- Easy to adjust: You can use fresh or frozen cherries, and you can swap the type of flour or sweetener depending on what you already have at home. I’ve even tried coconut oil instead of butter, and it worked fine.
- Great for sharing: Since the bars can be sliced into squares, they’re easy to serve at family gatherings or to pack for a picnic. They hold up well and don’t need plates or forks.
- Tastes better chilled: I noticed that refrigerating the bars after baking makes them easier to cut and gives the filling a firmer texture, which I personally prefer.
- Flexible occasions: You can enjoy them as a quick snack, a light dessert after dinner, or even with coffee in the morning when you want something sweet but not too heavy.
Ingredients Needed:

- Cherries: You can use fresh or frozen cherries, and both work well. I usually go with frozen because they are already pitted, which saves time and effort.
- Oats: Rolled oats give a chewier bite, while quick oats make the texture softer. I’ve tried both, and honestly either one works fine depending on what you prefer.
- Flour: Spelt flour adds a nutty flavor, but regular all‑purpose flour is perfectly fine too. If you want to make it gluten‑free, oat flour or a blend works as well.
- Sugar or sweetener: White sugar, brown sugar, or even maple syrup can be used. I once tried coconut sugar, and it gave the bars a deeper flavor that I liked.
- Butter or oil: Melted butter makes the crust softer, while coconut oil gives the topping a crispier finish. I’ve tested both, and each has its own charm.
- Extras: A little cinnamon, baking powder, cornstarch, and salt are needed. These small additions help balance the flavor and keep the filling from getting too runny.
💡 Note: For the full ingredient list with exact amounts and measurements, please check the recipe card below.
Step-By-Step Instructions to Make Cherry Crumble Bars:
One big thing I learned while making these bars at home is that pressing the crust too lightly makes the bottom fall apart when you slice it. So now I always take a minute to really pack it down firmly, and that small change makes a big difference.
Step 1: Prepare the pan
Start by lining your baking pan with parchment paper or greasing it well. This helps the bars release easily later, and it saves you from scraping stuck crumbs.
Step 2: Mix the dry base
In a large bowl, stir together the oats, flour, sugar, cinnamon, salt, and baking powder. Keep mixing until everything looks evenly combined. This is the part where you want the dry mix to feel balanced, so no clumps of flour or sugar remain.
Step 3: Add butter or oil
Pour in melted butter or oil and mix until the texture looks crumbly. I usually use a fork, but sometimes I pulse it in a food processor if I want finer crumbs. The mixture should hold together when pressed between your fingers.
Step 4: Press the crust
Take about two‑thirds of the crumb mixture and press it firmly into the bottom of the pan. I once pressed too lightly and the crust broke apart, so now I use the back of a spoon to really pack it down.
Step 5: Prepare the cherry filling
Chop or dice the cherries, then toss them with cornstarch and a spoonful of sweetener. The cornstarch helps thicken the juices so the filling doesn’t run. You’ll know it’s ready when the cherries look glossy and slightly coated.
Step 6: Layer the filling
Spread the cherry mixture evenly over the crust. Try to cover the whole surface so every slice gets fruit. If you see gaps, just move the cherries around with a spoon.
Step 7: Add the topping
Sprinkle the remaining crumb mixture over the cherries. Press it down gently so it sticks but still looks crumbly. This topping will bake into a golden layer that adds crunch.
Step 8: Bake until golden
Place the pan in the oven and bake until the top looks golden and the cherry filling bubbles at the edges. The smell will tell you it’s close because you’ll notice a warm, buttery aroma mixed with the fruit.
Step 9: Cool and slice
Let the bars cool completely, then refrigerate before slicing. I found that chilling makes the bars hold together better and gives cleaner cuts. If you try to slice too soon, the filling may spill out.
💡 Note: These steps are just an overview. For detailed quantities, measurements, and exact timings to make this recipe, please check the recipe card below.
Helpful Tips For The Best Results:
- Press the crust firmly: When I first made Classic Cherry Crumble Bars, I pressed the crust too lightly and it broke apart. Using the back of a spoon to really pack it down keeps the base solid.
- Watch the topping color: The bars are ready when the crumb topping turns golden and the edges of the cherries bubble. If the top looks pale, give it a little more time.
- Swap ingredients wisely: I’ve tried coconut oil instead of butter, and it worked fine, but coconut flour made the bars too dry. Stick with spelt, oat, or all‑purpose flour for better texture.
- Cool before slicing: Cutting while warm makes the filling spill out. Refrigerating first gives clean slices and a firmer texture.
- Balance sweetness: If your cherries are very sweet, reduce the sugar slightly. Tart cherries may need the full amount to balance flavor.
Tasty Variations to Try:
- Cherry vanilla twist: Add a splash of vanilla extract to the cherry filling for a softer flavor.
- Chocolate chip version: Mix mini chocolate chips into the topping or sprinkle them on before baking.
- Black forest style: Replace part of the oats with cocoa powder and serve with whipped cream.
- Berry mix: Swap half the cherries for raspberries, blueberries, or blackberries for a mixed fruit bar.
- Nutty topping: Sprinkle sliced almonds or chopped walnuts over the crumb layer before baking for extra crunch.
- Seasonal swap: In summer, peaches or strawberries work well, while in winter, frozen cherries keep the recipe easy.
Serving Suggestions:

1. Serve with coffee:
These Classic Cherry Crumble Bars pair really well with a hot cup of coffee or tea, especially when you want something sweet but not too heavy in the morning.
2. Perfect for gatherings:
They are easy to slice and share, which makes them a good choice for family get‑togethers, picnics, or casual parties where you don’t want to fuss with plates.
3. Pairs well with ice cream:
If you want to make them feel more like a dessert, serve the bars slightly warm with a scoop of vanilla ice cream on the side.
4. Light after‑dinner treat:
They work nicely as a small sweet bite after dinner, especially when you don’t want something too rich or heavy.
Storage & Reheating Tips:
- Best storage method: Keep Classic Cherry Crumble Bars in an airtight container in the refrigerator. I noticed they stay fresher and hold their shape better when chilled instead of left at room temperature.
- How long they keep: They usually last about four days in the fridge without losing texture. If you want to keep them longer, freezing works well, and they can stay good for a few weeks.
- Simple reheating advice: If you prefer them warm, place a slice in the microwave for a short burst until the topping feels slightly crisp again. Just avoid overheating because the filling can turn too soft.
Frequently Asked Questions (FAQ):
-
Can I use frozen cherries instead of fresh?
Yes, frozen cherries work really well because they are already pitted, and they save time. Just make sure to thaw them slightly so the filling doesn’t get too watery.
-
Can I make Classic Cherry Crumble Bars ahead of time?
Absolutely, you can bake them the day before and keep them in the fridge. I’ve found they actually slice cleaner once chilled overnight.
-
Why did my bars turn out crumbly?
Usually this happens if the crust wasn’t pressed firmly enough or if too much flour was added. Packing the base tightly helps keep the slices together.
-
Can I make them gluten‑free or dairy‑free?
Yes, you can swap the flour for oat flour or a gluten‑free blend, and use coconut oil or plant‑based butter instead of regular butter.
-
Do they taste better warm or cold?
It depends on preference. Warm bars are softer and more gooey, while cold bars hold their shape better and give cleaner slices. I personally like them chilled.
Cherry Crumble Bars

Classic Cherry Crumble Bars are a layered dessert made with a firm oat‑flour crust, a sweet and tart cherry filling, and a golden crumb topping. They are baked until the edges bubble and the top turns crisp, then cooled and sliced into squares. These bars are easy to prepare, hold their shape well once chilled, and can be enjoyed as a snack, a light dessert, or even with coffee in the morning.
Ingredients
- 2 ½ cups chopped cherries (fresh pitted or frozen, 300 g)
- 1 ½ cups rolled oats or quick oats (150 g)
- ½ cup melted butter or coconut oil (100 g)
- ⅔ cup flour (spelt, oat, or all‑purpose, 80 g)
- ½ cup sugar or xylitol (100 g)
- 1 tbsp maple syrup or sweetener of choice (15 g)
- 1 ½ tsp cornstarch or arrowroot (7 g)
- ½ tsp ground cinnamon
- ½ tsp baking powder
- ¼ tsp salt
Instructions
- Preheat oven to 350°F (177°C). Line an 8‑inch square pan with parchment paper or grease well.
- Mix 1 ½ cups oats, ⅔ cup flour, ½ cup sugar, ½ tsp cinnamon, ¼ tsp salt, and ½ tsp baking powder in a large bowl until combined.
- Stir in ½ cup melted butter or coconut oil until the mixture looks crumbly and holds together when pressed.
- Press about two‑thirds of this mixture firmly into the prepared pan to form the crust.
- In another bowl, toss 2 ½ cups chopped cherries with 1 ½ tsp cornstarch and 1 tbsp maple syrup until glossy and coated.
- Spread the cherry filling evenly over the crust, covering the entire surface.
- Sprinkle the remaining crumb mixture on top and press lightly so it sticks.
- Bake for about 45 minutes, until the topping turns golden and the cherry filling bubbles at the edges.
- Cool completely, then refrigerate for at least 30 minutes before slicing for clean cuts.
Notes
Nutrition Information
Yield 16 Serving Size 1 barAmount Per Serving Calories 100Total Fat 4gSaturated Fat 2gUnsaturated Fat 2gCholesterol 5mgSodium 70mgCarbohydrates 16gNet Carbohydrates 14gFiber 2gSugar 8gProtein 2g
Percent Daily Values are based on a 2,000‑calorie diet, and your daily needs may be higher or lower depending on your lifestyle. Nutrition information is shared only as a general estimate and may not always be fully accurate. If you follow a special diet or have specific health concerns, it’s best to check with a registered dietitian for personalized guidance.