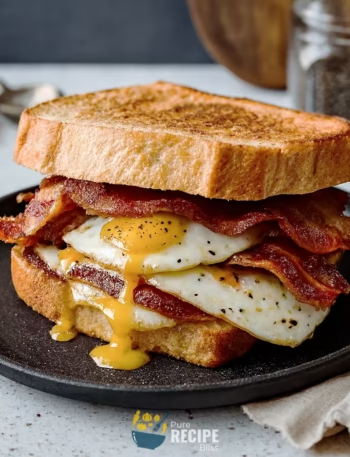
The Grilled Cheese Sandwich came about for me when I was just pulling together what I had in the fridge like some leftover bacon and a mix of cheeses. It’s quick to make, doesn’t need much planning, and it’s the kind of thing I reach for when I want something warm and filling without fuss.
I usually think of it as a go-to meal that works for lunch, dinner, or even a snack. It’s simple, but it feels satisfying, and that’s why I wanted to share it before explaining more about what this sandwich actually is.
What is Grilled Cheese Sandwich?
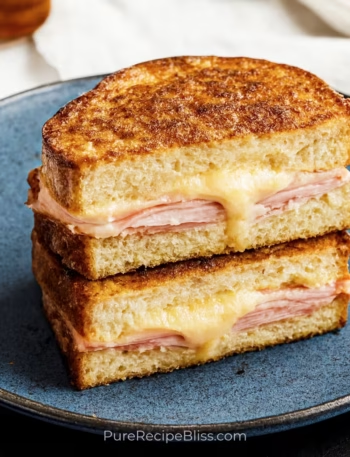
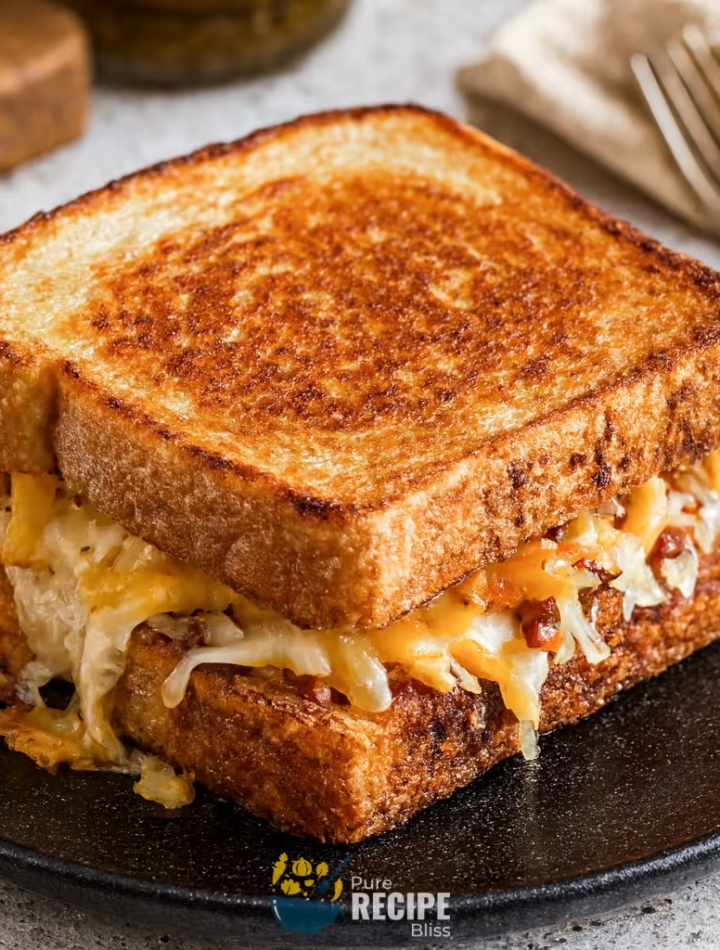
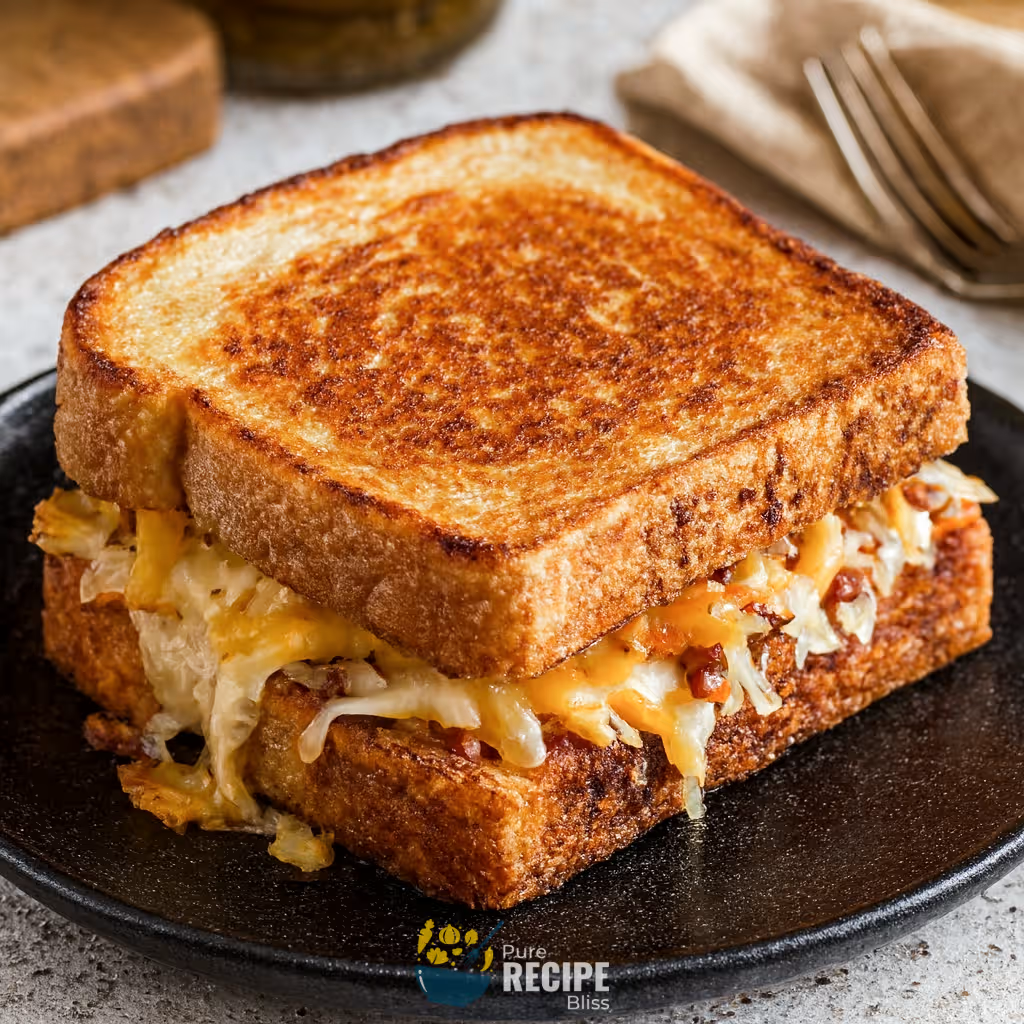
The Grilled Cheese Sandwich is basically a toasted bread sandwich filled with melted cheese, but here it’s taken a step further with three different cheeses mixed together and a bit of bacon for extra flavor. The bread gets coated with butter on the outside so it crisps up nicely, and mayonnaise on the inside adds creaminess when the cheese melts.
It’s the kind of dish people usually eat hot, straight from the pan, and it’s often served with ketchup or pickles on the side. In many homes, it shows up as a quick lunch or dinner option, but it can also work as a filling snack when you want something warm and satisfying. That’s why this version feels a little special compared to the usual single-cheese sandwich.
Why You’ll Love This Recipe:
- Quick to make: The Grilled Cheese Sandwich doesn’t take long at all, about thirty minutes from start to finish, so it works well when you don’t want to spend too much time cooking.
- Gooey and crispy: The mix of cheddar, Gruyère, and Parmesan melts together in a way that feels creamy and stringy, while the bread gets golden and crisp from the butter.
- Bacon surprise: Adding chopped bacon gives a salty crunch inside, and I found it made the sandwich feel more filling compared to the usual version.
- Easy to adjust: You can swap the bread type or skip the bacon if you prefer, and when I tested sourdough it held up better than softer bread.
- Works for different meals: It fits nicely as a quick lunch, a light dinner, or even a snack, and I noticed it pairs well with ketchup or pickles on the side.
Ingredients Needed:

- Bread choice: You’ll need about eight slices of bread, and I noticed that thicker bread like brioche or sourdough holds the filling better than thin sandwich bread.
- Cheese mix: The recipe uses cheddar, Gruyère, and Parmesan, and when I tested it, grating them fresh gave a smoother melt compared to pre-shredded packs.
- Bacon: Four rashers of bacon cooked until crisp add a salty crunch, and I found chopping them finely helped spread the flavor more evenly.
- Butter: A few tablespoons of softened butter go on the outside of the bread, and this is what makes the crust golden and crisp.
- Mayonnaise: Spreading mayo on the inside of the bread adds creaminess, and I noticed it also helps the cheese blend together better.
- Extras: A little black pepper for seasoning, and ketchup or pickles on the side if you like dipping or balancing the richness.
💡 Note: For the full ingredient list with exact amounts and measurements, please check the recipe card below.
Step-By-Step Instructions to Make Grilled Cheese Sandwich:
Before I go into the steps, I should mention one small thing I learned while making this at home. I tried cooking the sandwich on high heat once, and the bread browned too quickly while the cheese inside stayed firm. So now I always keep the heat lower, and it gives me a better melt and a more even golden crust.
Step 1: Cook the bacon
Start by cooking the bacon until it turns crisp and has that nice crunch. Once it cools a little, chop it into small pieces so it mixes well with the cheese later. I found that chopping it finely spreads the flavor more evenly instead of having big chunks in one bite.
Step 2: Mix the cheeses and bacon
Take the cheddar, Gruyère, and Parmesan, and combine them with the chopped bacon in a bowl. Mixing them together first helps the flavors blend, and it also makes sure every bite has a bit of everything. I noticed that grating the cheese fresh gave a smoother melt compared to using pre-shredded packs.
Step 3: Prepare the bread
Spread butter on the outside of each slice of bread, and then spread mayonnaise on the inside. The butter helps the bread crisp up in the pan, while the mayo adds creaminess when the cheese melts. I once skipped the mayo, and the sandwich felt a little dry, so now I always include it.
Step 4: Assemble the sandwich
Place a generous amount of the cheese and bacon mixture on one slice of bread, then top it with another slice, keeping the buttered side facing out. Press it down gently so the filling spreads evenly. I found that pressing lightly before grilling helps the sandwich cook more evenly.
Step 5: Grill the sandwich
Heat your skillet or griddle on moderate to low heat, then place the sandwich in. Cook slowly until the bread turns golden and crisp, and the cheese inside looks melted and gooey. Flip it carefully and repeat on the other side. I noticed that resting the sandwich for a minute before cutting helps keep the cheese from spilling out too quickly.
Step 6: Serve and enjoy
Remove the sandwich from the pan, cut it in half, and serve right away. It goes really well with ketchup or pickles on the side, and I sometimes dip mine in a little sriracha mayo for extra flavor.
💡 Note: These steps are just an overview. For detailed quantities, measurements, and exact timings to make this recipe, please check the recipe card below.
Helpful Tips For The Best Results:
- Heat control: Keep the skillet at a lower to medium heat because if it’s too hot the bread browns too fast while the cheese inside stays firm. I learned this the hard way when I rushed it once.
- Texture balance: Don’t overload the filling because too much cheese and bacon makes the sandwich heavy and harder to crisp evenly. A moderate layer melts better and keeps the bread from getting soggy.
- Ingredient swap: If you don’t have Gruyère, mozzarella works fine and gives extra stretch. I tested this once and it still tasted great.
- Extra crisp trick: Sprinkling a little Parmesan directly on the outside of the bread before grilling gave me a nice crunchy crust.
- Resting tip: Let the sandwich sit for a minute after grilling before cutting. This keeps the cheese from spilling out too quickly.
Tasty Variations to Try:
- Onion swap: Replace bacon with caramelized onions for a sweeter flavor that still adds texture.
- Spicy kick: Add sliced jalapeños or a spoon of chili flakes into the cheese mix for heat.
- Herb twist: Mix in a little pesto with the cheese blend, which I tried once and it gave a fresh, herby flavor.
- Vegetarian option: Skip the bacon and add sautéed mushrooms or spinach for a filling meat-free version.
- Seasonal idea: In colder months, pair the sandwich with tomato soup, while in summer I liked serving it with fresh cucumber pickles.
- Cheese experiment: Try swapping Gruyère for Havarti or Fontina if you want a milder taste.
Serving Suggestions:

1. When to serve:
The Grilled Cheese Sandwich works well for lunch or dinner, and I sometimes make it as a quick snack when I want something warm and filling.
2. Classic pairing:
Serve with ketchup or pickles because they balance the richness of the cheese and bacon.
3. Cozy option:
Pairs well with tomato soup, especially on cooler days when you want something comforting.
4. Extra flavor:
I like dipping mine in sriracha mayo since it adds a little heat without overpowering the cheese.
Storage & Reheating Tips:
- How long it keeps: The Grilled Cheese Sandwich is best eaten fresh, but if you have extras you can keep them in the fridge for about two days. I noticed they taste better if stored uncut.
- Best storage method: Wrap the sandwich in foil or place it in an airtight container so the bread doesn’t dry out too quickly. I once tried plastic wrap, but the bread turned soggy faster.
- Simple reheating advice: Reheat on a skillet or in an air fryer until the bread feels crisp again and the cheese looks melted. Avoid the microwave because it makes the bread soft instead of crunchy.
Frequently Asked Questions (FAQ):
-
Can I swap the cheeses in the Grilled Cheese Sandwich?
Yes, you can replace Gruyère with mozzarella or Havarti. I tried mozzarella once and it gave more stretch, though the flavor was milder.
-
Can I make the sandwich ahead of time?
Yes, you can assemble it earlier and keep it wrapped in foil in the fridge. I noticed grilling it later still worked well if the bread was thick enough.
-
Why does my bread turn soggy?
This usually happens if the heat is too low or if the sandwich sits too long before eating. Resting for just one minute before cutting helped me keep the texture better.
-
Can I make it vegetarian?
Yes, just skip the bacon and add mushrooms or spinach. I tested mushrooms once and they gave a nice earthy flavor without losing the filling feel.
Grilled Cheese Sandwich
Description
The Grilled Cheese Sandwich is a warm, cheesy, and crispy sandwich made with three different cheeses, butter, mayonnaise, and bacon. It’s cooked slowly on the stovetop until golden and gooey inside. This version is filling, slightly indulgent, and works well for lunch, dinner, or even a snack.
Ingredients
Instructions
- Cook 4 rashers of bacon in the oven or skillet until crisp, then chop finely and set aside.
- In a bowl, mix ½ cup grated Gruyère, ½ cup grated cheddar, ¼ cup grated Parmesan, and the chopped bacon until evenly combined.
- Spread ½ tablespoon softened butter on the outside of each of the 8 bread slices, then spread ½ tablespoon mayonnaise on the inside of each slice.
- Place about ¼ of the cheese and bacon mixture on four slices of bread, then top with the remaining slices, butter side facing out.
- Heat skillet on medium-low, place sandwiches in, and cook slowly for about 3-4 minutes per side until bread is golden and cheese is melted. Flip carefully and repeat on the other side.
- Remove from skillet, let rest for 1 minute, then cut in half and serve with ketchup or pickles.
Notes
- Using freshly grated cheese gives smoother melting compared to pre-shredded packs.
- Resting the sandwich for a minute before cutting prevents cheese from spilling out.
- Sourdough bread works well if you prefer a sturdier bite.
Nutrition Facts
Servings 4
Serving Size 1 sandwich
- Amount Per Serving
- Calories 520kcal
- % Daily Value *
- Total Fat 32g50%
- Saturated Fat 15g75%
- Cholesterol 85mg29%
- Sodium 780mg33%
- Total Carbohydrate 32g11%
- Dietary Fiber 2g8%
- Sugars 4g
- Protein 24g48%
- Vitamin A 950 IU
- Vitamin C 0.5 mg
- Calcium 310 mg
- Iron 2 mg
- Vitamin D 120 IU
* Percent Daily Values are based on a 2,000‑calorie diet, and your daily needs may be higher or lower depending on your lifestyle. Nutrition information is shared only as a general estimate and may not always be fully accurate. If you follow a special diet or have specific health concerns, it’s best to check with a registered dietitian for personalized guidance.