So, whenever I think about making a grilled cheese sandwich, it feels like one of those quick fixes that doesn’t ask for much effort but still gives you something warm and filling.
It’s the kind of recipe I reach for when I don’t want to spend too long in the kitchen, and honestly, it works whether you’re sitting down for lunch, grabbing dinner, or even sneaking in a late snack.
It’s simple, but it always feels rewarding because of how the bread crisps up and the cheese melts together. That’s why I keep coming back to it whenever I want comfort food without too much fuss.
What is Grilled Cheese Sandwich?
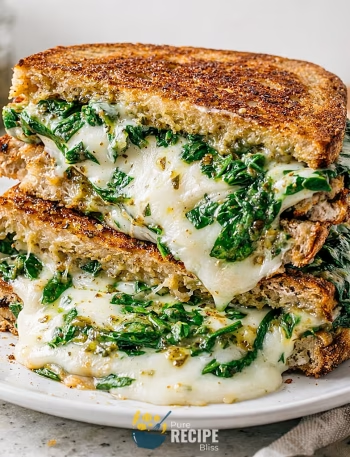
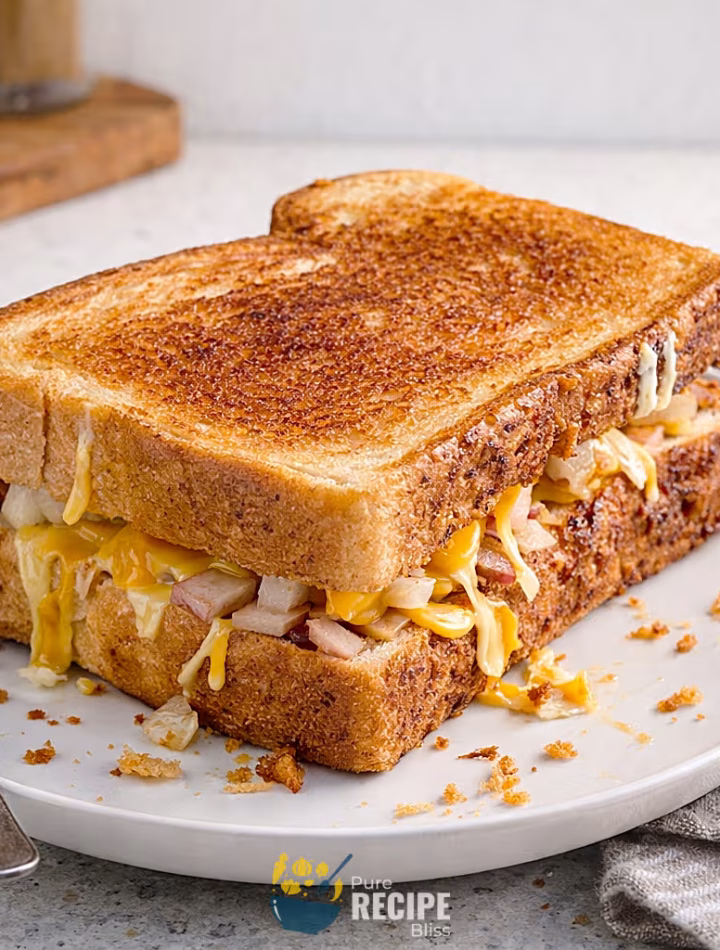
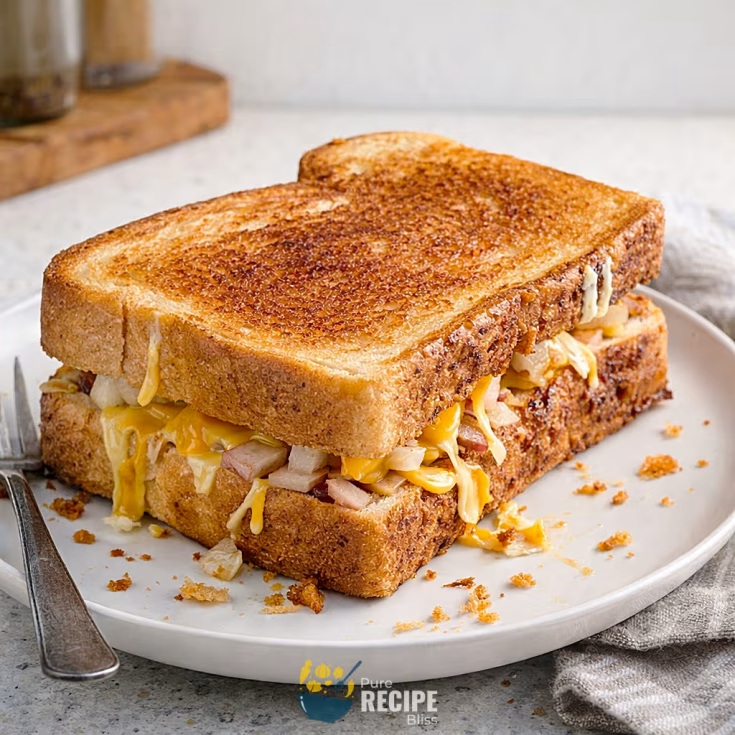
A grilled cheese sandwich is basically bread filled with melted cheese, cooked slowly on a pan until the outside turns golden and crisp. In this version, the mix of cheddar, Gruyère, and Parmesan gives it a creamy, stringy, and slightly salty flavor that feels extra satisfying.
Most people enjoy it as a quick meal, often for lunch or dinner, but it can also be served as a snack when you want something warm and filling. In many homes, it’s paired with ketchup or pickles, and sometimes even a bowl of soup, making it a comfort food that fits different occasions.
Why You’ll Love This Recipe:
- Quick to make: The whole process doesn’t take much longer than half an hour, so it’s easy to fit in when you don’t want to spend too much time cooking.
- Cheese trio flavor: Using cheddar, Gruyère, and Parmesan together gives a creamy, stringy, and slightly salty taste that feels richer than using just one cheese.
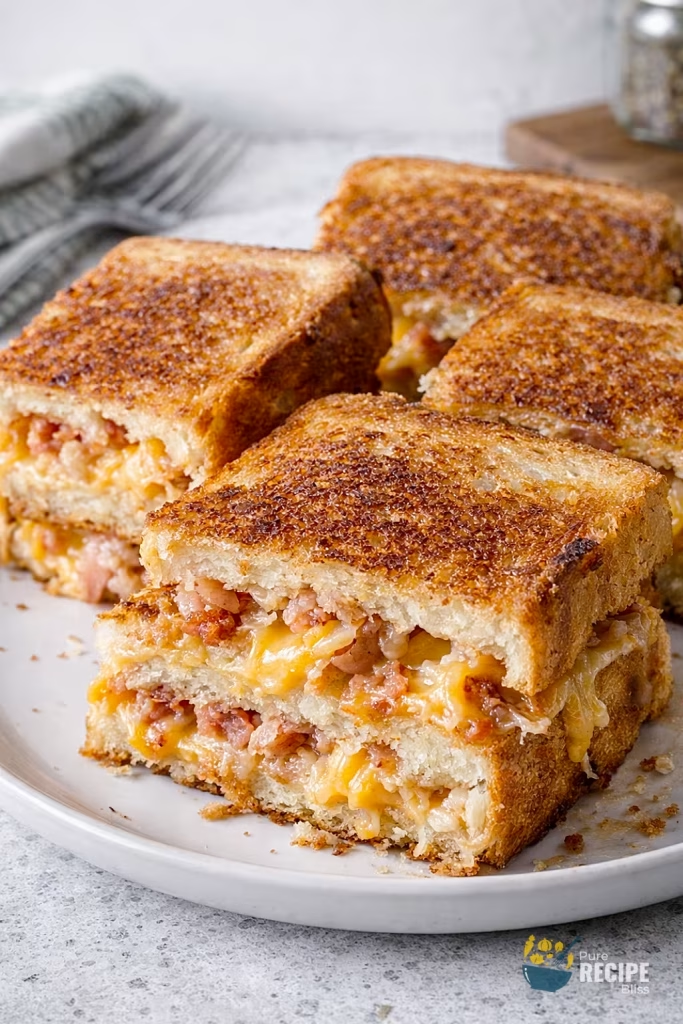
- Crispy and gooey balance: The bread gets golden and crisp while the inside stays soft and melty, which makes every bite feel satisfying.
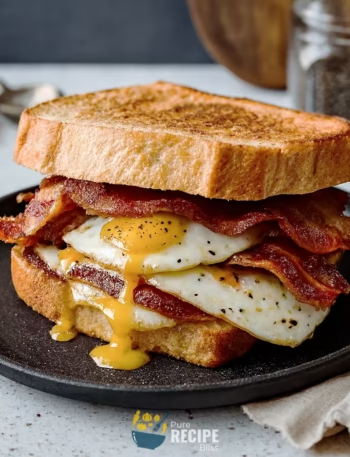
- Optional bacon twist: Adding chopped bacon makes the sandwich more filling and adds a smoky flavor. I tried it both ways, and honestly, the bacon version is the one I keep going back to.
- Comfort food feel: It’s the kind of recipe that works when you want something warm and reliable, whether it’s for lunch, dinner, or even a late snack.
Ingredients Needed:

- Bread slices: Thick white bread like brioche or Italian works best because it holds the filling well and gets nicely crisp when grilled. I once tried thinner bread, and it tore too easily, so I stick to thicker slices now.
- Cheddar cheese: This melts smoothly and gives a creamy base flavor. It’s the one cheese I always keep on hand because it makes the sandwich feel rich without being too heavy.
- Gruyère cheese: Adds that stretchy, stringy texture when melted. It also has a nutty taste that balances the cheddar. If you don’t have Gruyère, you can swap with mozzarella, but the flavor won’t be quite the same.
- Parmesan cheese: A small amount adds saltiness and sharpness. I like grating it fresh because it blends better with the other cheeses.
- Bacon rashers: Cooked until crispy, then chopped. This adds a smoky crunch. I once skipped the bacon, and while it was still good, the bacon version felt more complete.
- Butter: Spread on the outside of the bread to help it crisp and turn golden. Using room-temperature butter makes it easier to spread evenly.
- Mayonnaise: Spread on the inside of the bread for extra creaminess. It also helps the cheese mixture stick better.
- Black pepper: A light sprinkle on the bacon gives a subtle kick without overpowering the cheese.
💡 Note: For the full ingredient list with exact amounts and measurements, please check the recipe card below.
Kitchen Gadgets & Tools You’ll Need:
- Non‑stick skillet or griddle: A flat pan helps the bread cook evenly and prevents sticking. I’ve tried using a regular steel pan before, but the bread browned unevenly, so now I always reach for my non‑stick one (see the one I use).
- Spatula: You’ll need this to flip the sandwich gently without squishing it too much. A wide spatula makes it easier to lift the whole sandwich at once, and I find it keeps the cheese from spilling out.
- Cheese grater: Freshly grated cheese melts better than pre‑shredded. I use a box grater because it gives me different size options, and it’s quicker when I’m working with three types of cheese (check it here).
- Mixing bowl: A small bowl is handy for tossing the bacon with the cheese before filling the sandwich. It keeps everything combined and saves time during assembly.
- Sharp knife: You’ll want a clean cut when slicing the sandwich in half. A sharp knife makes sure the bread doesn’t tear, and it also helps the melted cheese stay inside instead of pulling out.
Step-By-Step Instructions to Make Grilled Cheese Sandwich:
Before starting, one small thing I learned while making this at home is that grilling on lower heat really makes a difference. The bread gets evenly golden, and the cheese melts all the way through without burning the outside too fast.
Step 1: Cook the bacon
Place the bacon on a baking sheet with a rack so the fat drips away. Sprinkle a little black pepper if you like. Bake until it turns crisp, then let it cool on paper towels before chopping it into small pieces. This way, the bacon stays crunchy inside the sandwich.
Step 2: Mix the filling
In a small bowl, combine the chopped bacon with the grated cheddar, Gruyère, and Parmesan. Toss them together so the flavors blend evenly. I noticed that mixing first helps the cheese melt more smoothly inside the bread.
Step 3: Prepare the bread
Spread butter on one side of each bread slice, making sure it covers the edges. Flip the slices and spread mayonnaise on the other side. This double layer makes the bread crisp outside and creamy inside. Room‑temperature butter spreads easier, so I always leave it out for a bit before using.
Step 4: Assemble the sandwich
Take four slices of bread and add a generous mound of the cheese and bacon mixture. Spread it evenly so every bite has the same filling. Place the remaining slices on top, with the buttered side facing out.
Step 5: Grill the sandwich
Heat your skillet or griddle on moderate to low heat. Place the sandwiches gently and let them cook until the bread turns golden and crisp. Press lightly with a spatula so the filling melts together. Flip carefully and cook the other side until it looks the same. The slower heat makes the cheese gooey and the bread evenly browned.
Step 6: Slice and serve
Remove the sandwiches from the pan and let them rest for a minute so the cheese settles. Slice each one in half with a sharp knife. Serve warm with ketchup or pickles on the side. I sometimes add a small bowl of tomato soup, and it feels like a complete meal.
💡 Note: These steps are just an overview. For detailed quantities, measurements, and exact timings to make this recipe, please check the recipe card below.
Helpful Tips For The Best Results:
- Texture control: Spread the butter all the way to the edges of the bread so the crust gets evenly crisp. I once skipped the corners, and they stayed soft instead of golden.
- Heat management: Keep the skillet on moderate to low heat. This slower cooking lets the cheese melt fully without burning the bread too quickly.
- Ingredient swaps: If Gruyère isn’t available, mozzarella works fine for stretchiness, though the flavor is milder. I’ve tried it, and while it’s not the same, it still makes a good sandwich.
- Cheese blend balance: Mix the cheeses together before adding them to the bread. This way, every bite has the same creamy, salty, and nutty flavor instead of uneven pockets.
Tasty Variations to Try:
- Smoky flavor swap: Add a pinch of smoked paprika to the cheese mix for a subtle smoky taste.
- Vegetarian option: Skip the bacon and add sautéed mushrooms or caramelized onions for a hearty filling.
- Seasonal twist: In summer, fresh tomato slices inside the sandwich add juiciness, while in winter, a little spinach or kale makes it more wholesome.
- Extra spicy: Sprinkle chili flakes or drizzle hot sauce before grilling if you like more heat.
- Creamy upgrade: Spread a thin layer of cream cheese inside along with the mayo for extra richness.
Serving Suggestions:
- Best time to enjoy: Grilled cheese sandwich works well for lunch or dinner because it feels filling but not too heavy. I sometimes make it as a late snack when I want something warm and quick.
- Serve with ketchup: A small dish of ketchup on the side balances the salty cheese and crispy bread. It’s simple, but it makes the sandwich taste even better.
- Pairs well with pickles: Bread and butter pickles or garlic dill pickles add crunch and tang. I like serving them because they cut through the richness of the cheese.
- Soup pairing idea: A bowl of tomato soup makes this sandwich feel like a complete meal. The warm soup and gooey sandwich together are always comforting.
Storage & Reheating Tips:
- How long it keeps: Grilled cheese sandwich stays fine in the fridge for about two to three days. I noticed the bread softens a little, but the flavor of the cheese still holds well.
- Best storage method: Let the sandwich cool before wrapping it in foil or placing it in an airtight container. I sometimes separate the halves with parchment so they don’t stick together.
- Simple reheating advice: Warm it slowly in a skillet on low heat until the bread crisps again and the cheese melts inside. If it feels dry, I add a tiny splash of water to the pan.
Frequently Asked Questions (FAQ):
-
Can I substitute the cheeses?
Yes, you can swap Gruyère with mozzarella for stretchiness or use Colby instead of cheddar. The flavor changes a little, but the sandwich still turns out creamy and melty.
-
Can I make it ahead of time?
You can assemble the sandwiches and keep them wrapped in the fridge for a day or two. I’ve tried grilling them later, and they still taste good, though the bread softens slightly.
-
Why is my bread burning before the cheese melts?
This usually happens when the heat is too high. Keep the skillet on moderate to low heat so the bread browns slowly while the cheese melts inside.
-
Is there a vegetarian option?
Yes, just skip the bacon and add extras like sautéed mushrooms or caramelized onions. They give the sandwich a hearty flavor without the meat.
Grilled Cheese Sandwich with Bacon & Triple Cheese
A golden, crispy grilled cheese filled with cheddar, Gruyère, and Parmesan, plus smoky bacon and creamy mayo. Quick to make, gooey inside, crunchy outside - perfect comfort food.
Ingredients
- 8 slices thick white bread (brioche or Italian)
- 4 rashers bacon, cooked and chopped
- 1 cup cheddar cheese, grated
- ¾ cup Gruyère cheese, grated
- ¼ cup Parmesan cheese, grated
- 4 tablespoons mayonnaise
- 4 tablespoons butter, softened
- ½ teaspoon black pepper
Instructions
- Cook 4 rashers of bacon until crisp, then chop into small pieces and set aside.
- In a bowl, mix 1 cup cheddar, ¾ cup Gruyère, ¼ cup Parmesan, and the chopped bacon with ½ teaspoon black pepper.
- Spread 1 tablespoon mayonnaise on one side of each of the 8 bread slices. Flip and spread 1 tablespoon butter on the other side.
- Place 4 slices down, mayo side up, and divide the cheese mixture evenly across them. Top with the remaining slices, butter side out.
- Heat a skillet on medium‑low. Grill sandwiches until bread turns golden and crisp, about 3–4 minutes per side, pressing lightly with a spatula.
- Remove, rest for 1 minute, then slice in half and serve warm.
Notes
Nutrition Information
Yield 4 Serving Size 1 sandwichAmount Per Serving Calories 420Total Fat 25gSaturated Fat 12gTrans Fat 0gUnsaturated Fat 11gCholesterol 65mgSodium 780mgCarbohydrates 32gNet Carbohydrates 30gFiber 2gSugar 4gSugar Alcohols 0gProtein 18g
Percent Daily Values are based on a 2,000‑calorie diet, and your daily needs may be higher or lower depending on your lifestyle. Nutrition information is shared only as a general estimate and may not always be fully accurate. If you follow a special diet or have specific health concerns, it’s best to check with a registered dietitian for personalized guidance.