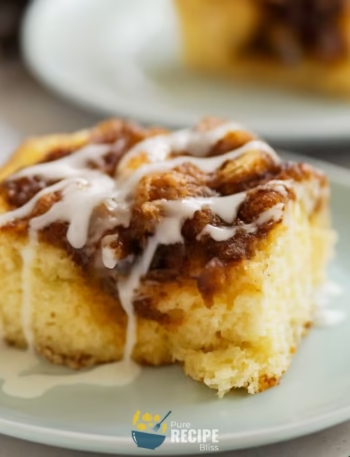
These Cherry Crumb Bars turned out really nice and they didn’t take me much time at all. The steps are pretty simple, and once you get the cherries ready, the rest comes together quickly. They bake in under forty minutes, so you don’t feel like you’re stuck in the kitchen for too long.
I think they work best as a little snack in the afternoon or even something sweet after dinner, but honestly you could enjoy them anytime you want something fruity. They have that cozy homemade feel, and that’s why I thought you’d like to hear about them before I explain more about what Cherry Crumb Bars actually are.
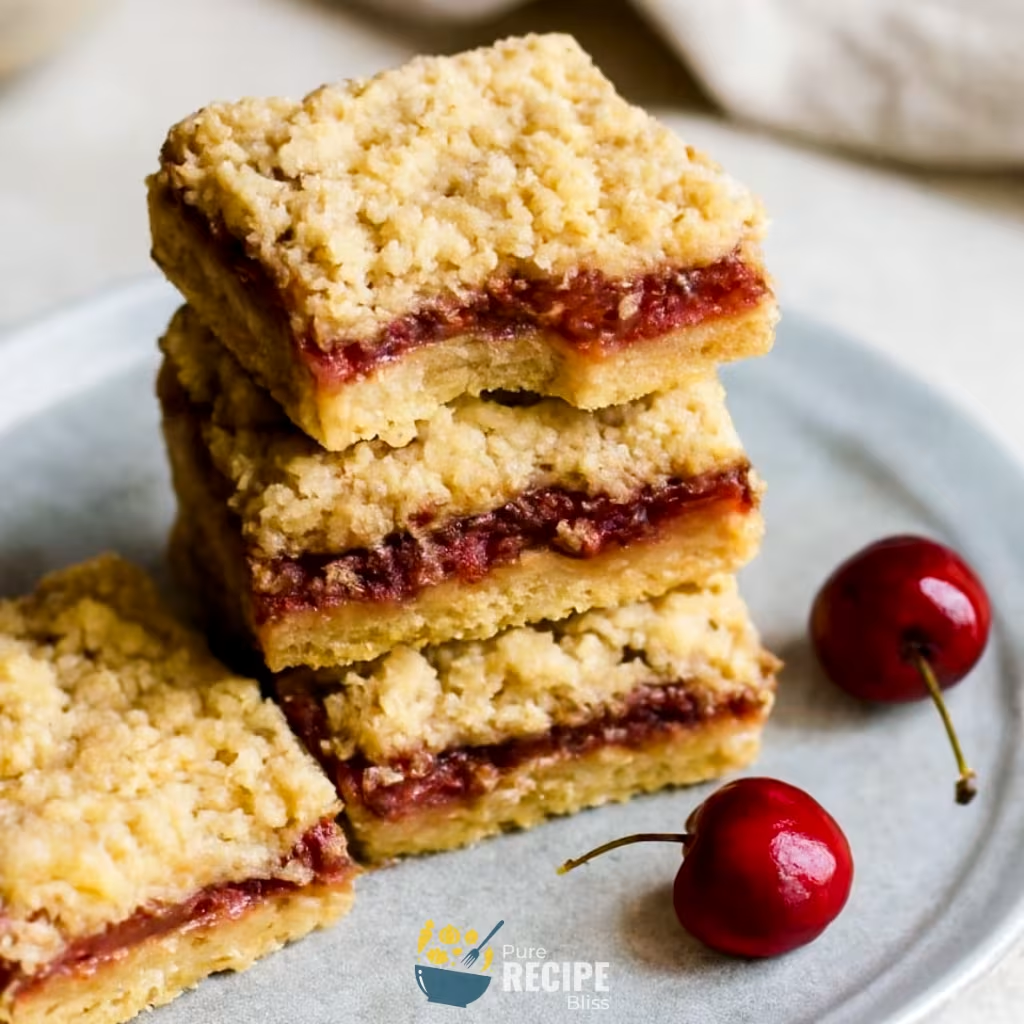
What is Cherry Crumb Bars?
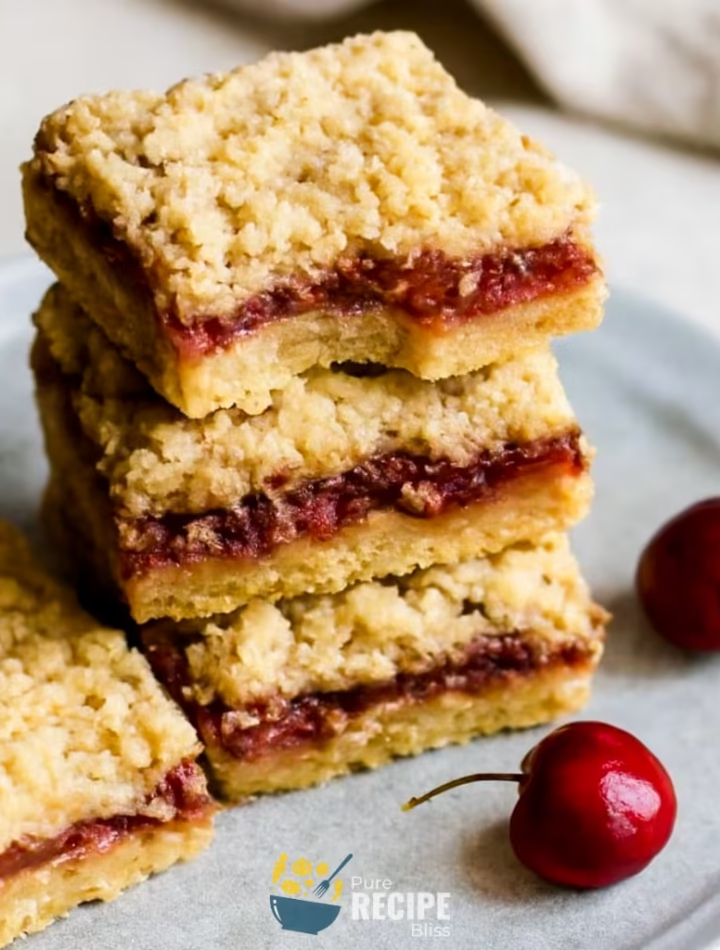
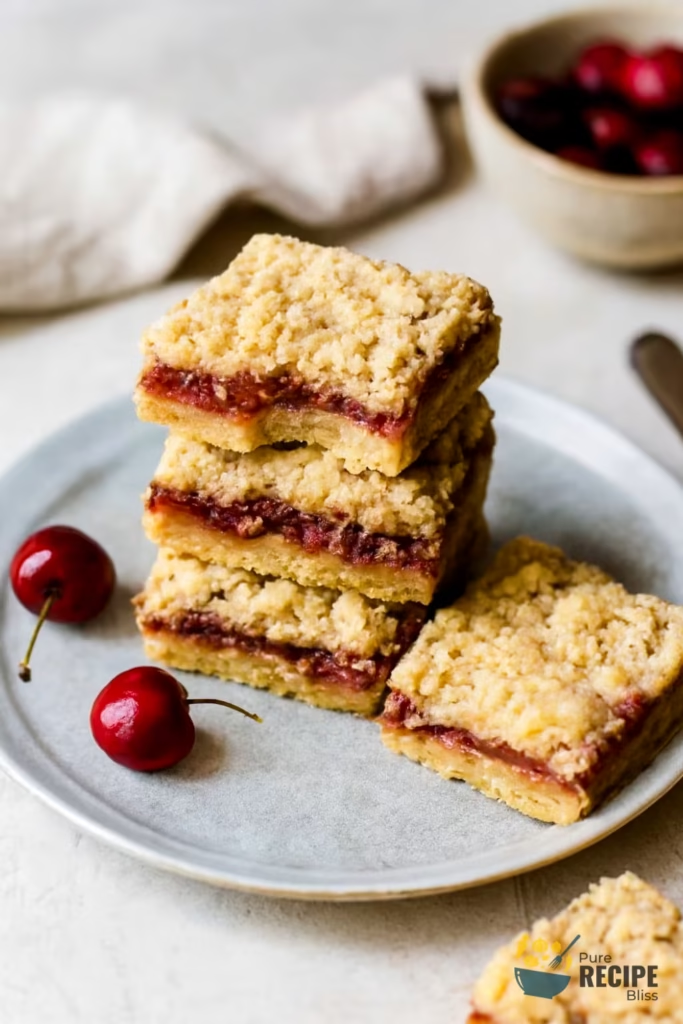
Cherry Crumb Bars are basically a baked dessert that has three simple parts. A soft crust at the bottom, a sweet cherry filling in the middle, and a crumbly topping on the top. The nice thing is that the crust and topping come from the same mixture, so you don’t have to make two separate doughs.
They are usually eaten as small square bars, which makes them easier to serve compared to pie slices. People often enjoy them as a snack in the afternoon or as a light dessert after dinner. Since they hold their shape well, they’re also good for sharing at gatherings or packing into lunch boxes.
In many homes, crumb bars are a common way to use seasonal fruit, and cherries are one of the most popular choices because they bake down into a jam-like filling. That’s why Cherry Crumb Bars feel both practical and cozy at the same time.
Why You’ll Love This Recipe:
- Quick to bake: The Cherry Crumb Bars don’t take too long in the oven, around thirty-five minutes, so you don’t feel like you’re waiting forever. I like that because I can start them after lunch and still have them ready before evening tea.
- Easy ingredients: Most of the things you need are already in the kitchen like flour, sugar, butter, and milk. The only thing I had to plan for was getting fresh cherries, but frozen ones worked fine when I drained them well.
- Flexible filling: You can change the fruit if cherries aren’t available. I once tried blueberries, and they turned out nice, though I had to add a little extra sugar.
- Beginner-friendly steps: The crust and topping come from the same mixture, so it feels less complicated. When I first made them, I worried about the dough being too dry, but adding just a splash more milk fixed it.
- Good for sharing: Since they slice into neat squares, they’re easier to carry to a friend’s place than pie. I once packed them in a box lined with parchment paper, and they stayed together without crumbling.
- Tastes homemade: The filling cooks down into a jam-like layer, and it feels cozy and homemade. I noticed that letting them cool fully before cutting made the texture much better.
That’s why I think Cherry Crumb Bars are worth trying. They’re simple, but they give you that nice mix of fruity sweetness and buttery crunch without too much effort.
Ingredients Needed:
- Flour – gives the crust and topping their structure so they hold together.
- Sugar – adds sweetness and also helps the cherries taste more balanced.
- Butter – makes the crust and crumbs soft but still a little crisp after baking.
- Egg – helps bind the dry mixture so it doesn’t fall apart.
- Milk – keeps the crumb mixture from being too dry and crumbly.
- Cherries – the main filling that cooks down into a jam-like layer.
- Cornstarch – thickens the cherry mixture so it doesn’t get watery.
One small note from me: I once tried skipping the milk, and the bars ended up breaking apart too easily, so I wouldn’t recommend leaving it out.
💡 Note: For the full ingredient list with exact amounts and measurements, please check the recipe card below.
Step-By-Step Instructions to Make Cherry Crumb Bars:
When I first tried making Cherry Crumb Bars at home, I learned one small thing that made a big difference. Draining the cherries properly before mixing them with sugar and cornstarch. The first time I skipped that step, the filling turned out too watery and the bars didn’t hold together well. After that, I always make sure to press out the extra liquid, and the texture comes out much better.
Step 1: Prepare the crumb mixture
Start by combining the dry ingredients in a bowl, then grate in the cold butter. I found grating easier than cutting cubes because it blends faster and gives a more even crumb. Once you add the egg and milk, the mixture should clump together when you pinch it. If it feels too dry, just add a tiny splash more milk. This mixture will be used for both the crust and the topping, so keep that in mind.
Step 2: Make the cherry filling
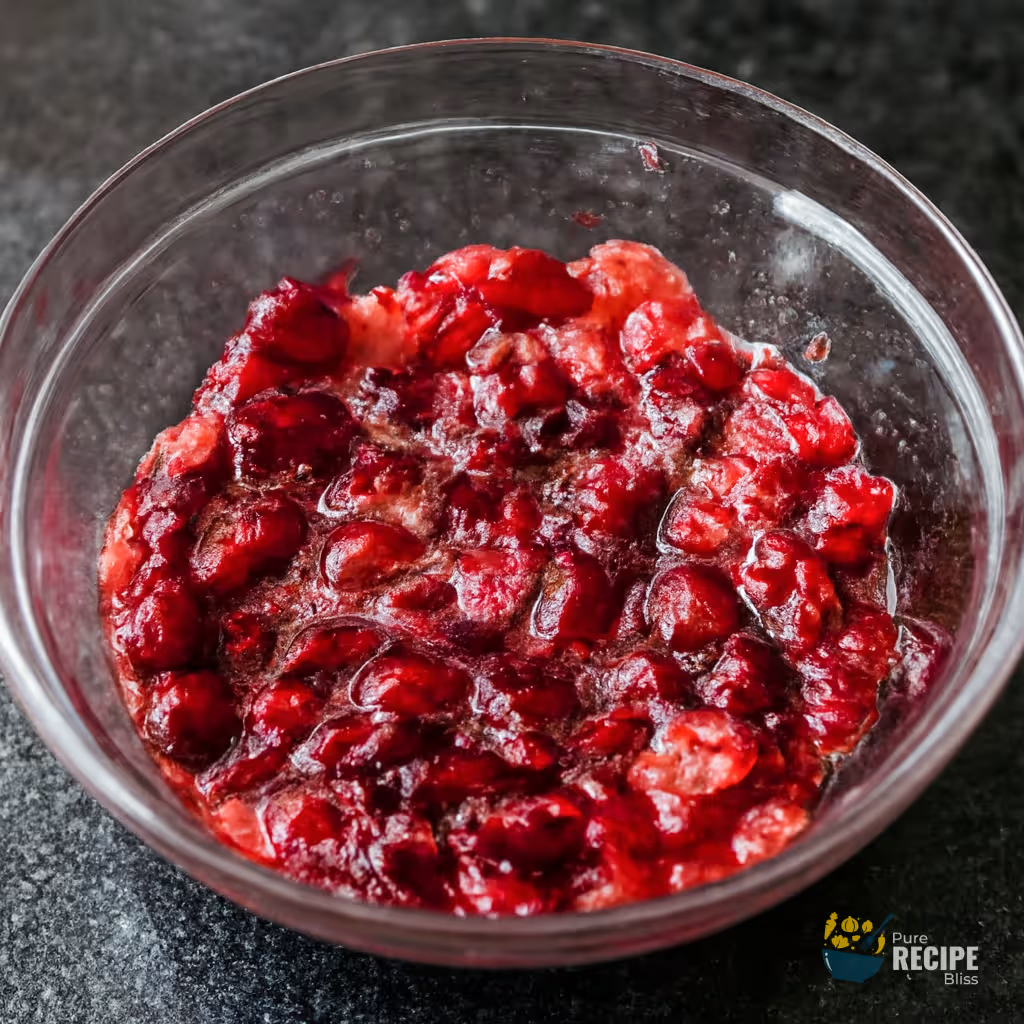
Mash the cherries with a potato masher or even a fork. You don’t want them completely smooth like small chunks give a nice bite. Drain off the extra liquid, then stir in sugar and cornstarch until it looks slightly thick and glossy. I once tried skipping the cornstarch, but the filling spread too much, so I wouldn’t recommend leaving it out.
Step 3: Assemble the layers
Press about two-thirds of the crumb mixture into the bottom of a lined baking pan. Make sure it’s pressed firmly so it doesn’t crumble later. Spread the cherry filling evenly over the crust. Then sprinkle the remaining crumb mixture on top, but don’t press it down like leaving it loose helps it bake into a crunchy topping.
Step 4: Bake until golden
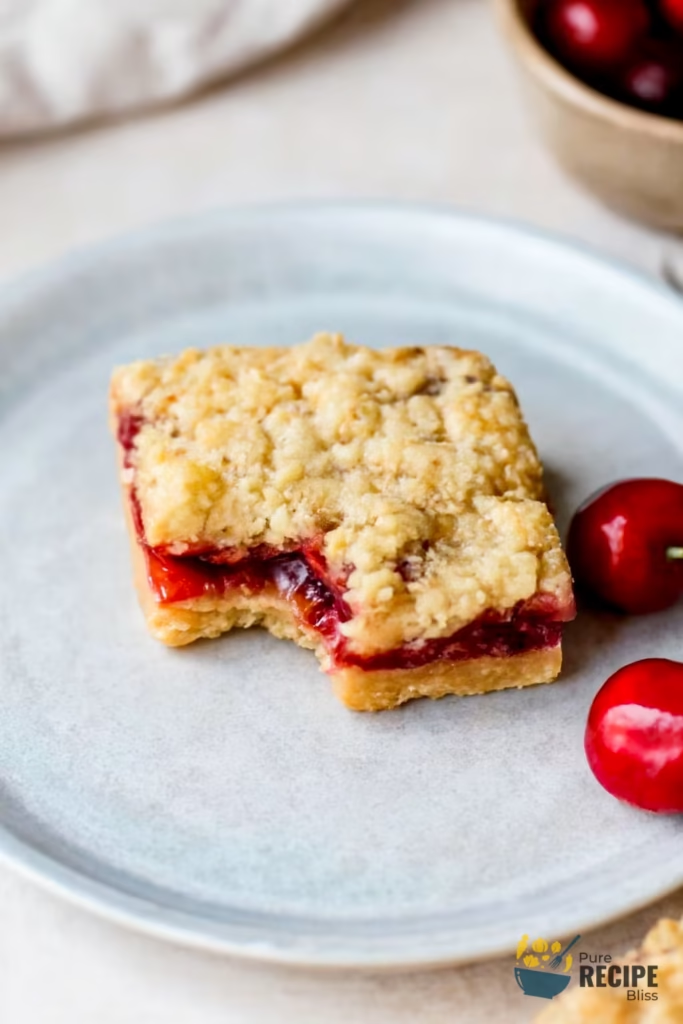
Place the pan in the oven and bake until the edges look golden and the top smells buttery. The filling should bubble slightly, which means the cherries have cooked down into a jam-like layer. Once baked, let the bars cool completely in the pan. I learned that cutting them too early makes them fall apart, so patience really pays off here.
That’s the way I usually make Cherry Crumb Bars. Each step feels simple, but the little details like draining the cherries and letting the bars cool fully make a big difference in how they turn out.
💡 Note: These steps are just an overview. For detailed quantities, measurements, and exact timings to make this recipe, please check the recipe card below.
Helpful Tips For The Best Results:
- Drain cherries well: If you don’t remove the extra liquid, the filling will be too wet and the bars won’t hold their shape. I learned this the hard way when mine came out soggy.
- Texture check: The crumb mixture should clump when pinched. If it feels too dry, add a splash of milk. If it feels too sticky, sprinkle a little more flour.
- Heat control: Keep an eye on the oven near the end. The edges should look golden, not dark brown. If they brown too fast, cover loosely with foil.
- Ingredient swap: If you don’t have cornstarch, all-purpose flour works fine to thicken the cherry filling. I’ve tried it and the texture was still good.
- Cooling time: Let the bars cool completely before slicing. Cutting too early makes them fall apart, but waiting gives you neat squares.
Tasty Variations to Try:
- Berry mix: Use half cherries and half blueberries for a colorful filling.
- Chocolate twist: Add a spoonful of cocoa powder to the crumb mixture for a chocolate-cherry flavor.
- Nutty topping: Sprinkle chopped almonds or walnuts over the top layer before baking for extra crunch.
- Vegan option: Replace the egg with a flax egg and use plant-based butter. I’ve tried this once and the bars still held together nicely.
- Seasonal swap: In peach season, diced peaches work well, though I usually add a little extra sugar since peaches are less tart.
- Citrus hint: Mix in a teaspoon of lemon zest with the cherries to brighten the flavor.
Serving Suggestions:
1. Serve at gatherings
Cherry Crumb Bars are perfect for family get‑togethers or casual evenings with friends. They slice neatly, so you don’t have to worry about messy servings, and they look nice stacked on a plate.
2. Afternoon snack
Serve with a cup of tea or coffee when you want something sweet but not too heavy. I’ve noticed they hold their shape well, so they’re easy to pick up without a fork.
3. Dessert option
Pairs well with vanilla ice cream or whipped cream if you want to make them feel more like a dessert. I once tried them with plain yogurt, and it balanced the sweetness nicely.
4. Quick treat
Perfect for packing into lunch boxes or carrying along for a picnic. They don’t crumble much if you let them cool fully, which makes them easy to transport.
Storage & Reheating Tips:
- How long it keeps: Cherry Crumb Bars usually stay good for about a week in the fridge. I once left them out overnight, and they softened too much, so keeping them chilled works better.
- Best storage method: Place the bars in a sealed container with parchment between layers. This way they don’t stick together, and the crumb topping stays a little crisp.
- Simple reheating advice: If you want them warm again, just microwave for a few seconds. I sometimes use the oven for a short time, which brings back that fresh-baked smell.
Frequently Asked Questions (FAQ):
-
Can I swap the cherries?
Yes, you can use blueberries, raspberries, or even diced peaches. Just remember that softer fruits may need a little extra sugar or thickener.
-
Can I make them ahead?
You can prepare the crumb mixture and cherry filling a day before, then assemble and bake when you’re ready. I’ve done this, and it saves time.
-
Why do my bars fall apart?
Usually it’s because the cherries weren’t drained enough or the bars were cut too soon. Cooling fully makes them hold together better.
-
Can I make them vegan?
Yes, just use a flax egg and plant-based butter. I tried this once, and the bars still came out firm and tasty.
Cherry Crumb Bars
Description
Cherry Crumb Bars are a simple baked dessert with a buttery crust, a sweet cherry filling, and a crumb topping. They slice neatly into squares, making them easy to serve at gatherings or enjoy as a snack.
Ingredients
Instructions
- Preheat oven to 375°F and line an 8×8 or 9×9 baking dish with parchment paper, leaving a 1-inch overhang. Spray sides lightly with nonstick spray.
- In a large bowl, mix 1 ¾ cups all-purpose flour, ¾ cup cane sugar, ½ teaspoon baking powder, and ¼ teaspoon salt. Grate in ½ cup cold unsalted butter and combine until crumbly.
- Add 1 whisked egg and 2 tablespoons milk. Stir until the mixture clumps together when pinched.
- Press two-thirds of the crumb mixture firmly into the prepared pan to form the crust.
- Mash 2 ¼ cups fresh cherries with a potato masher or fork until chunky. Drain excess liquid through a fine mesh strainer.
- Stir in 3 tablespoons sugar and 2 tablespoons cornstarch until the mixture looks slightly thick and glossy.
- Spread the cherry filling evenly over the crust. Sprinkle the remaining crumb mixture loosely on top without pressing down.
- Bake for 32-36 minutes, until the edges are golden and the filling bubbles slightly.
- Cool completely in the pan for about 30 minutes before slicing into squares.
Notes
- If using frozen cherries, thaw and drain them thoroughly to avoid soggy bars.
- Adding a splash more milk can help if the crumb mixture feels too dry.
- Cooling fully before slicing is important for neat squares.
Nutrition Facts
Servings 9
Serving Size 1 bar
- Amount Per Serving
- Calories 295kcal
- % Daily Value *
- Total Fat 11g17%
- Saturated Fat 7g35%
- Trans Fat 0.4g
- Cholesterol 45mg15%
- Sodium 181mg8%
- Potassium 113mg4%
- Total Carbohydrate 45g15%
- Dietary Fiber 1g4%
- Sugars 25g
- Protein 4g8%
- Vitamin A 364 IU
- Vitamin C 2 mg
- Calcium 31 mg
- Iron 1 mg
* Percent Daily Values are based on a 2,000‑calorie diet, and your daily needs may be higher or lower depending on your lifestyle. Nutrition information is shared only as a general estimate and may not always be fully accurate. If you follow a special diet or have specific health concerns, it’s best to check with a registered dietitian for personalized guidance.