I wanted to tell you about this recipe I’ve been making a lot lately, and it’s called Chickpea Salad Sandwich. It’s basically a creamy and filling mix that goes between bread, and the nice part is that it doesn’t take much time at all. You can put it together pretty quickly, so it works well when you don’t feel like cooking something complicated.
I usually make it for lunch because it feels light but still keeps me full, though it can easily be eaten for dinner or even as a snack if you want something different. It’s one of those recipes that feels easy to repeat during the week, and that’s why I thought I’d share it with you before we get into what exactly a chickpea salad sandwich is.
What is Chickpea Salad Sandwich?
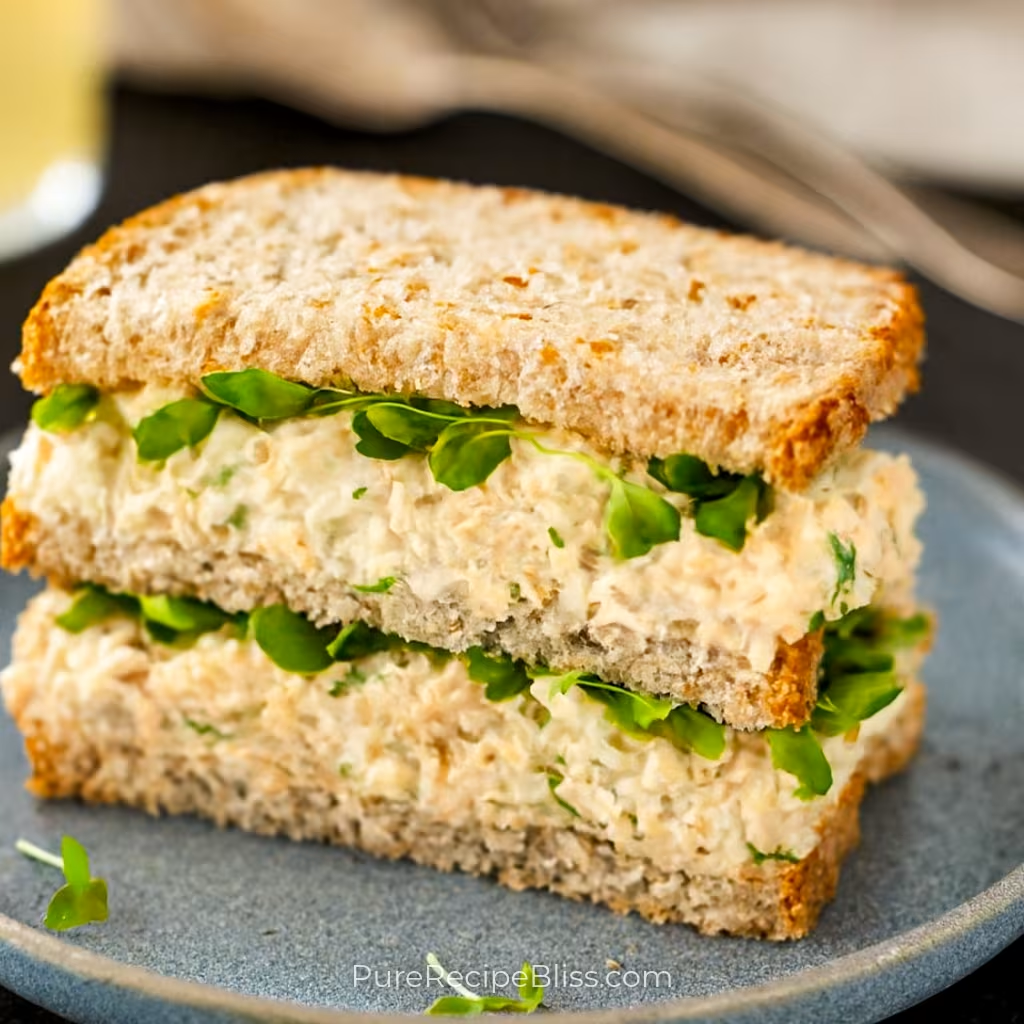
The Chickpea Salad Sandwich is basically a plant-based version of the classic chicken or tuna salad sandwich. Instead of meat, you mash chickpeas and mix them with things like mayo, mustard, onion, celery, and herbs. The chickpeas give it a chunky texture that feels hearty, while the creamy mix makes it taste familiar and comforting.
Most people eat it as a quick lunch or light dinner, usually tucked between slices of bread or inside pita pockets. Some even scoop it into lettuce cups if they want something lighter. It’s a flexible dish that works well for meal prep too, since you can make a batch and keep it in the fridge for a few days.
Why You’ll Love This Recipe:
- Quick to prepare: You don’t really spend much time cooking here, since the chickpeas only need a short simmer and then some mashing, so the whole thing comes together in less than 20 minutes.
- Easy ingredients: Most of the things you need like chickpeas, mayo, mustard, onion, and celery are usually lying around in the kitchen, so you don’t have to go hunting for anything special.
- Flexible flavors: You can adjust the taste easily, like adding more mustard if you want it sharper or a little extra mayo if you prefer it creamier, so it never feels boring.
- Good for meal prep: The salad stays fine in the fridge for a few days, so you can make it once and keep eating it for lunch or dinner without having to cook again.
- Beginner-friendly: There’s nothing tricky about the steps, and even if you don’t cook often, you’ll be able to mash and mix everything without worrying about messing it up.
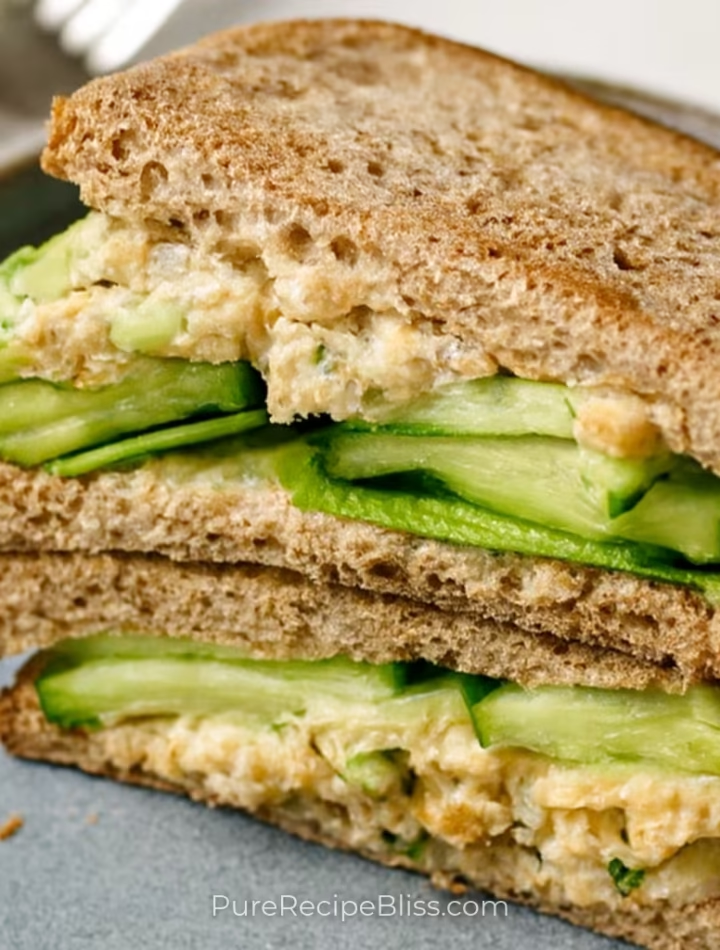
One small note from me: I once tried adding chopped cucumber for crunch, but it released too much water after a day in the fridge, so I stick to celery now. That’s something to keep in mind.

Ingredients Needed:
It’s not a long list, but every item adds something important to the mix, and that’s why the salad tastes balanced and filling.
- Chickpeas – they are the main base and give the salad its chunky texture and protein.
- Celery – adds crunch and keeps the mix from feeling too soft.
- Onion – brings a little sharp flavor that cuts through the creaminess.
- Parsley – gives freshness and a light herbal taste.
- Mayonnaise – makes everything creamy and helps bind the chickpeas together.
- Dijon mustard – adds tang and a bit of sharpness to balance the flavors.
- Salt – ties everything together and makes the flavors stand out.
One small note from me: I once tried adding chopped pickles instead of parsley, and while it gave a nice tang, it made the salad a little too salty, so I usually stick with parsley now.
💡 Note: For the full ingredient list with exact amounts and measurements, please check the recipe card below.
Step-By-Step Instructions to Make Chickpea Salad Sandwich:
One small thing I learned while making the Chickpea Salad Sandwich at home is that the texture really changes depending on how much you mash the chickpeas. The first time I made it, I mashed them too much and it turned into more of a paste, which wasn’t as nice. Now I leave some chunks in there, and it feels more filling and has a better bite.
Step 1: Simmer the Chickpeas
Start by warming the chickpeas in their liquid on the stove. This softens them and makes them easier to mash later. You don’t need to boil them hard, just let them gently simmer until they look plump and slightly tender. I noticed that this step makes a big difference because the chickpeas mash more smoothly and don’t feel dry.
Step 2: Drain and Cool
Once they’re softened, pour them into a colander and let the liquid drain away. I usually give them a quick shake so extra water doesn’t stay behind. If they’re too hot, I let them cool for a few minutes because mashing warm chickpeas can feel sticky.
Step 3: Mash the Chickpeas
Transfer the chickpeas to a large bowl and mash them with a fork or potato masher. I stop when most of them are broken down but still leave a few whole ones for texture. The mixture should look chunky and not too smooth. If you mash too much, it can feel heavy, so I like to keep it a little uneven.
Step 4: Add the Mix-Ins

Now add the celery, onion, parsley, mayo, mustard, and salt. Stir everything together until it looks creamy and evenly mixed. The salad should hold together but still show bits of herbs and veggies. I usually taste it here and adjust like sometimes I add more mustard if I want extra tang.
Step 5: Chill or Serve
At this point, you can cover the bowl and let the salad chill in the fridge, which helps the flavors blend together. Or if you’re hungry, you can spread it right away onto bread or spoon it into lettuce cups. I’ve noticed that chilling makes the salad taste more balanced, but serving immediately works fine too.
💡 Note: These steps are just an overview. For detailed quantities, measurements, and exact timings to make this recipe, please check the recipe card below.
Helpful Tips For The Best Results:
- Texture control: Don’t mash the chickpeas too much, because if they turn into a paste the sandwich feels heavy. Leaving some chunks makes it taste better.
- Heat check: When simmering canned chickpeas, keep the heat gentle. If it’s too high, they can split and get mushy, which makes mashing uneven.
- Mayo balance: Start with less mayo and add more slowly. Too much at once can make the salad watery.
- Ingredient swap: If you don’t have parsley, dill works fine. I tried it once and it gave a fresh flavor without changing the texture.
- Taste test: Always taste before chilling. Adjust mustard or salt right away so the flavors settle properly in the fridge.
Tasty Variations to Try:
- Spicy version: Add chopped jalapeños or a spoon of hot sauce for extra heat.
- Herb change: Swap parsley for cilantro if you want a brighter, citrus-like flavor.
- Avocado mix: Replace part of the mayo with mashed avocado for a creamier but lighter option.
- Pickle crunch: Stir in diced pickles for tang, though I found they release water if stored too long.
- Seasonal twist: In summer, add diced cucumber for freshness, but eat it the same day. In colder months, a little smoked paprika gives warmth.
- Bread choice: Try it in pita pockets, wraps, or even on toasted sourdough for different textures.
Serving Suggestions:

When I think about how to serve the Chickpea Salad Sandwich, I usually keep it simple but also try to pair it with things that make the meal feel complete. It works in different situations, so here are a few ideas.
1. Lunch option:
Perfect for a quick midday meal, especially when you want something filling but not too heavy. Serve with a small side salad or some fresh fruit to balance it out.
2. Light dinner:
Works well in the evening when you don’t feel like cooking a big meal. Pairs well with a bowl of soup or roasted vegetables on the side.
3. Snack idea:
If you don’t want a full sandwich, you can scoop the chickpea salad onto crackers or inside lettuce cups. Serve with pickles or sliced cucumbers for extra crunch.
One note from me: I once tried it with toasted sourdough, and the crisp bread made the creamy filling taste even better, so now I use that often.
Storage & Reheating Tips:
- How long it keeps: The chickpea salad usually stays good for about three to four days in the fridge, and after that the texture starts to change.
- Best storage method: I always keep it in an airtight container, because if it’s left open it dries out quickly and loses flavor.
- Simple reheating advice: Since this is meant to be eaten cold, I don’t reheat it, but if the bread feels stale I lightly toast fresh slices and then add the chilled filling.
I once stored it in a bowl with just plastic wrap, and the edges dried out, so now I always use a proper container with a lid.
Frequently Asked Questions (FAQ):
-
Can I substitute the mayo?
Yes, you can use mashed avocado or even plain yogurt if you don’t want mayonnaise, though the flavor will be a little different.
-
Can I make it ahead of time?
Yes, the salad keeps well in the fridge for a few days, so you can prepare it earlier and just assemble the sandwich when you need it.
-
What if the texture feels too mushy?
Try mashing less or leave some chickpeas whole, because that gives more bite and makes the filling less heavy.
-
Is it suitable for vegan diets?
Yes, just use vegan mayo and mustard, and it stays completely plant-based without losing flavor.
Chickpea Salad Sandwich
Description
This Chickpea Salad Sandwich is a creamy, filling, and plant-based twist on the classic chicken or tuna salad. It’s quick to prepare, keeps well in the fridge, and works for lunch, dinner, or even a light snack.
Ingredients
Instructions
- Add 2 (15.5‑ounce) cans chickpeas with liquid into a medium saucepan. Simmer gently over medium heat for about 10 minutes, stirring occasionally until softened.
- Drain the chickpeas well in a colander and let them cool slightly.
- Transfer the drained chickpeas to a large mixing bowl. Mash with a fork or potato masher until most are broken down but still a little chunky.
- Stir in 2 tablespoons minced celery, 2 tablespoons minced yellow onion, 2 tablespoons minced fresh parsley, 4-5 tablespoons mayonnaise (vegan if desired), 2–3 teaspoons Dijon mustard (vegan if desired), and ½ teaspoon salt. Mix until creamy and evenly combined.
- Taste the mixture and adjust seasoning if needed, adding a little more mustard or salt if you prefer stronger flavor.
- Cover the bowl and chill in the refrigerator for about 1 hour for best flavor, or serve immediately on bread, pita, or lettuce cups.
Notes
- If chickpeas feel dry, add a splash of olive oil along with the mayo.
- Don’t mash too much because leaving some chunks gives better texture.Add cucumber only if serving right away, since it releases water when stored.
Nutrition Facts
Servings 6
Serving Size 1 sandwich filling portion (~1/6 of recipe)
- Amount Per Serving
- Calories 196kcal
- % Daily Value *
- Total Fat 10g16%
- Saturated Fat 1g5%
- Trans Fat 0.02g
- Cholesterol 4mg2%
- Sodium 682mg29%
- Potassium 235mg7%
- Total Carbohydrate 20g7%
- Dietary Fiber 7g29%
- Sugars 0.3g
- Protein 7g15%
- Vitamin A 154 IU
- Vitamin C 2 mg
- Calcium 57 mg
- Iron 2 mg
* Percent Daily Values are based on a 2,000‑calorie diet, and your daily needs may be higher or lower depending on your lifestyle. Nutrition information is shared only as a general estimate and may not always be fully accurate. If you follow a special diet or have specific health concerns, it’s best to check with a registered dietitian for personalized guidance.