When I first tried baking healthy banana bread, I realized how simple it was to put together once the bananas were ready. The mixing doesn’t take long, and most of the steps feel easy enough that you don’t have to plan ahead too much.
It’s the kind of recipe I like to keep in mind because it works well for mornings when you want something homemade, or even later in the day when you just want a small bite. That’s why I thought it would be nice to share before explaining more about what healthy banana bread actually is.
What is Banana Bread?
Healthy banana bread is basically a softer and lighter version of the classic loaf, but it’s made with ingredients that feel a little more wholesome. The bananas are the main part of the recipe, and they give the bread its natural sweetness and moist texture. A small amount of maple syrup adds extra flavor, and the mix of flours keeps it balanced without being heavy.
Most people enjoy it sliced on its own, but I’ve found it works nicely with a little butter or even a spread of nut butter if you want something more filling. It’s usually served as a quick bite in the morning or as a small snack later in the day, though I’ve also kept it on the table after dinner when I wanted something not too rich but still satisfying.
Why You’ll Love This Recipe:
- Quick to prepare: The batter comes together in one bowl, and once the bananas are mashed, the rest of the steps feel straightforward. I’ve noticed that even when I’m short on time, I can get it into the oven without much fuss.
- Balanced ingredients: Using a mix of whole wheat and all-purpose flour makes the bread feel hearty but not too dense. I tried only whole wheat once, and it came out heavier, so the blend works better for me.
- Easy to adjust: You can swap the walnuts for pecans or even add chocolate chips if you want something sweeter. I’ve done raisins once, and they gave a nice chewy texture.
- Works for different times of day: I usually slice it for breakfast, but I’ve also packed it as a snack when heading out. It’s not overly sweet, so it doesn’t feel out of place after dinner either.
- Family-friendly: When I baked it at home, even the kids liked helping with the mixing part. It’s a recipe that feels approachable for anyone in the kitchen.
Ingredients Needed:

- Bananas: You’ll want very ripe bananas because they mash easily and give the bread a stronger flavor. I once tried using bananas that were just yellow, and the taste wasn’t as sweet, so overripe ones really do make a difference.
- Flour mix: A blend of whole wheat and all-purpose flour keeps the bread soft but still adds a little nutty flavor. I tested it with only whole wheat once, and it felt too heavy, so the mix works better.
- Maple syrup: This is what sweetens the loaf naturally. I like it because it doesn’t make the bread overly sugary, and it blends smoothly into the batter.
- Coconut oil: Melted coconut oil adds moisture and richness. I’ve also tried vegetable oil when I didn’t have coconut oil, and it worked fine, but the flavor was a little more neutral.
- Eggs and baking soda: These help the bread rise and hold together. Without them, the loaf doesn’t get the same structure.
- Spices and vanilla: Cinnamon, nutmeg, and vanilla give the bread a warm flavor. I sometimes add a little extra cinnamon because I like the stronger taste.
- Walnuts: Chopped walnuts add crunch. I’ve swapped them for pecans before, and they gave a softer bite, so it depends on what you prefer.
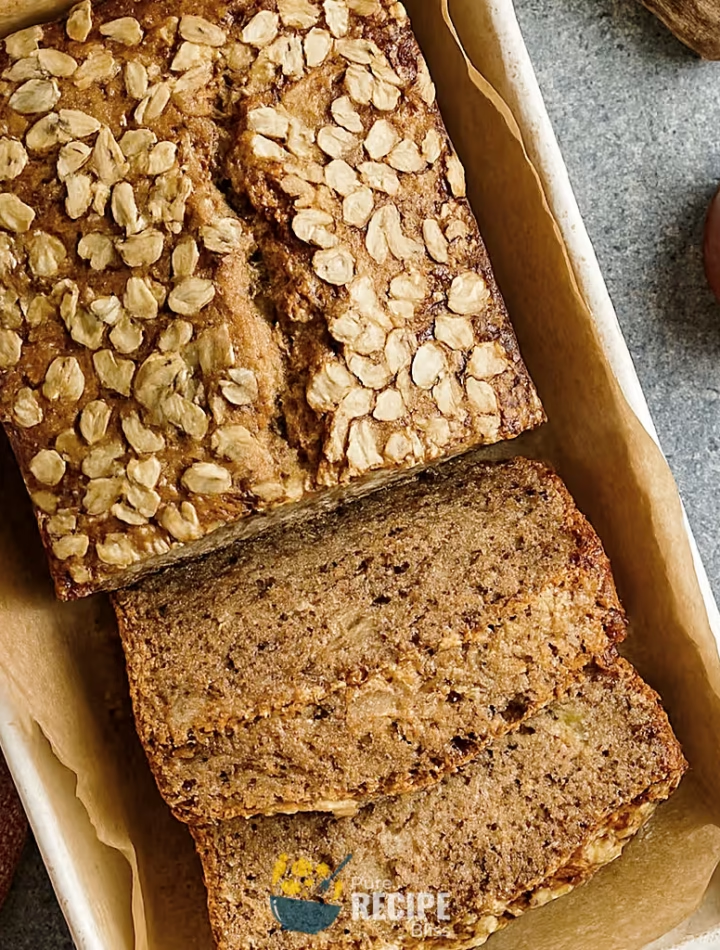
- Rolled oats: Sprinkled on top, they toast while baking and give a nice finish. If you skip them, the bread still works, but the texture on top feels less interesting.
💡 Note: For the full ingredient list with exact amounts and measurements, please check the recipe card below.
Step-By-Step Instructions to Make Healthy Banana Bread:
One small thing I learned while making this recipe at home is that the bananas really control the texture. The first time I used bananas that weren’t fully ripe, the bread came out a little dry, so now I always wait until they’re soft and spotty before baking.
Step 1: Mash the bananas
Start by peeling and mashing the bananas in a large bowl until they look smooth but still have a few small lumps. This helps the bread stay moist without turning gummy. SEO image alt text: mashed bananas in mixing bowl with fork
Step 2: Mix the wet ingredients
Add the oil, maple syrup, eggs, and vanilla into the bowl with the bananas. Stir until everything blends together and looks glossy. I usually check that the oil doesn’t sit on top, because that means it needs a little more mixing.
Step 3: Combine the dry ingredients
In a separate bowl, mix the flours, baking soda, salt, and spices. I’ve noticed that whisking them first helps avoid clumps later. If you skip this step, the cinnamon sometimes stays in one spot in the loaf. SEO image alt text: dry flour and spices in mixing bowl
Step 4: Bring the batter together
Slowly add the dry mixture into the wet mixture, stirring gently until it looks combined. Don’t overmix because I once kept stirring too long, and the bread turned out tougher. Fold in the walnuts at the end so they stay evenly spread.
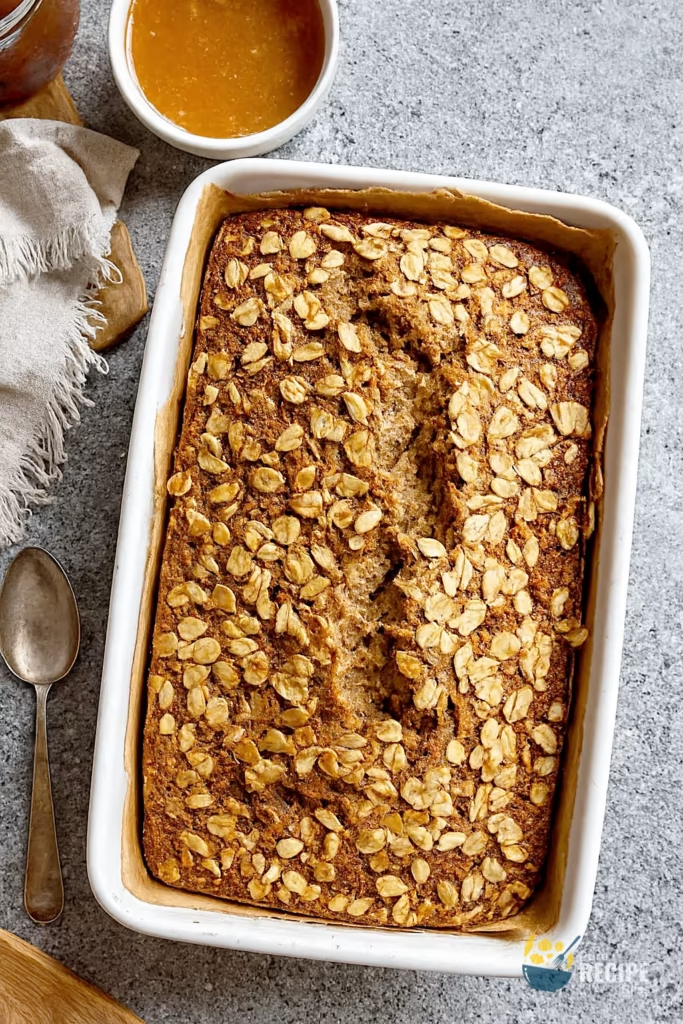
Step 5: Transfer to pan and top with oats
Pour the batter into a greased loaf pan and spread it evenly. Sprinkle oats on top for a light crunch. I sometimes press them down slightly so they stick better while baking.
Step 6: Bake until golden
Place the pan in the oven and bake until the top looks golden and springs back when touched. A toothpick should come out with a few moist crumbs, not wet batter. If the top browns too quickly, I loosely cover it with foil.
Step 7: Cool before slicing
Let the bread rest for a bit before cutting. If you slice too early, the steam makes the texture gummy. I usually wait until it feels just warm to the touch.
💡 Note: These steps are just an overview. For detailed quantities, measurements, and exact timings to make this recipe, please check the recipe card below.
Helpful Tips For The Best Results:
- Banana ripeness: Always use bananas that are very soft and spotty. I once tried with firm yellow bananas, and the bread didn’t taste as sweet or moist.
- Mixing control: Stir the batter gently and stop once the dry ingredients disappear. Overmixing makes the loaf dense, and I learned that the hard way when my bread turned chewy instead of tender.
- Heat adjustment: If the top browns too quickly, loosely cover the pan with foil. I usually check halfway through baking, because my oven tends to run hot.
- Ingredient swaps: Coconut oil works well, but I’ve also used vegetable oil when I ran out, and the bread still turned out fine. Just avoid butter if you want to keep the texture light.
- Texture check: The bread should spring back lightly when touched. If it feels too soft in the center, give it a little more time instead of slicing early.
Tasty Variations to Try:
- Nut swap: Replace walnuts with pecans for a softer crunch, or use almonds if you want a firmer bite.
- Chocolate twist: Add a handful of chocolate chips to make it sweeter. I’ve done this once, and it felt more like dessert than breakfast.
- Fruit mix-ins: Dried cranberries or raisins give a chewy texture. I like cranberries because they add a slight tartness.
- Spice change: Try adding extra cinnamon or even a pinch of cardamom for a different flavor.
- Seasonal idea: In cooler months, I sometimes add pumpkin spice instead of nutmeg, and it makes the bread feel more festive.
- Dietary option: A gluten-free flour blend can be used, though the texture may be a little softer. I tested it once, and while it wasn’t exactly the same, it was still enjoyable.
Serving Suggestions:
1. Breakfast slice:
Serve with a little butter or nut butter spread. It pairs well with coffee or tea in the morning when you want something filling but not heavy.
2. Afternoon snack:
Perfect for a quick bite with fruit on the side. I sometimes add apple slices or yogurt to make it feel more balanced.
3. After-dinner treat:
Pairs well with a warm drink like chai or hot chocolate. It’s not overly sweet, so it works as a light finish to the day.
4. Sharing option:
Serve cut into smaller squares for gatherings. It holds its shape well, so it’s easy to pass around without crumbling.
Storage & Reheating Tips:
- Room temperature storage: Keep healthy banana bread in a sealed container on the counter. It usually stays fresh for about two to three days, but I noticed it dries faster if left uncovered.
- Refrigeration: Store slices in the fridge if you want them to last longer. I usually wrap each piece in plastic or foil so they don’t pick up other smells.
- Freezing: Freeze individual slices for a few months. I like doing this because it makes reheating easier, and you can just take out what you need.
- Reheating: Warm a slice in the microwave for a short time or toast it lightly. I prefer the toaster because it gives the edges a nice crisp texture.
Frequently Asked Questions (FAQ):
-
Can I swap the flour?
Yes, you can use white whole wheat flour or even a gluten-free blend. I tried the gluten-free option once, and while the texture was softer, it still tasted good.
-
Can I make it ahead?
Absolutely. Healthy banana bread keeps well for a few days, and I often bake it the night before so it’s ready for breakfast. Freezing slices also works if you want to plan ahead.
-
Why is my bread too dense?
This usually happens if the batter is mixed too much. I learned to stop stirring once the flour disappears, otherwise the loaf turns heavy.
-
Can I reduce the sugar?
Since the recipe uses maple syrup and bananas, you can cut back slightly without losing flavor. I’ve done this before, and the bread still tasted sweet enough.
-
Is it dairy-free?
Yes, the recipe doesn’t use butter or milk. I’ve served it to friends who avoid dairy, and they enjoyed it without any changes.

Healthy Banana Bread
Description
Healthy banana bread is a soft, moist loaf made with ripe bananas, a mix of flours, and naturally sweetened with maple syrup. It’s simple to prepare, easy to adjust with mix-ins, and works well for breakfast, snacks, or even a light dessert.
Ingredients
Instructions
- Preheat oven to 350°F and lightly grease a loaf pan with 1 tsp coconut oil. Line with parchment if you prefer easier removal.
- Mash 2 ¼ cups ripe bananas (about 4 medium) in a large bowl until mostly smooth with a few small lumps.
- Add ½ cup melted coconut oil, ½ cup maple syrup, 2 large eggs, and 1 tsp vanilla extract. Whisk until mixture looks glossy and blended.
- In another bowl, combine 1 cup whole wheat flour, ¾ cup all-purpose flour, 1 tsp baking soda, ½ tsp ground cinnamon, ¼ tsp ground nutmeg, and ½ tsp sea salt. Mix well to avoid clumps.
- Gently fold the dry mixture into the wet mixture until just combined. Do not overmix.
- Stir in ½ cup chopped walnuts evenly through the batter.
- Pour batter into prepared loaf pan, spread evenly, and sprinkle 3 tbsp rolled oats on top.
- Bake for about 50 minutes, checking around 45 minutes. Bread should be golden and spring back when touched. A toothpick should come out with a few moist crumbs.
- Cool in pan for 10 minutes, then transfer to a wire rack. Slice once slightly warm or fully cooled.
Notes
- If the top browns too quickly, cover loosely with foil.
- Overripe bananas give the best flavor and moisture.
- For a lighter loaf, avoid stirring the batter too much.
Nutrition Facts
Servings 9
Serving Size 1 slice
- Amount Per Serving
- Calories 295kcal
- % Daily Value *
- Total Fat 14g22%
- Saturated Fat 9g45%
- Cholesterol 32mg11%
- Sodium 240mg10%
- Potassium 290mg9%
- Total Carbohydrate 38g13%
- Dietary Fiber 3g12%
- Sugars 14g
- Protein 5g10%
- Vitamin A 80 IU
- Vitamin C 4 mg
- Calcium 35 mg
- Iron 1.2 mg
* Percent Daily Values are based on a 2,000‑calorie diet, and your daily needs may be higher or lower depending on your lifestyle. Nutrition information is shared only as a general estimate and may not always be fully accurate. If you follow a special diet or have specific health concerns, it’s best to check with a registered dietitian for personalized guidance.