I wanted to share this recipe because mornings can get a little hectic, and having something ready to heat up makes life easier. These breakfast burritos are the kind of food you can prepare ahead of time, keep in the freezer, and then warm up whenever you need them.
They don’t take too long to put together, and they give you a filling option that works best in the morning but can also be handy for lunch or even a quick dinner. That’s why I keep coming back to them, and it’s the reason I thought you might like to try making them too.
What is Breakfast Burritos?
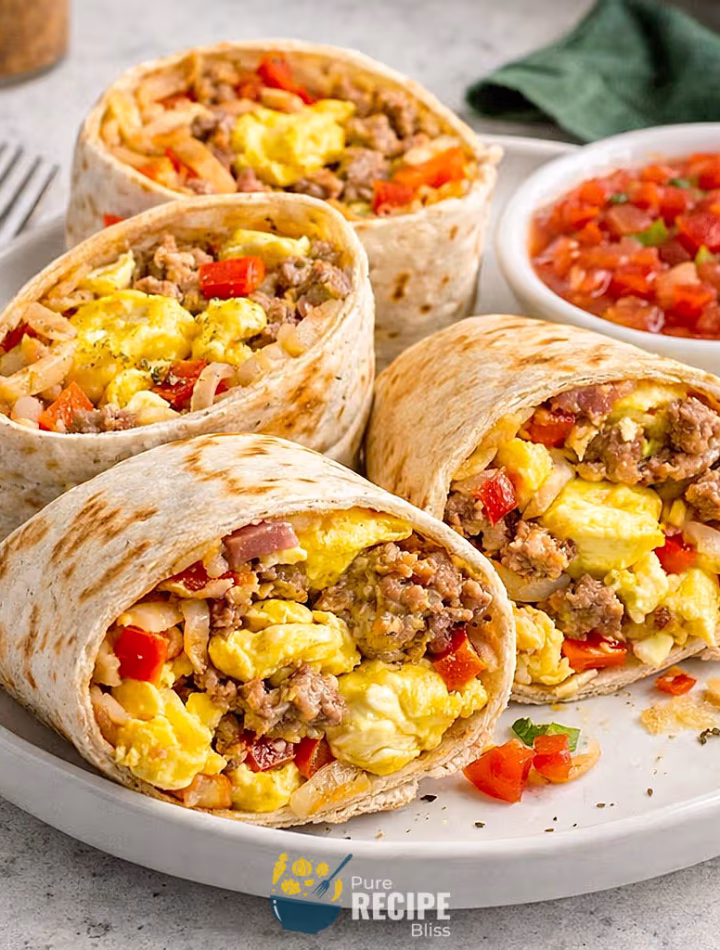
Breakfast burritos are basically flour tortillas filled with scrambled eggs, cheese, and a mix of meats and vegetables, then rolled up into a wrap. They are usually cooked just enough to hold together, and you can eat them fresh or save them for later.
Most people enjoy them in the morning because they are filling and easy to reheat, but they can also work for lunch or even a quick dinner if you don’t want to spend much time cooking. In many homes, they are served with salsa, sour cream, or guacamole on the side, which makes them taste even better.
They’ve become popular because you can make a batch ahead of time, freeze them, and then warm one up whenever you need something fast. That’s why they’re such a handy option for families or anyone who likes having ready-to-go meals.
Why You’ll Love This Recipe:
- Make-ahead convenience: You can prepare a batch of breakfast burritos in one go, and then keep them in the freezer so you don’t have to cook from scratch every morning. It saves time and makes mornings less stressful.
- Filling and satisfying: Each burrito has eggs, cheese, veggies, and meat, which means you get protein, carbs, and flavor all in one wrap. I’ve noticed they keep me full longer compared to just toast or cereal.
- Easy to change up: You don’t have to stick to the same fillings every time. I’ve swapped sausage for chicken, added spinach instead of peppers, and even tried black beans when I wanted a vegetarian version.
- Family-friendly option: My kids like grabbing one straight from the freezer and heating it up themselves. It’s simple enough that everyone can enjoy it without needing extra prep.
- Works for more than breakfast: Even though they’re called breakfast burritos, I’ve had them for lunch and dinner too. They’re handy when you don’t want to spend much time cooking but still want something warm and filling.
Ingredients Needed:
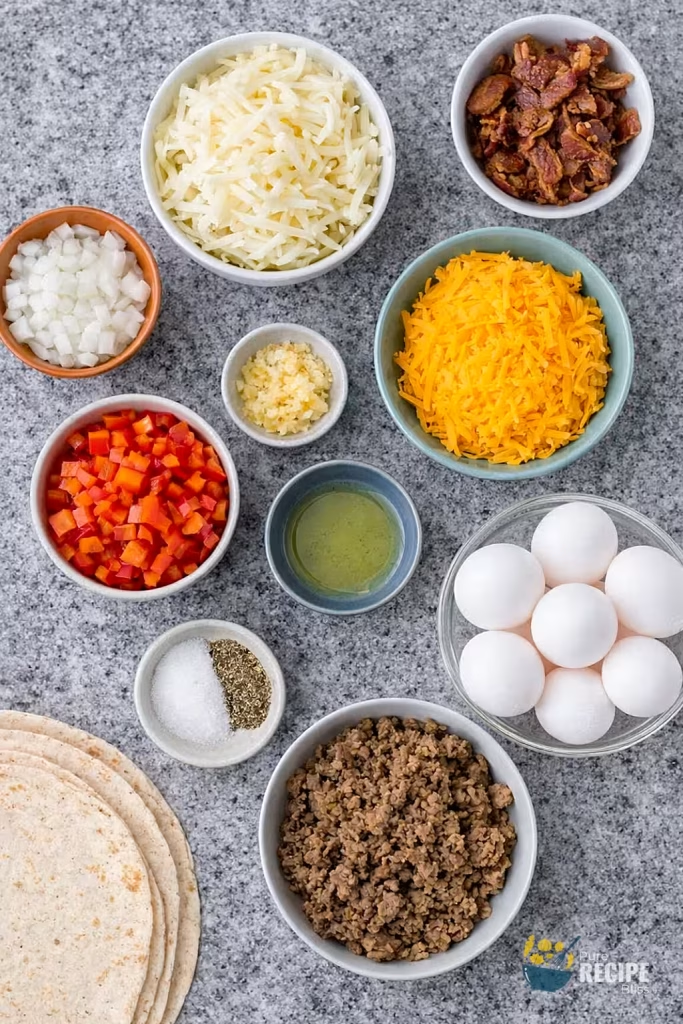
- Eggs: You’ll need about ten large eggs, and I’ve found that scrambling them until they’re just set works best because they stay softer inside the burrito.
- Olive oil or butter: A small amount helps keep the veggies and potatoes from sticking, and butter gives a richer taste if you prefer that.
- Onion: Diced onion adds flavor and a bit of texture, and I usually cook it until it’s slightly golden before mixing it in.
- Hash browns: Using thawed shredded hash browns makes the filling more hearty, and they crisp up nicely when cooked in the pan.
- Red bell pepper: This adds color and a mild sweetness, and I like how it balances the saltiness from the meat.
- Garlic: A spoonful of minced garlic gives a stronger flavor, but I usually add it toward the end so it doesn’t burn.
- Sausage and bacon: Cooked and crumbled sausage with crispy bacon makes the burritos more filling, and you can swap them for turkey sausage or even leftover chicken if you want something lighter.
- Cheddar cheese: Shredded cheese melts into the eggs and holds everything together, and I’ve noticed it helps the burrito taste less dry.
- Salt and pepper: A simple seasoning that makes a big difference, and I always add it while scrambling the eggs.
- Flour tortillas: Eight-inch tortillas are the right size for rolling, and warming them first makes them easier to fold without breaking.
💡 Note: For the full ingredient list with exact amounts and measurements, please check the recipe card below.
Kitchen Gadgets & Tools You’ll Need:
- Large skillet: This is where you’ll scramble the eggs and cook the veggies and meat. I like using one big pan so everything comes together without needing extra dishes.
- Mixing bowl: After scrambling the eggs, I usually transfer them to a bowl to keep them warm while finishing the rest of the filling.
- Wooden spoon or spatula: A spatula works best for stirring the eggs gently and for folding the cheese into the hot mixture so it melts evenly.
- Sharp knife and cutting board: You’ll need these for chopping onions, peppers, and any other veggies you decide to add.
- Measuring cups and spoons: These help keep the portions balanced, especially for the cheese and seasonings.
- Tongs or flat spatula: When browning the burritos seam-side down, I find tongs make it easier to flip them without tearing the tortilla. You can try this tong if you don’t have one.
- Freezer-safe bags or containers: If you plan to store them, having good bags or containers keeps the burritos fresh and prevents freezer burn. I use these freezer-safe bags.
- Microwave and paper towels: For reheating, wrapping the burrito in a damp paper towel before microwaving keeps the tortilla soft instead of drying out.
Step-By-Step Instructions to Make Breakfast Burritos:
Before I discuss the steps, do you know letting the filling cool a little before rolling makes a big difference. If you wrap them while everything is steaming hot, the tortillas get soggy later when you freeze them.
Step 1: Scramble the eggs
Start by cooking the eggs in a skillet until they are just set. They don’t need to be browned or overcooked because they will continue to warm inside the burrito later. I usually stir them slowly so they stay soft and fluffy.
Step 2: Cook the veggies and potatoes
In the same pan, add the onion, peppers, and hash browns with a little oil. Keep stirring until the potatoes look golden and the peppers soften. I’ve noticed that cooking them until they have a slight crisp makes the burritos taste better.
Step 3: Add garlic, meat, and eggs back in
Once the veggies are ready, stir in the garlic, sausage, and bacon. Then add the scrambled eggs back to the pan. Mix everything together so the flavors combine. I like to sprinkle the cheese at this point because it melts into the hot mixture instead of clumping.
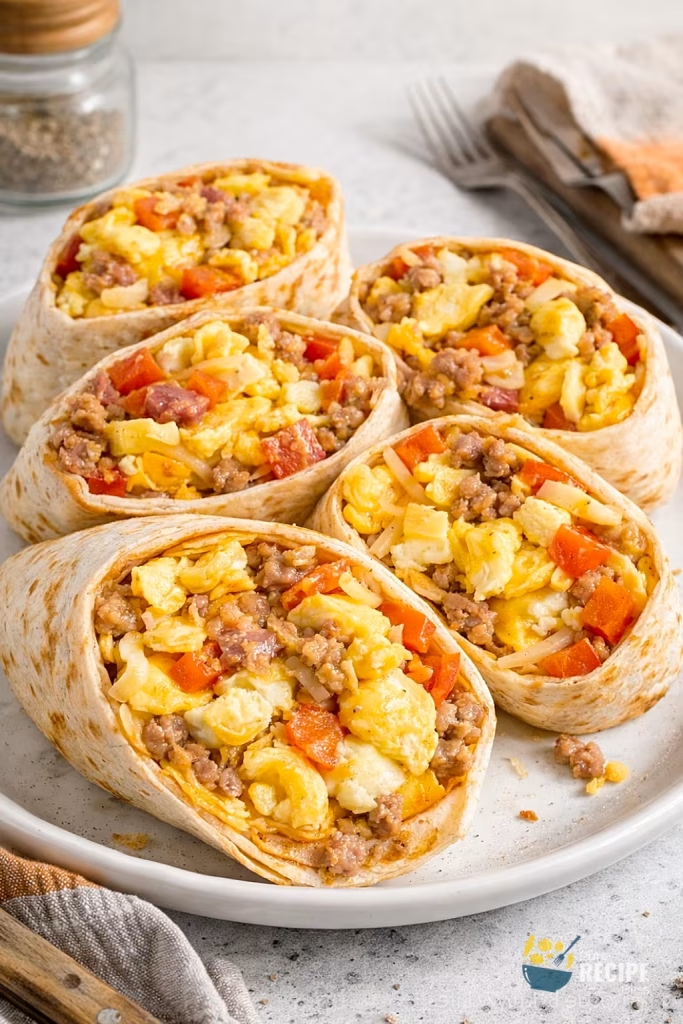
Step 4: Fill and roll the tortillas
Spoon the mixture into the center of each tortilla. Fold the sides in first, then roll tightly so the filling doesn’t spill out. Warming the tortillas beforehand makes this step easier.
Step 5: Brown the burritos in a pan
Place the rolled burritos seam-side down in a hot skillet. Cook each side until lightly golden. This step helps seal the wrap and gives a nice texture. I once skipped this, and the burritos opened up in the freezer, so now I always do it.
Step 6: Cool and store
Let the burritos cool on a tray before wrapping or freezing. Cooling prevents condensation, which can make the tortillas soggy. Once cooled, you can store them in bags or containers.
💡 Note: These steps are just an overview. For detailed quantities, measurements, and exact timings to make this recipe, please check the recipe card below.
Helpful Tips For The Best Results:
- Control the heat: When scrambling the eggs, keep the heat on medium so they don’t turn rubbery. I once cooked them too hot, and they ended up dry inside the burrito.
- Don’t skip warming tortillas: A quick warm-up makes the wraps flexible, and it prevents cracking when you roll them. Cold tortillas almost always split.
- Cheese placement matters: Add the cheese while the filling is still hot so it melts in smoothly. If you wait too long, it clumps instead of blending.
- Cool before freezing: Let the burritos sit out until room temperature. If you freeze them while steaming, the moisture makes the tortillas soggy later.
- Ingredient swaps that work: I’ve tried turkey sausage instead of pork, and it tasted lighter but still filling. Black beans also work well if you want a vegetarian option.
Tasty Variations to Try:
- Vegetarian option: Skip the meat and add roasted potatoes with black beans. It still feels hearty and keeps the protein balance.
- Spicy version: Add jalapeños or drizzle hot sauce inside before rolling. I’ve done this when I wanted more kick, and it worked well.
- Seasonal veggies: Use spinach in spring, zucchini in summer, or roasted pumpkin in fall. It keeps the burritos interesting throughout the year.
- Cheese swap: Try mozzarella for a milder flavor or pepper jack for extra spice. Each one changes the taste without changing the process.
- Herb boost: Fresh cilantro or parsley added at the end gives a fresh flavor. I like sprinkling them right before rolling.
- Breakfast-for-dinner twist: Replace sausage with shredded chicken or leftover steak, and it feels more like a dinner wrap than a morning one.
Serving Suggestions:
- Morning meal: Breakfast burritos are perfect for busy mornings when you want something filling but don’t have time to cook. Serve with a glass of orange juice or coffee for a complete start.
- Lunch option: They also work well for lunch because they are easy to reheat and pair nicely with a small salad or fresh fruit on the side.
- Dinner idea: If you don’t feel like cooking a big dinner, these burritos can be served with roasted vegetables or a bowl of soup to make them more satisfying.
- Snack or party food: Cut them in half and serve with salsa or guacamole. They make a handy snack or even a casual party dish when you want something simple.
Storage & Reheating Tips:
- Fridge storage: Breakfast burritos can be kept in the refrigerator for a few days if wrapped tightly in foil or plastic. This keeps them fresh and prevents the tortillas from drying out.
- Freezer storage: For longer storage, place cooled burritos in freezer-safe bags or containers. They usually stay good for up to two months without losing much flavor.
- Reheating from fridge: Unwrap and microwave with a damp paper towel around the burrito. This keeps the tortilla soft while heating evenly.
- Reheating from freezer: Remove any wrapping, cover with a damp paper towel, and microwave until hot. Rotating halfway helps avoid cold spots in the filling.
Frequently Asked Questions (FAQ):
-
Can I substitute the meat?
Yes, you can swap sausage or bacon for turkey, chicken, or even beans if you want a lighter or vegetarian version. I’ve tried black beans, and they worked well with the eggs and cheese.
-
Can I make breakfast burritos ahead of time?
Absolutely, you can prepare them in advance, cool them properly, and then freeze. This way, you’ll always have a quick meal ready to heat up.
-
Why do my tortillas crack when rolling?
Usually, it happens if the tortillas are cold. Warming them for a few seconds makes them flexible and easier to fold.
-
Are breakfast burritos good for special diets?
They can be adjusted easily. Use whole wheat tortillas for more fiber, skip the meat for vegetarian, or add more veggies if you want a lighter option.
-
How do I keep the texture soft after reheating?
Wrapping the burrito in a damp paper towel before microwaving helps keep the tortilla soft and prevents it from drying out.
Breakfast Burritos

These breakfast burritos are hearty wraps filled with eggs, cheese, veggies, and meat. They are freezer-friendly, easy to reheat, and make mornings less stressful. I like making a batch ahead so there’s always something filling ready to grab.
Ingredients
- 10 large eggs
- 1 cup cooked ground sausage
- ½ cup cooked crumbled bacon
- 1¼ cups shredded cheddar cheese
- ½ cup diced onion
- 1 cup diced red bell peppers
- 1 cup shredded hash brown potatoes, thawed
- 1 tbsp minced garlic
- ½ tbsp olive oil (or butter)
- 8 flour tortillas (8-inch size)
- Salt and pepper, to taste
Instructions
- Crack 10 large eggs into a bowl, whisk, then scramble in a large skillet over medium heat until just set. Transfer to a bowl and cover to keep warm.
- In the same skillet, heat ½ tbsp olive oil. Add ½ cup diced onion, 1 cup diced red bell peppers, and 1 cup thawed shredded hash browns. Cook until potatoes are golden and peppers soften.
- Stir in 1 tbsp minced garlic, 1 cup cooked ground sausage, and ½ cup crumbled bacon. Mix well, then return the scrambled eggs to the pan. Sprinkle 1¼ cups shredded cheddar cheese and stir until melted. Season with salt and pepper.
- Warm 8 flour tortillas briefly in a skillet or microwave. Spoon filling into the center of each tortilla, fold sides in, and roll tightly.
- Place burritos seam-side down in a hot skillet. Brown each side for 30-60 seconds until lightly golden.
- Cool burritos on a tray for 10 minutes before wrapping. Store in fridge for 3-4 days or freeze up to 2 months.
- To reheat: Microwave refrigerated burritos for 1 minute wrapped in a damp paper towel. For frozen, microwave 2 minutes, rotating halfway.
Notes
Nutrition Information
Yield 8 servings Serving Size 1 burritoAmount Per Serving Calories 549Total Fat 31gSaturated Fat 10gTrans Fat 0gUnsaturated Fat 19gCholesterol 272mgSodium 912mgCarbohydrates 33gNet Carbohydrates 20gFiber 13gSugar 2gSugar Alcohols 0gProtein 32g
Percent Daily Values are based on a 2,000‑calorie diet, and your daily needs may be higher or lower depending on your lifestyle. Nutrition information is shared only as a general estimate and may not always be fully accurate. If you follow a special diet or have specific health concerns, it’s best to check with a registered dietitian for personalized guidance.