I’ve been trying out a homemade French bread recipe, and I was surprised at how quick it came together compared to what I expected. It doesn’t feel like one of those all‑day projects, because the dough is simple to mix and the rise time is manageable. That means you can actually bake fresh bread without planning your whole day around it.
The nice part is that it works for different meals. I’ve had it warm at dinner with soup, sliced for lunch sandwiches, and even toasted in the morning with butter. It’s the kind of bread that fits into everyday cooking, and that’s why I wanted to share it before explaining more about what French bread really is.
What is Homemade French Bread?
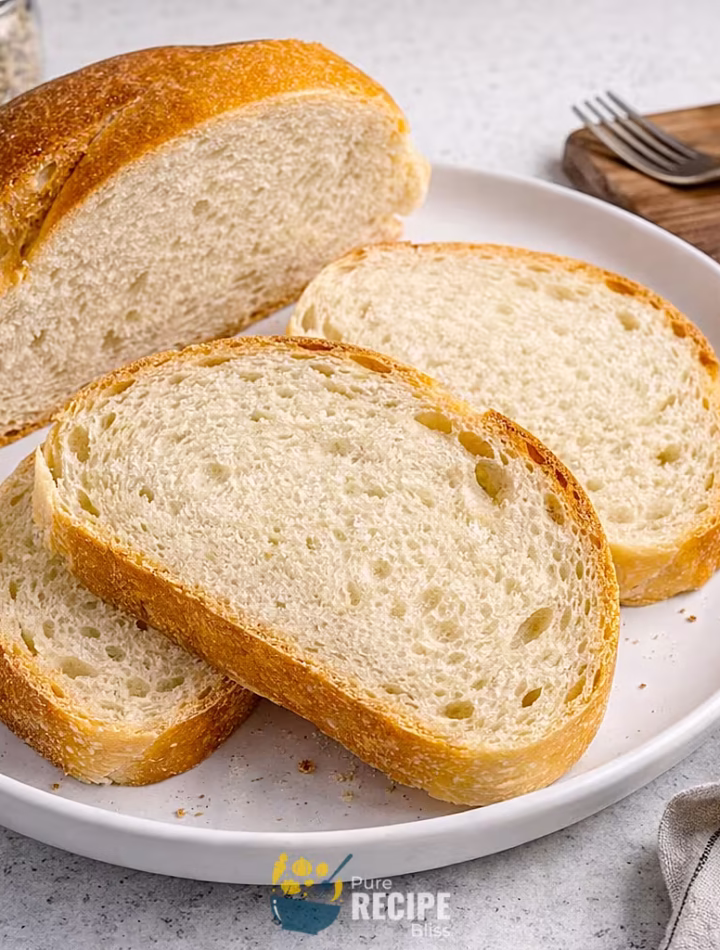
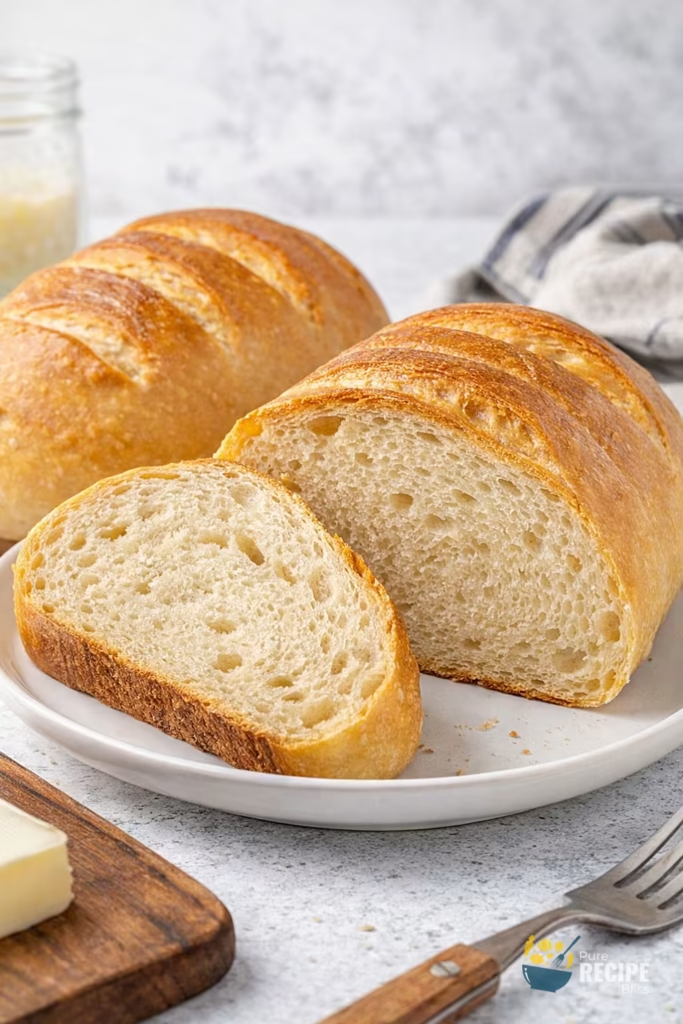
French bread is a type of loaf that is known for being soft inside with a light crust on the outside. It’s not the same as the traditional crusty baguette you might picture, because this version has a little butter added, which makes the texture more tender and easier to slice.
It’s usually eaten in simple ways, like sliced for sandwiches, served with soups, or placed on the table at dinner. Some people also enjoy it toasted for breakfast or as part of a snack with cheese or spreads. The idea is that it’s versatile and fits into everyday meals without being complicated.
This makes it a practical bread to bake at home, especially when you want something fresh that can be used across different meals.
Why You’ll Love This Recipe:
- Quick to make: The nice thing about homemade French bread is that it doesn’t take all day. The dough comes together fast, and the rise times are short enough that you can actually bake it on a regular weekday without feeling rushed.
- Soft texture: The bread turns out light inside with a gentle crust outside, which makes it easy to slice and enjoy. I noticed it stays tender even the next day, so it works well for sandwiches or toast.
- Beginner-friendly process: Even if you don’t bake bread often, this recipe is forgiving. The dough isn’t sticky, and shaping it feels manageable once you’ve tried it once.
- Easy to adjust: You can make two loaves, or you can divide the dough into rolls if you want something smaller. I’ve tried brushing the top with butter after baking, and it gave the crust a softer finish that I really liked.
- Versatile for meals: It fits into different parts of the day like breakfast with butter, lunch as a sandwich base, or dinner alongside soup. That flexibility makes it worth keeping in your regular rotation.
Ingredients Needed:
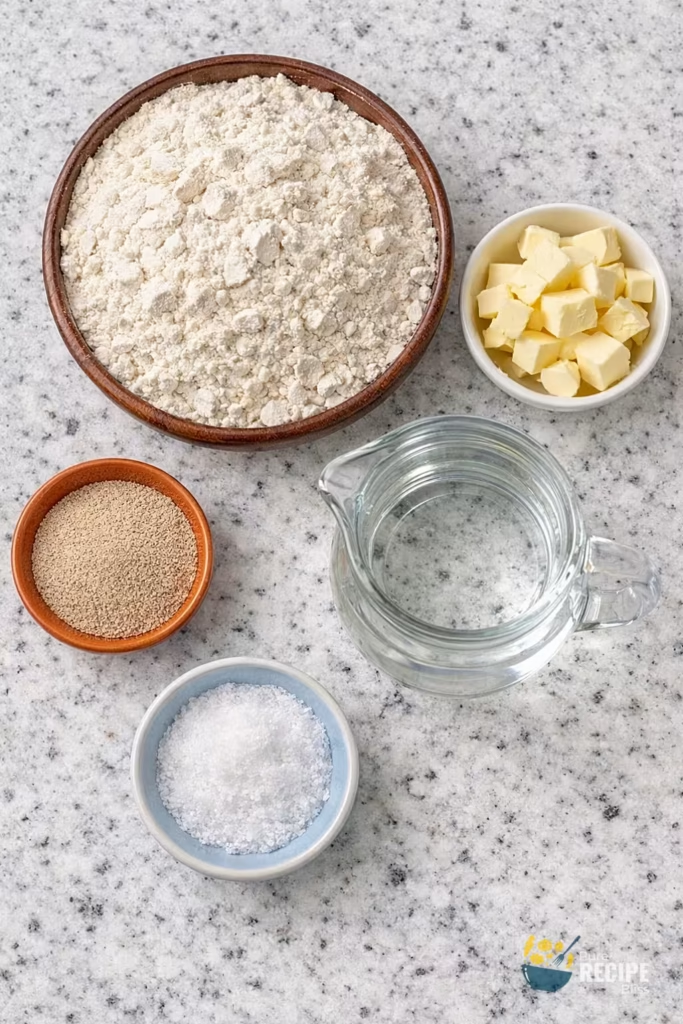
- Warm water: You’ll need water that feels warm but not hot, because if it’s too hot it can kill the yeast. I usually test it with my finger, and if it feels like comfortable bath water, then it’s fine.
- Instant yeast: This helps the dough rise faster, and it saves time compared to active dry yeast. If you only have active dry yeast, you can still use it, but the rise will take longer.
- All-purpose flour: I like using all-purpose flour because it gives a softer texture. Bread flour works too, but it makes the bread a little chewier, which some people prefer.
- Salt: Salt is important because it adds flavor and also helps the dough hold its shape. Without it, the bread tastes flat and the texture isn’t as good.
- Butter: Adding butter makes the bread softer and gives a nice flavor. I’ve tried using oil before, but butter gave me better results, so I stick with that.
💡 Note: For the full ingredient list with exact amounts and measurements, please check the recipe card below.
Kitchen Gadgets & Tools You’ll Need:
- Large mixing bowl: You’ll need a sturdy bowl to bring the dough together. I find it easier to use one that’s wide enough so I can mix without spilling flour everywhere.
- Wooden spoon or silicone spatula: This helps when combining the flour and yeast mixture. A spoon works fine, but I like a silicone spatula because it scrapes the sides clean.
- Stand mixer with dough hook (optional): If you don’t want to knead by hand, a mixer saves time. I’ve tried both ways, and honestly, kneading by hand gives me better control over the dough texture.
- Sharp knife or bread lame: You’ll need something sharp to score the loaves before baking. I once used a dull knife, and the cuts didn’t open properly, so now I always keep a sharp blade ready.
- Baking sheet with parchment paper: A flat baking sheet lined with parchment makes it easy to transfer the loaves and prevents sticking. I prefer using one with a rim so it feels more secure when moving it in and out of the oven.
- Wire cooling rack: Cooling the bread on a rack helps keep the crust from getting soggy. I learned that leaving it on the baking sheet traps steam underneath, which softens the bottom too much. Here’s the one I use.
Step-By-Step Instructions to Make Homemade French Bread:
When I first tried making this bread at home, I realized that the dough feels very different once the butter is added. At first it looks messy and uneven, but if you keep going, it smooths out and becomes soft. That was something I had to learn by doing, because I almost thought I had ruined it the first time.
Step 1: Bloom the yeast
Start by mixing the yeast into warm water. It should look foamy after a few minutes, which tells you it’s alive and ready. If nothing happens, it usually means the yeast is old.
Step 2: Mix the dough
Add flour and salt to the yeast water and stir until everything comes together. The dough will look rough at first, but that’s normal. Don’t worry if it feels a little shaggy, because kneading will fix that.
Step 3: Knead until elastic
Work the dough until it stretches without tearing. I usually check by pulling a small piece thin enough to see light through it. It doesn’t need to be perfect, just strong enough to hold together.
Step 4: Add the butter
Mix in cubes of butter. At first, the dough looks greasy and uneven, but keep kneading until it blends in. The dough will feel softer and slightly shiny once it’s ready.
Step 5: First rise
Place the dough in a lightly oiled bowl and cover it. Leave it until it doubles in size. The dough should feel airy and spring back gently when pressed.
Step 6: Divide and preshape
Turn the dough out and split it into two pieces. Shape each into a round ball and let them rest. This step makes the dough easier to handle later.
Step 7: Shape into loaves
Roll each ball into a log shape, tapering the ends slightly. Pinch the seams tightly so they don’t open in the oven. I learned that loose seams can ruin the shape.
Step 8: Second rise
Place the shaped loaves on parchment paper and cover them loosely. Let them puff up again until they look light and airy.
Step 9: Score the dough
Use a sharp knife or blade to make three diagonal cuts across each loaf. The cuts should be deep enough to let the bread expand while baking.
Step 10: Bake until golden
Put the loaves in the oven and bake until the crust turns golden brown. The bread should sound hollow when tapped on the bottom.
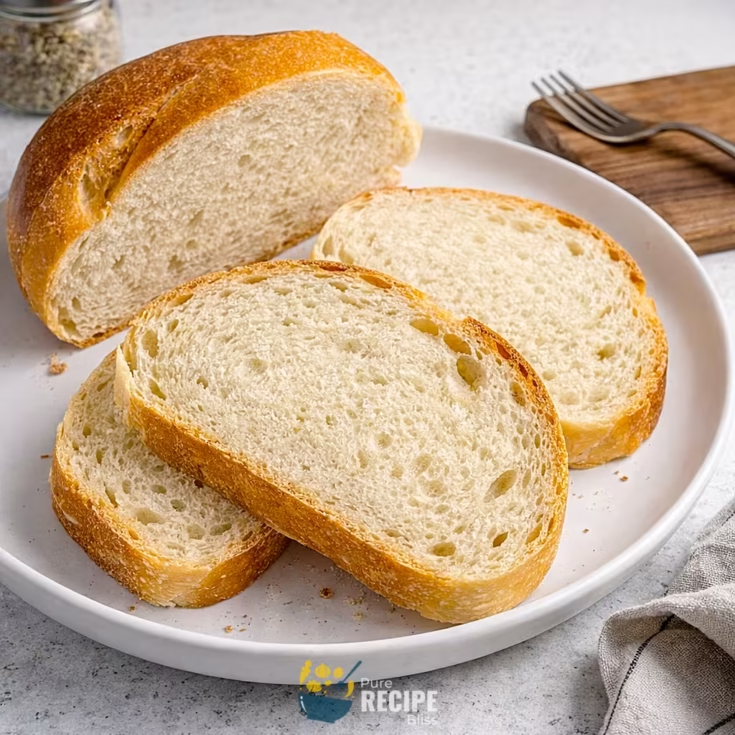
Step 11: Cool before slicing
Let the bread rest on a wire rack before cutting. If you slice too soon, the crumb gets squished. Waiting a little makes the slices cleaner and softer.
💡 Note: These steps are just an overview. For detailed quantities, measurements, and exact timings to make this recipe, please check the recipe card below.
Helpful Tips For The Best Results:
- Watch the dough texture: The dough should feel soft and elastic, not sticky. If it feels too wet, add just a little flour, but don’t overdo it because that can make the bread dry.
- Control the heat: Make sure your oven is fully preheated before baking. If the oven is too cool, the bread won’t rise properly, and if it’s too hot, the crust will brown too quickly while the inside stays underdone.
- Swap ingredients carefully: If you don’t have butter, you can use olive oil, but the flavor will be different. Butter gives a softer crumb, while oil makes it slightly chewier.
- Don’t rush the rise: Let the dough double in size before shaping. If you cut the rise short, the bread will taste yeasty and the texture will be dense.
- Score with confidence: When you cut the top before baking, make sure the slashes are deep enough. Shallow cuts don’t open well, and the bread can split at the seams instead.
Tasty Variations to Try:
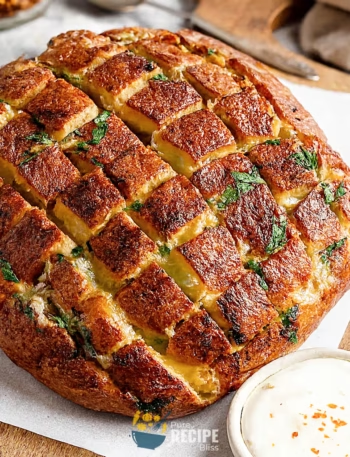
- Garlic butter loaf: Mix in roasted garlic with the butter for a savory version that smells amazing when toasted.
- Whole wheat option: Replace part of the flour with whole wheat flour. It makes the bread heartier but still soft enough to slice.
- Cheese topping: Sprinkle shredded cheese on top before baking. I’ve tried cheddar, and it melts into a golden crust that’s fun for snacks.
- Seeded crust: Brush the dough with egg wash and add sesame or poppy seeds. It gives a nice crunch and looks pretty on the table.
- Herb twist: Add dried herbs like rosemary or thyme into the dough. It changes the flavor slightly and pairs well with soups.
- Mini rolls: Shape the dough into small rolls instead of loaves. They bake faster and are easy to serve at gatherings.
Serving Suggestions:
1. Dinner side:
Serve with soups or stews, because the bread is soft enough to soak up broth without falling apart.
2. Lunch option:
Perfect for sandwiches, since the slices hold fillings well and stay tender.
3. Breakfast idea:
Pairs well with butter or jam when lightly toasted, making it a simple morning choice.
4. Snack plate:
Serve with cheese and spreads for a quick snack board when you have guests.
5. Seasonal use:
Works nicely at holiday meals, especially when brushed with butter and sprinkled with herbs.
Storage & Reheating Tips:
- Best storage method: Keep homemade French bread in an airtight bag or container at room temperature. This helps prevent it from drying out too quickly.
- How long it keeps: The bread usually stays soft for about three days. After that, it starts to lose freshness, but it can still be toasted.
- Freezing option: Slice the bread before freezing so you can take out only what you need. It reheats well straight from the freezer.
- Simple reheating advice: Warm slices in the oven for a few minutes until soft, or toast lightly for a crisp edge. Avoid microwaving because it makes the bread chewy.
Frequently Asked Questions (FAQ):
-
Can I swap the butter for oil?
Yes, you can use olive oil or vegetable oil instead of butter, but the bread will taste slightly different and the texture may be a little chewier.
-
Can I make French bread ahead of time?
You can prepare the dough and let it rise in the fridge overnight. Just bring it back to room temperature before shaping and baking.
-
Why does my bread turn out dense?
Usually this happens if the dough didn’t rise long enough or if too much flour was added during shaping. Try letting it proof fully and avoid adding extra flour.
-
Is there a way to make it healthier?
You can replace part of the flour with whole wheat flour. It makes the bread a bit heavier but adds more fiber and flavor.
-
Can I make it dairy-free?
Yes, you can skip the butter and use oil instead. The bread will still be soft, but the flavor will be slightly different.
Homemade French Bread
This is a soft, buttery loaf that you can bake at home without much effort. The dough is easy to handle, and the bread comes out light inside with a golden crust. It works for sandwiches, soups, or even breakfast toast.
Ingredients
- 4 ½ cups all-purpose flour (or bread flour)
- 1 ¾ cups warm water (100–110°F)
- 2 ½ teaspoons kosher salt (or 1 ¼ teaspoons table salt)
- ¼ cup unsalted butter, cubed
- 2 ½ teaspoons instant yeast (1 packet rapid rise)
Instructions
- Combine 1 ¾ cups warm water with 2 ½ teaspoons instant yeast in a small bowl and let it sit until foamy.
- In a stand mixer bowl, add 4 ½ cups flour and 2 ½ teaspoons salt, then pour in the yeast mixture. Mix until shaggy dough forms.
- Knead on medium speed for 4–5 minutes until elastic and smooth.
- Add ¼ cup cubed butter and knead until fully incorporated. Dough will look rough at first but smooths out with time.
- Place dough in a lightly oiled bowl, cover, and let rise until doubled (about 45-60 minutes).
- Turn dough onto a lightly floured surface, divide into two equal pieces (about 485 g each), and shape each into a round ball.
- Let dough balls rest covered for 15-20 minutes.
- Shape into bâtards (logs with tapered ends), pinching seams tightly to prevent splitting.
- Place loaves on parchment-lined baking sheet, cover loosely, and let rise until doubled (30-45 minutes).
- Preheat oven to 375°F. Score each loaf with 3 diagonal cuts about ½ inch deep.
- Bake for 28-30 minutes until golden brown and hollow-sounding when tapped.
- Cool on wire rack for at least 15 minutes before slicing.
Notes
Nutrition Information
Yield 24 Serving Size 1 sliceAmount Per Serving Calories 106Total Fat 2gSaturated Fat 1gTrans Fat 0.1gUnsaturated Fat 1.2gCholesterol 5mgSodium 244mgCarbohydrates 18gNet Carbohydrates 17gFiber 1gSugar 0.1gProtein 3g
Percent Daily Values are based on a 2,000‑calorie diet, and your daily needs may be higher or lower depending on your lifestyle. Nutrition information is shared only as a general estimate and may not always be fully accurate. If you follow a special diet or have specific health concerns, it’s best to check with a registered dietitian for personalized guidance.