So, whenever I think about Kimchi Fried Rice, it feels like one of those dishes that saves the day when I don’t want to spend too much time in the kitchen. It’s quick to put together, and honestly, it always tastes like more effort went into it than it really did.
I usually make it when I want something warm and filling without being heavy, and it works for lunch or dinner, or even as a late snack when I’m craving something bold. It’s the kind of recipe that feels reliable, and that’s why I keep coming back to it.
What is Kimchi Fried Rice?
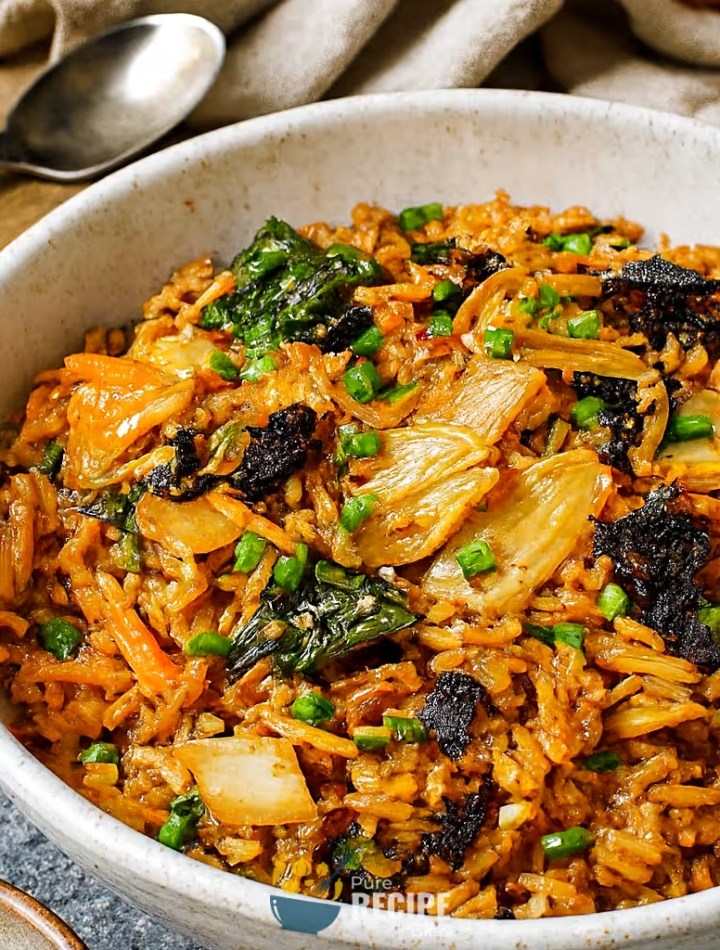
Kimchi Fried Rice is a classic Korean dish that mixes tangy fermented kimchi with rice and a few seasonings to create something bold and satisfying. It’s basically a quick stir-fry, but the flavor feels much deeper because of the fermented chili paste and sesame oil that go into it.
Most people enjoy it as a main meal, especially for lunch or dinner, but it can also be served as a side with grilled meats or even topped with a fried egg. In Korean homes, it’s often made with leftover rice and kimchi, which makes it both practical and comforting at the same time.
Why You’ll Love This Recipe:
- Quick to make: Kimchi Fried Rice comes together in just about ten minutes once you have the rice and kimchi ready, so it’s one of those dishes you can pull off even when you don’t feel like spending too much time in the kitchen.
- Uses everyday ingredients: Most of the items are things you probably already have at home, like rice, oil, and kimchi. I’ve noticed that even when I don’t have furikake, roasted seaweed flakes work fine, so it’s flexible.
- Easy to adjust: You can make it spicier with chili flakes or keep it mild if you prefer. I once added extra sesame oil because I like the nutty flavor, and it turned out even better.
- Comforting and filling: The mix of tangy kimchi and warm rice feels satisfying without being heavy. I usually top mine with a fried egg, and it makes the whole dish feel more complete.
- Great for leftovers: Day‑old rice and kimchi that’s been sitting for a while actually make the flavor stronger, so it’s a smart way to use what you already have instead of wasting food.
Ingredients Needed:
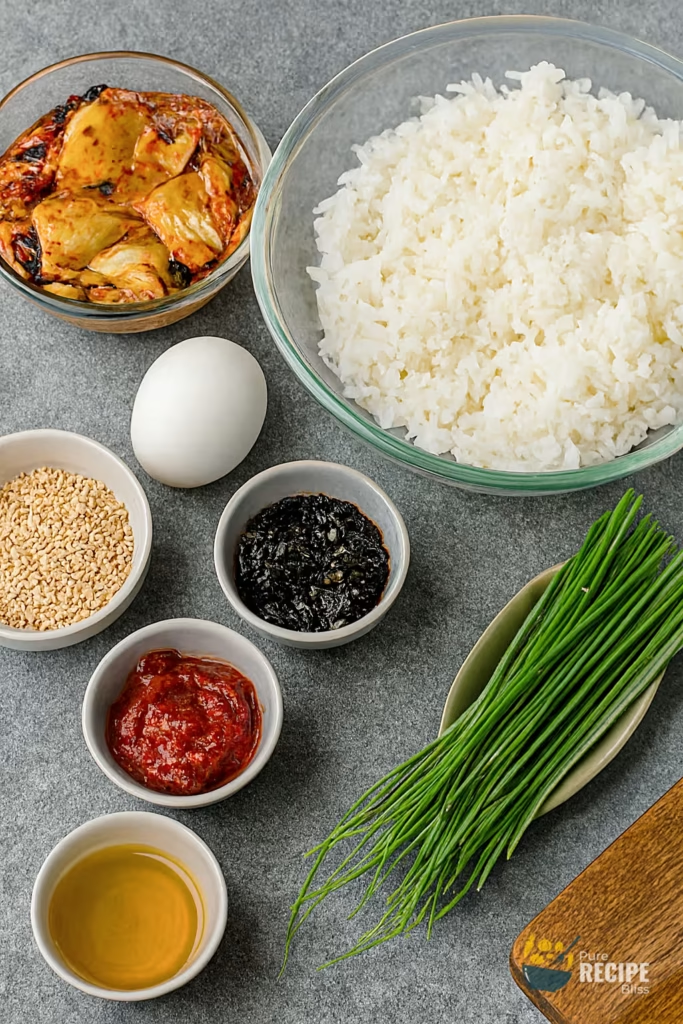
- Cooked rice: Day‑old rice works best because the grains are firmer and less sticky, so the fried rice turns out with better texture. I sometimes spread fresh rice on a tray to cool it quickly when I don’t have leftovers.
- Kimchi: This is the main flavor, giving the rice that tangy and spicy kick. I’ve noticed that older kimchi actually makes the dish taste deeper, so don’t worry if yours has been sitting in the fridge for a while.
- Gochujang: This fermented chili paste adds a sweet‑savory balance. I like to stir in a little extra when I want more heat, but you can adjust it to your taste.
- Sesame oil and seeds: These give a nutty aroma and a bit of crunch. I usually drizzle a touch more sesame oil at the end because it makes the rice smell amazing.
- Furikake or seaweed flakes: This adds texture and a briny flavor. If I don’t have furikake, I just crush roasted seaweed sheets, and it works fine.
- Spring onions: They bring freshness and color. I like to save a handful for topping at the end because it makes the dish look brighter.
- Cooking oil: Any neutral oil like vegetable or canola works. I’ve tried with sunflower oil once, and it didn’t change the taste much, so use what you have.
- Optional fried egg: Adding a fried egg on top makes the meal more filling and gives it that extra comfort factor.
💡 Note: For the full ingredient list with exact amounts and measurements, please check the recipe card below.
Kitchen Gadgets & Tools You’ll Need:
- Non‑stick wok or large pan: A wok makes stir‑frying easier because the heat spreads evenly, and the rice doesn’t stick as much. I’ve tried using a regular frying pan before, and while it works, the wok really helps keep the grains fluffy (see the one I use).
- Wooden spatula or rice paddle: This is handy for breaking up clumps of rice without scratching the pan. I noticed that using a metal spoon sometimes crushes the grains too much, so the wooden one feels gentler.
- Mixing bowl: You’ll need a bowl to squeeze and chop the kimchi before cooking. I usually keep one medium‑sized bowl nearby so I can quickly transfer the kimchi juices back into the rice later.
- Sharp knife and cutting board: A good knife makes chopping kimchi and spring onions faster. I once tried with a dull knife, and it made the process messy, so keeping a sharp one ready saves time.
- Measuring spoons: These help keep the seasoning balanced. I sometimes eyeball sesame oil, but when I measured properly, the flavor came out more consistent.
Step-By-Step Instructions to Make Kimchi Fried Rice:
You know that squeezing the kimchi really well before cooking makes a big difference. If you leave too much liquid, the rice can turn soggy, so I always take a minute to press it out firmly.
Step 1: Prepare the kimchi
Chop the kimchi into smaller pieces after squeezing out the juices. Keep the liquid aside because it adds flavor later. This way the rice gets the tangy taste without being too wet.
Step 2: Heat the pan
Warm up a wok or non‑stick pan with a little vegetable oil and sesame oil. Once it feels hot enough, add the kimchi and stir it around until it smells fragrant. I usually wait until the edges look slightly caramelized because that’s when the flavor deepens.
Step 3: Add the rice
Put in the day‑old rice and break up any clumps with a spatula. Stir it together with the kimchi until the grains look evenly coated. I press the rice down gently so it mixes better, and I keep moving it so nothing sticks at the bottom.
Step 4: Season with gochujang and kimchi liquid
Add the reserved kimchi liquid and a spoonful of gochujang. Stir until the rice looks glossy and evenly colored. If it feels too dry, I splash in a little water, but only enough to loosen it without making it watery.
Step 5: Finish with toppings
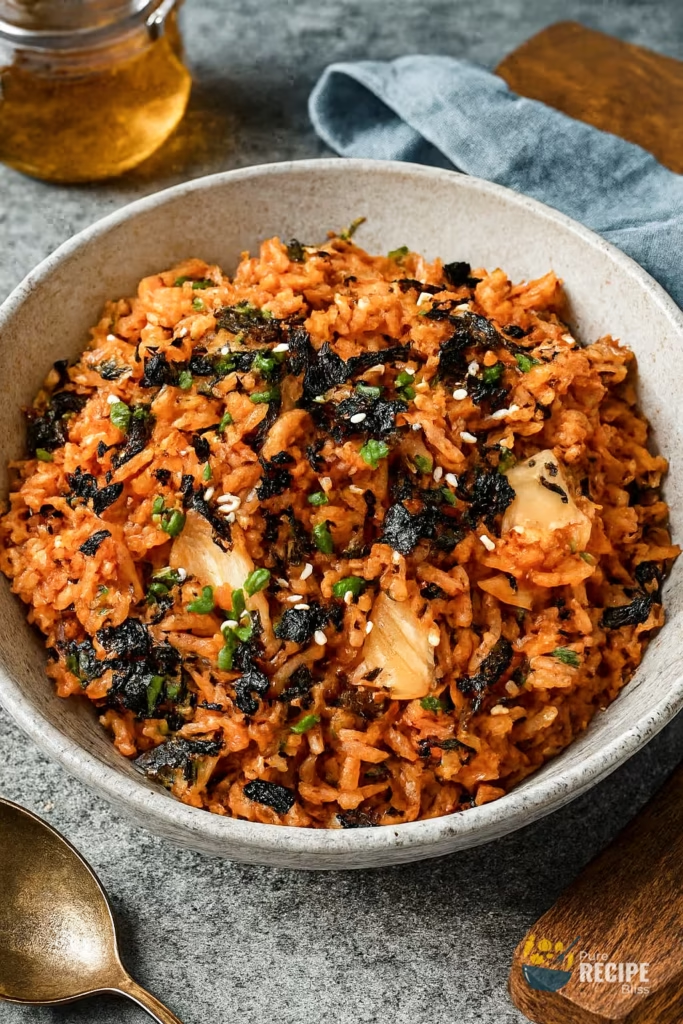
Turn off the heat and mix in chopped spring onions, furikake, and sesame seeds. I like to save a bit of furikake for sprinkling on top after plating because it adds crunch.
Step 6: Serve with egg (optional)
Scoop the rice into bowls and, if you want, add a fried egg on top. I find the runny yolk makes the dish richer and more comforting.
💡 Note: These steps are just an overview. For detailed quantities, measurements, and exact timings to make this recipe, please check the recipe card below.
Helpful Tips For The Best Results:
- Texture matters: Make sure the rice is dry enough before cooking. I once tried with freshly cooked rice, and it clumped together, so now I always cool it down first or use leftovers.
- Control the heat: Keep the pan on medium heat so the rice doesn’t burn at the bottom. I noticed that high heat makes the grains stick too quickly, while lower heat keeps them separate.
- Balance the seasoning: Taste before adding more salt because kimchi and gochujang already bring plenty of flavor. I learned the hard way that extra soy sauce can make it too salty.
- Swap ingredients smartly: If you don’t have furikake, roasted seaweed flakes work fine. I’ve also used spinach instead of spring onions once, and it gave a fresh twist without changing the dish too much.
- Add moisture carefully: If the rice feels dry, add just a splash of water. Too much liquid makes it mushy, so I usually sprinkle a little at a time until it loosens up.
Tasty Variations to Try:
- Smoky flavor swap: Stir in smoked paprika or a dash of chili oil for a deeper taste. It changes the aroma in a nice way without overpowering the kimchi.
- Protein boost: Add cooked chicken, beef strips, or even shrimp if you want it more filling. I’ve tried tofu cubes too, and they crisp up nicely in the pan.
- Vegan option: Skip the egg topping and add extra veggies like carrots or bok choy. It still feels hearty without needing meat.
- Seasonal twist: Use whatever greens are in season. I’ve swapped kale for spinach in summer, and it worked perfectly.
- Creamy version: Mix in a little coconut milk at the end for a softer texture. It gives a mild sweetness that balances the spice.
- Extra spicy: Add chili flakes or sriracha if you like more heat. I sometimes do this when serving it to friends who enjoy bold flavors.
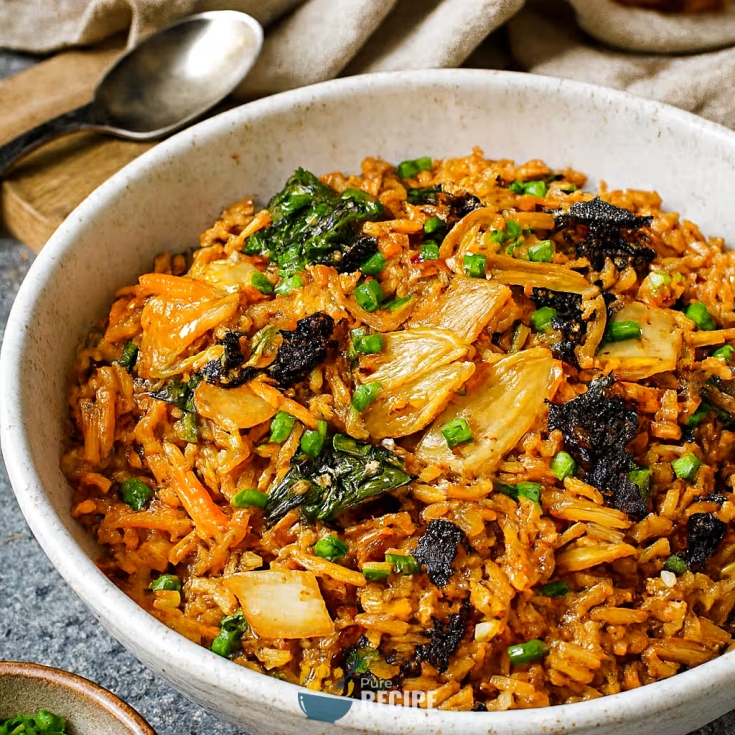
Serving Suggestions:
- Best time to enjoy: Kimchi Fried Rice works well for lunch or dinner because it’s filling but not too heavy. I sometimes make it for a quick weeknight meal when I don’t want to spend much time cooking.
- Serve with egg: Adding a fried egg on top makes the dish richer and more satisfying. The yolk blends into the rice and gives it a creamy texture that feels comforting.
- Pairs well with grilled meat: Serve with beef bulgogi, pork chops, or even simple grilled chicken. The smoky flavor from the meat balances nicely with the tangy kimchi.
- Simple side ideas: Pairs well with a light salad or roasted vegetables. I often add a small cucumber salad to keep the meal fresh and balanced.
Storage & Reheating Tips:
- How long it keeps: Kimchi Fried Rice stays good in the fridge for about five to seven days. I’ve noticed the flavor actually gets stronger after a day or two, so leftovers can taste even better.
- Best storage method: Let the rice cool down fully before packing it into airtight containers. I usually divide it into smaller portions so I can reheat only what I need instead of the whole batch.
- Simple reheating advice: Warm it gently in a pan over low heat, stirring now and then so it doesn’t stick. If it feels too dry, I splash in a little water or broth, and that brings back the texture nicely.
Frequently Asked Questions (FAQ):
-
Can I substitute the rice?
Yes, you can use brown rice or even quinoa if you want something different. I’ve tried with brown rice once, and it gave a chewier texture but still worked fine.
-
Can I make it ahead of time?
Absolutely, Kimchi Fried Rice keeps well in the fridge for several days. I usually cook a batch and reheat small portions during the week, and the flavor actually gets stronger.
-
Why does my rice turn mushy?
This usually happens if the rice is too fresh or too wet. I learned to cool fresh rice on a tray before cooking, and that solved the problem.
-
Is it suitable for vegetarians?
Yes, just skip the meat add‑ins and egg topping if you prefer. I often add tofu or extra vegetables, and it still feels hearty and filling.
-
Can I adjust the spice level?
Of course, you can reduce the gochujang or add more chili flakes depending on your taste. I sometimes add sriracha when serving friends who like it extra spicy.
Kimchi Fried Rice
A quick Korean comfort dish made with day‑old rice, tangy kimchi, and gochujang. It’s simple to prepare, full of flavor, and works well as a main meal or side dish.
Ingredients
- 4 cups cooked rice (day‑old, cooled)
- 1 ½ cups kimchi, chopped and juices reserved
- 2 tablespoons gochujang (fermented chili paste)
- 2 tablespoons vegetable oil
- 1 tablespoon sesame oil
- ¼ cup spring onions, chopped (plus extra for topping)
- ¼ cup furikake or roasted seaweed flakes
- 1 tablespoon toasted sesame seeds (optional)
- Fried eggs for topping (optional)
Instructions
- Squeeze 1 ½ cups kimchi to remove excess liquid, chop into small pieces, and keep the juices aside.
- Heat 2 tablespoons vegetable oil and 1 tablespoon sesame oil in a wok over medium heat, then stir‑fry the chopped kimchi until fragrant.
- Add 4 cups cooked rice, break up clumps with a spatula, and stir until grains are evenly coated with kimchi.
- Mix in the reserved kimchi liquid and 2 tablespoons gochujang, stirring until rice looks glossy and evenly colored.
- If rice feels dry, add up to ¼ cup water gradually while stirring to loosen the texture.
- Remove from heat, stir in ¼ cup spring onions, ¼ cup furikake, and 1 tablespoon sesame seeds.
- Serve warm, topped with extra furikake, spring onions, and a fried egg if desired.