I was looking for something fun to add to my holiday table, and that’s when I decided to try Moose Farts. They’re quick little no‑bake treats that don’t need an oven, which makes them easy to fit in when you’re already busy cooking other things.
They’re best when you just want a sweet snack to share with friends or family, especially around Christmas time. The name always gets people talking, but once they taste them, the laughter turns into requests for more. And that’s what makes them worth making.
What is Moose Farts?
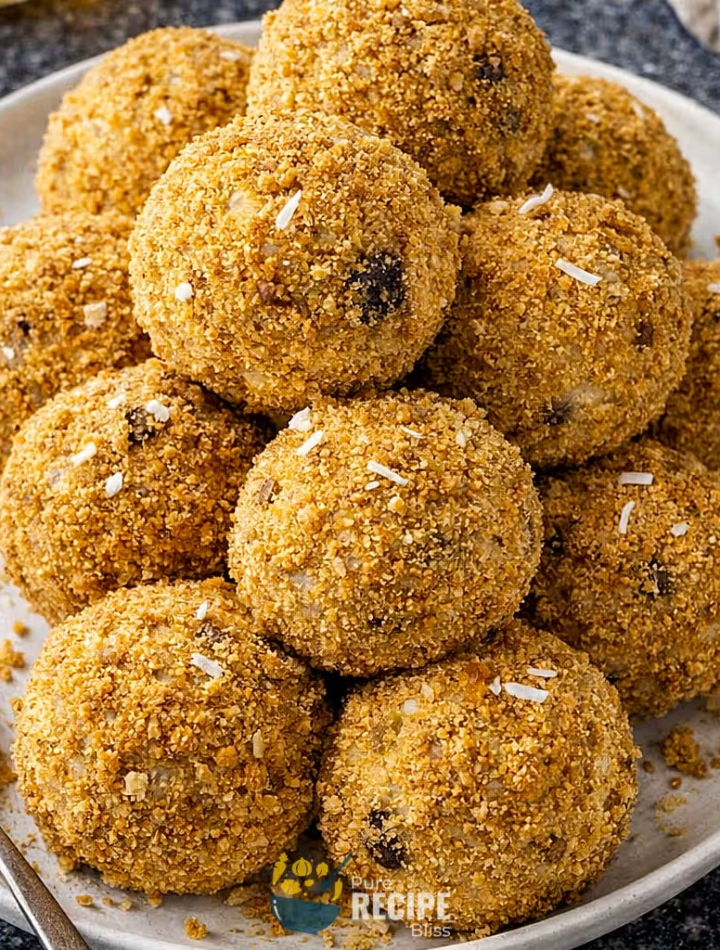
Moose Farts are small no‑bake dessert balls made with coconut, graham cracker crumbs, butter, condensed milk, and chocolate chips. They’re soft, chewy, and rolled in crumbs or coconut so they look neat and hold together well.
They’re usually served on holiday trays or at casual gatherings, and people often laugh at the name before they even try one. In Canada, they’ve become a quirky Christmas tradition, and the fun part is that they disappear quickly once they’re on the table. They’re more of a snack or sweet bite than a full dessert, and they’re easy to keep in the fridge or freezer for when guests drop by.
Why You’ll Love This Recipe:
- Quick to make: You don’t need an oven, and the whole process takes about an hour including chilling, so it feels easy to fit in even when you’re busy with other holiday cooking.
- Fun name factor: The name Moose Farts always gets people laughing, and that makes serving them feel more relaxed and lighthearted.
- Chewy texture: The mix of coconut and condensed milk gives a soft bite, and the graham crumbs keep everything together so they don’t fall apart when you pick them up.
- Easy to adjust: If you like more chocolate, you can add extra chips, or if you prefer less sweetness, you can swap in unsweetened coconut. I tried both, and the sweetened version held together better.
- Freezer friendly: You can make a batch ahead of time, freeze them, and then just pull them out when guests arrive, which saves stress during the holidays.
- Kid‑approved: When I tested these at home, the kids loved rolling them in crumbs, so it’s a recipe that can double as a fun activity.
Ingredients Needed:
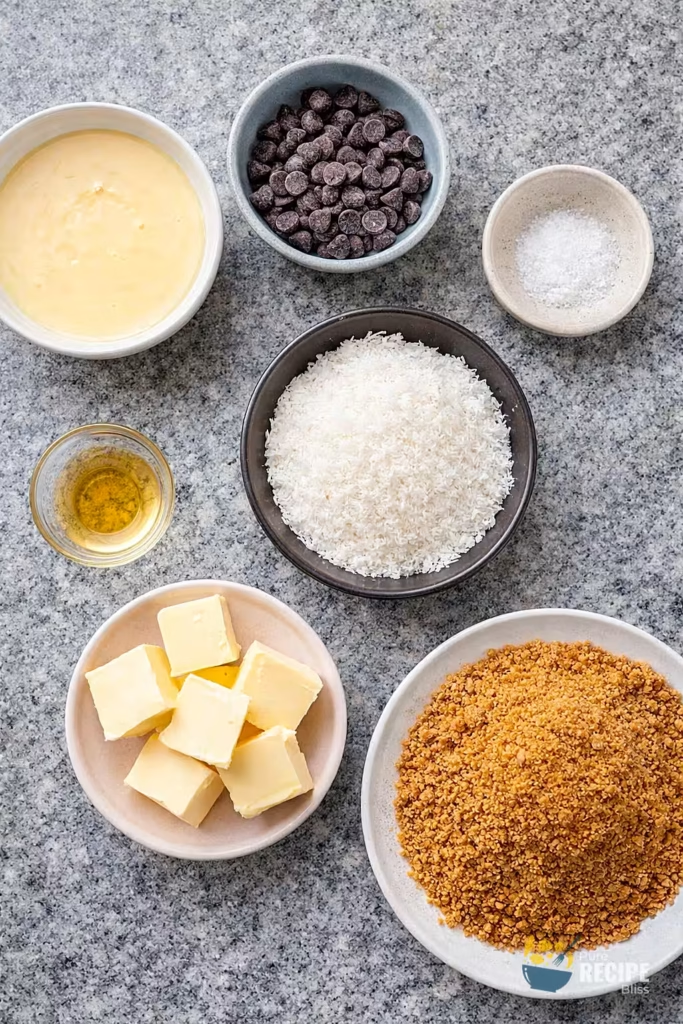
When you make Moose Farts, you only need a few simple things that all work together to give the cookie balls their sweet flavor and chewy texture. Each ingredient has its own little role, and when you mix them, you get that fun treat everyone enjoys.
- Butter for smooth mixing: It works best when it’s softened because then it blends easily with the condensed milk instead of staying lumpy.
- Condensed milk for sweetness: This is what holds everything together, so make sure you don’t accidentally grab evaporated milk.
- Coconut for chewy texture: This gives the balls their soft bite and that classic flavor.
- Graham crumbs for structure: The crumbs help the mixture stay firm and also give a nice finish on the outside.
- Salt for balance: It cuts through the sweetness and keeps the flavor from being too heavy.
- Chocolate chips for fun: I found the smaller ones mix better so you get a little chocolate in every bite instead of big chunks here and there.
- Extra crumbs for coating: Keep aside them so you can roll the balls at the end, which makes them look neat and keeps them from sticking together.
💡 Note: For the full ingredient list with exact amounts and measurements, please check the recipe card below.
Step-By-Step Instructions to Make Moose Farts:
I’ll tell you one small thing I learned while making Moose Farts at home. The first time I mixed everything, I didn’t chill the mixture long enough, and the balls kept sticking to my hands. Once I gave it more resting time, they rolled much easier and looked neat.
Step 1: Mix the creamy base
Start by combining the softened butter with the condensed milk and vanilla. Keep stirring until the mixture looks smooth and glossy, almost like a thick sauce. If it looks uneven or lumpy, that means the butter wasn’t soft enough, so just give it a few extra minutes at room temperature before mixing again.
Step 2: Add the dry ingredients
Now stir in the shredded coconut, graham crumbs, salt, and chocolate chips. The mixture will get thick quickly, and you’ll notice it feels heavy when you stir. That’s normal, and it should look like a sticky dough. If it feels too loose, sprinkle in a little more graham crumbs until it holds together better.
Step 3: Chill the mixture
Place the bowl in the fridge for a short rest. This helps the butter firm up and makes rolling easier. When you touch the mixture after chilling, it should feel less sticky and more solid, almost like cookie dough. If it still feels too soft, just give it another 10 minutes.
Step 4: Roll into balls
Scoop out small portions and roll them between your palms into round balls. Aim for about bite‑sized pieces, but don’t worry if some are slightly bigger or smaller. The texture should feel soft but not sticky, and the balls should hold their shape without collapsing.
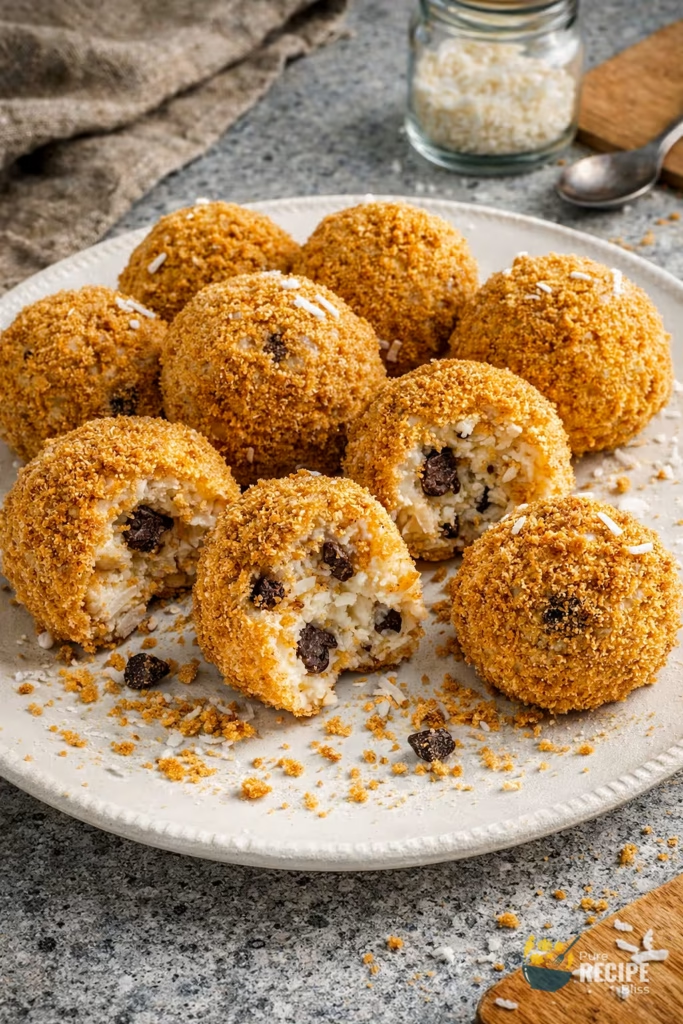
Step 5: Coat with crumbs or coconut
Take each ball and roll it in extra graham crumbs or shredded coconut. This coating makes them look finished and also keeps them from sticking together in the container. I found that graham crumbs give a golden look, while coconut makes them look snowy, so you can choose whichever finish you like.
Step 6: Chill again before serving
Place the coated balls on a tray and let them rest in the fridge one more time. This final chill helps the flavors settle and gives them a firmer bite. When you pick one up, it should feel solid but still soft inside.
💡 Note: These steps are just an overview. For detailed quantities, measurements, and exact timings to make this recipe, please check the recipe card below.
Helpful Tips For The Best Results:
- Texture check: If the mixture feels too sticky when you try to roll it, add a little more graham crumbs until it feels firm enough to hold shape. I learned this after my first batch kept collapsing.
- Butter softness: Make sure the butter is softened before mixing, because if it’s too firm, the base will look uneven and lumpy instead of smooth.
- Chill twice: Don’t skip the resting time in the fridge. The first chill makes rolling easier, and the second chill helps the balls set so they don’t stick together.
- Ingredient swap: If you don’t have graham crumbs, Biscoff cookies work fine, but they add a spiced flavor, so just keep in mind the taste will be different.
- Chocolate choice: Mini chips mix more evenly than regular ones, so you get a little chocolate in every bite instead of big chunks here and there.
Tasty Variations to Try:
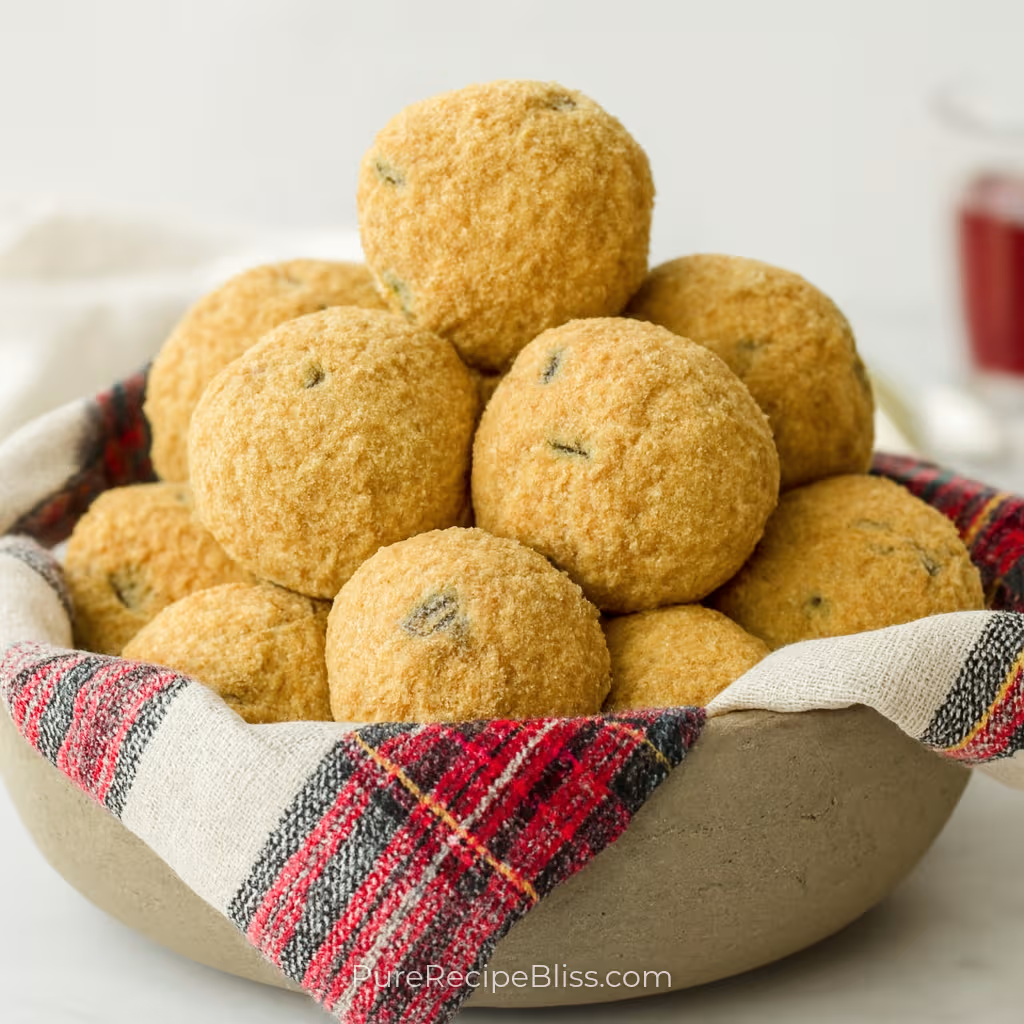
- Snowy finish: Roll the balls in shredded coconut instead of crumbs for a white, snowy look that feels festive.
- Nutty twist: Add chopped pecans or almonds to the mixture if you want a crunchier bite.
- Spiced version: Swap graham crumbs for Biscoff cookies to give a warm, spiced flavor that feels more seasonal.
- Less sweet option: Use unsweetened coconut if you prefer a lighter sweetness, though the texture will be a little drier.
- Holiday flavor: Mix in a pinch of cinnamon or nutmeg to give them a cozy holiday taste.
- Chocolate coating: Dip the finished balls halfway into melted chocolate for a richer version that looks fancy on a tray.
Serving Suggestions:
1. Holiday trays:
Moose Farts are perfect for Christmas dessert platters because they add something fun and different, and guests usually grab them quickly.
2. With hot drinks:
Serve with coffee, tea, or hot chocolate since the sweetness pairs well with warm drinks, and it makes the treat feel more cozy.
3. Casual snacking:
They work well as a small afternoon snack, especially when you want something sweet without baking, and they’re easy to keep in the fridge.
4. Party sharing:
Pairs well with other bite‑sized desserts like cookies or truffles, so you can mix them on one plate and make the spread look more inviting.
Storage & Reheating Tips:
- Fridge storage: Moose Farts keep well in the refrigerator for about a week, and I noticed they stay soft and chewy the whole time, so just place them in an airtight container.
- Freezer option: They freeze nicely for up to three months, and it helps to layer them with parchment paper so they don’t stick together when you take them out later.
- Reheating advice: Since they’re no‑bake, you don’t really reheat them, but if they feel too firm straight from the freezer, just let them sit at room temperature for 10-15 minutes before serving.
Frequently Asked Questions (FAQ):
-
Can I swap the crumbs?
Yes, you can use Biscoff cookies instead of graham crumbs, but the flavor will be spiced, so just keep in mind it changes the taste a little.
-
Can I make Moose Farts ahead of time?
Yes, they store well in the fridge for a week or in the freezer for a few months, so you can prepare them before the holidays and save time later.
-
What if the mixture feels too soft?
If the mixture doesn’t hold shape, add a little more crumbs and chill longer, because that usually fixes the texture without changing the flavor.
-
Are Moose Farts vegetarian?
Yes, they are vegetarian since they don’t contain meat or eggs, but they are not dairy‑free because of the butter and condensed milk.
-
Can I reduce the sweetness?
You can try unsweetened coconut, but the texture will be drier, so I usually prefer keeping the sweetened version for better chewiness.
Moose Farts
Description
Moose Farts are Canada’s cheeky holiday treat which are soft, chewy coconut‑graham bites rolled into golden little spheres with pops of chocolate inside. I tested these at home and learned two things: chilling the mixture twice makes rolling much easier, and mini chips really do give a better texture. They’re fun, festive, and guaranteed to spark laughter before anyone even tastes them.
Ingredients
Instructions
- In a large mixing bowl, blend ⅔ cup unsalted butter (softened) with 12 ounces sweetened condensed milk and 1 teaspoon vanilla extract until smooth and glossy.
- Stir in 2 ¾ cups sweetened shredded coconut, 1 ¼ cups graham cracker crumbs, ½ teaspoon fine salt, and ⅔ cup mini chocolate chips. Mix until the texture is thick but pliable.
- Refrigerate the mixture for about 30 minutes to allow the butter to firm up and make rolling easier.
- Scoop out portions of about 1 tablespoon each and roll into neat 1‑inch balls between your palms.
- Coat each ball in the reserved ¼ cup graham cracker crumbs until evenly covered.
- Place the coated balls on a tray and chill again for 15 minutes before serving.
Notes
- If the mixture feels sticky, add 1-2 extra tablespoons of graham crumbs before rolling.
Mini chocolate chips (⅔ cup) distribute more evenly than regular chips as I have tested both, and the smaller chips gave a smoother bite.
Don’t skip the second chill; 15 minutes makes the texture set properly and prevents sticking.
Nutrition Facts
Servings 26
Serving Size 1 ball
- Amount Per Serving
- Calories 182kcal
- % Daily Value *
- Total Fat 10g16%
- Saturated Fat 7g35%
- Cholesterol 15mg5%
- Sodium 105mg5%
- Potassium 110mg4%
- Total Carbohydrate 21g8%
- Dietary Fiber 1g4%
- Sugars 16g
- Protein 2g4%
- Vitamin A 170 IU
- Vitamin C 1 mg
- Calcium 55 mg
- Iron 0.5 mg
- Vitamin D 12 IU
* Percent Daily Values are based on a 2,000‑calorie diet, and your daily needs may be higher or lower depending on your lifestyle. Nutrition information is shared only as a general estimate and may not always be fully accurate. If you follow a special diet or have specific health concerns, it’s best to check with a registered dietitian for personalized guidance.